Maple Glazed Salmon

DSC_0797

Hi – long time no see!! I can’t believe it’s been over a month since my last post! I thought I’d have tons of free time to blog over the summer but so far it has been pretty jam-packed.

After school ended, I led a school trip to France with 10 students and a coworker. It was my first time ever traveling with students and planning a trip for that many people so I was a bit nervous. I had no reason to be nervous though – it all went great!

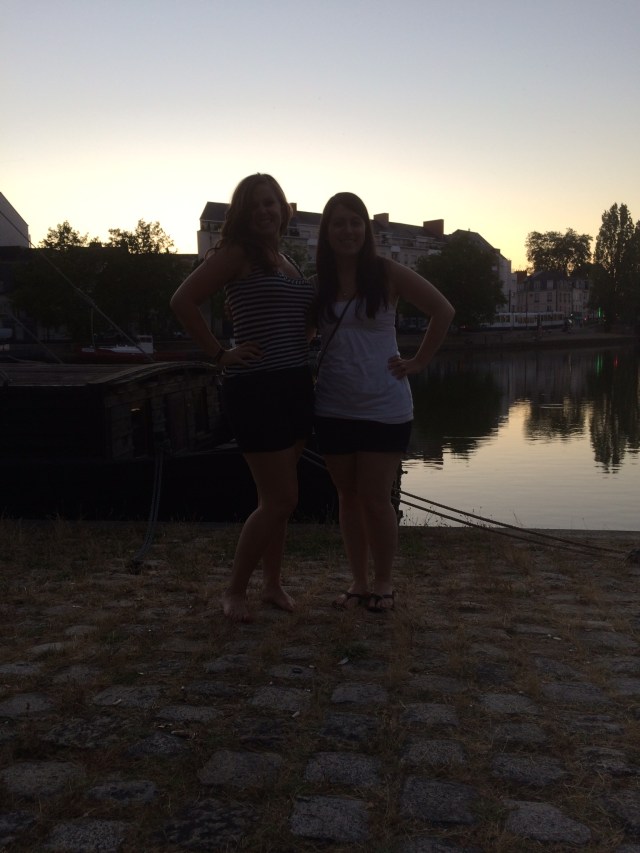
First, we spent 5 days in Nantes, France where the students stayed with host families. I was a little worried about them in the beginning, but they all had an amazing time with their families! We even ran into some of the students with their host siblings one day and they were having a blast.

108 114 117    179 184 245 307

IMG_0216

IMG_0261

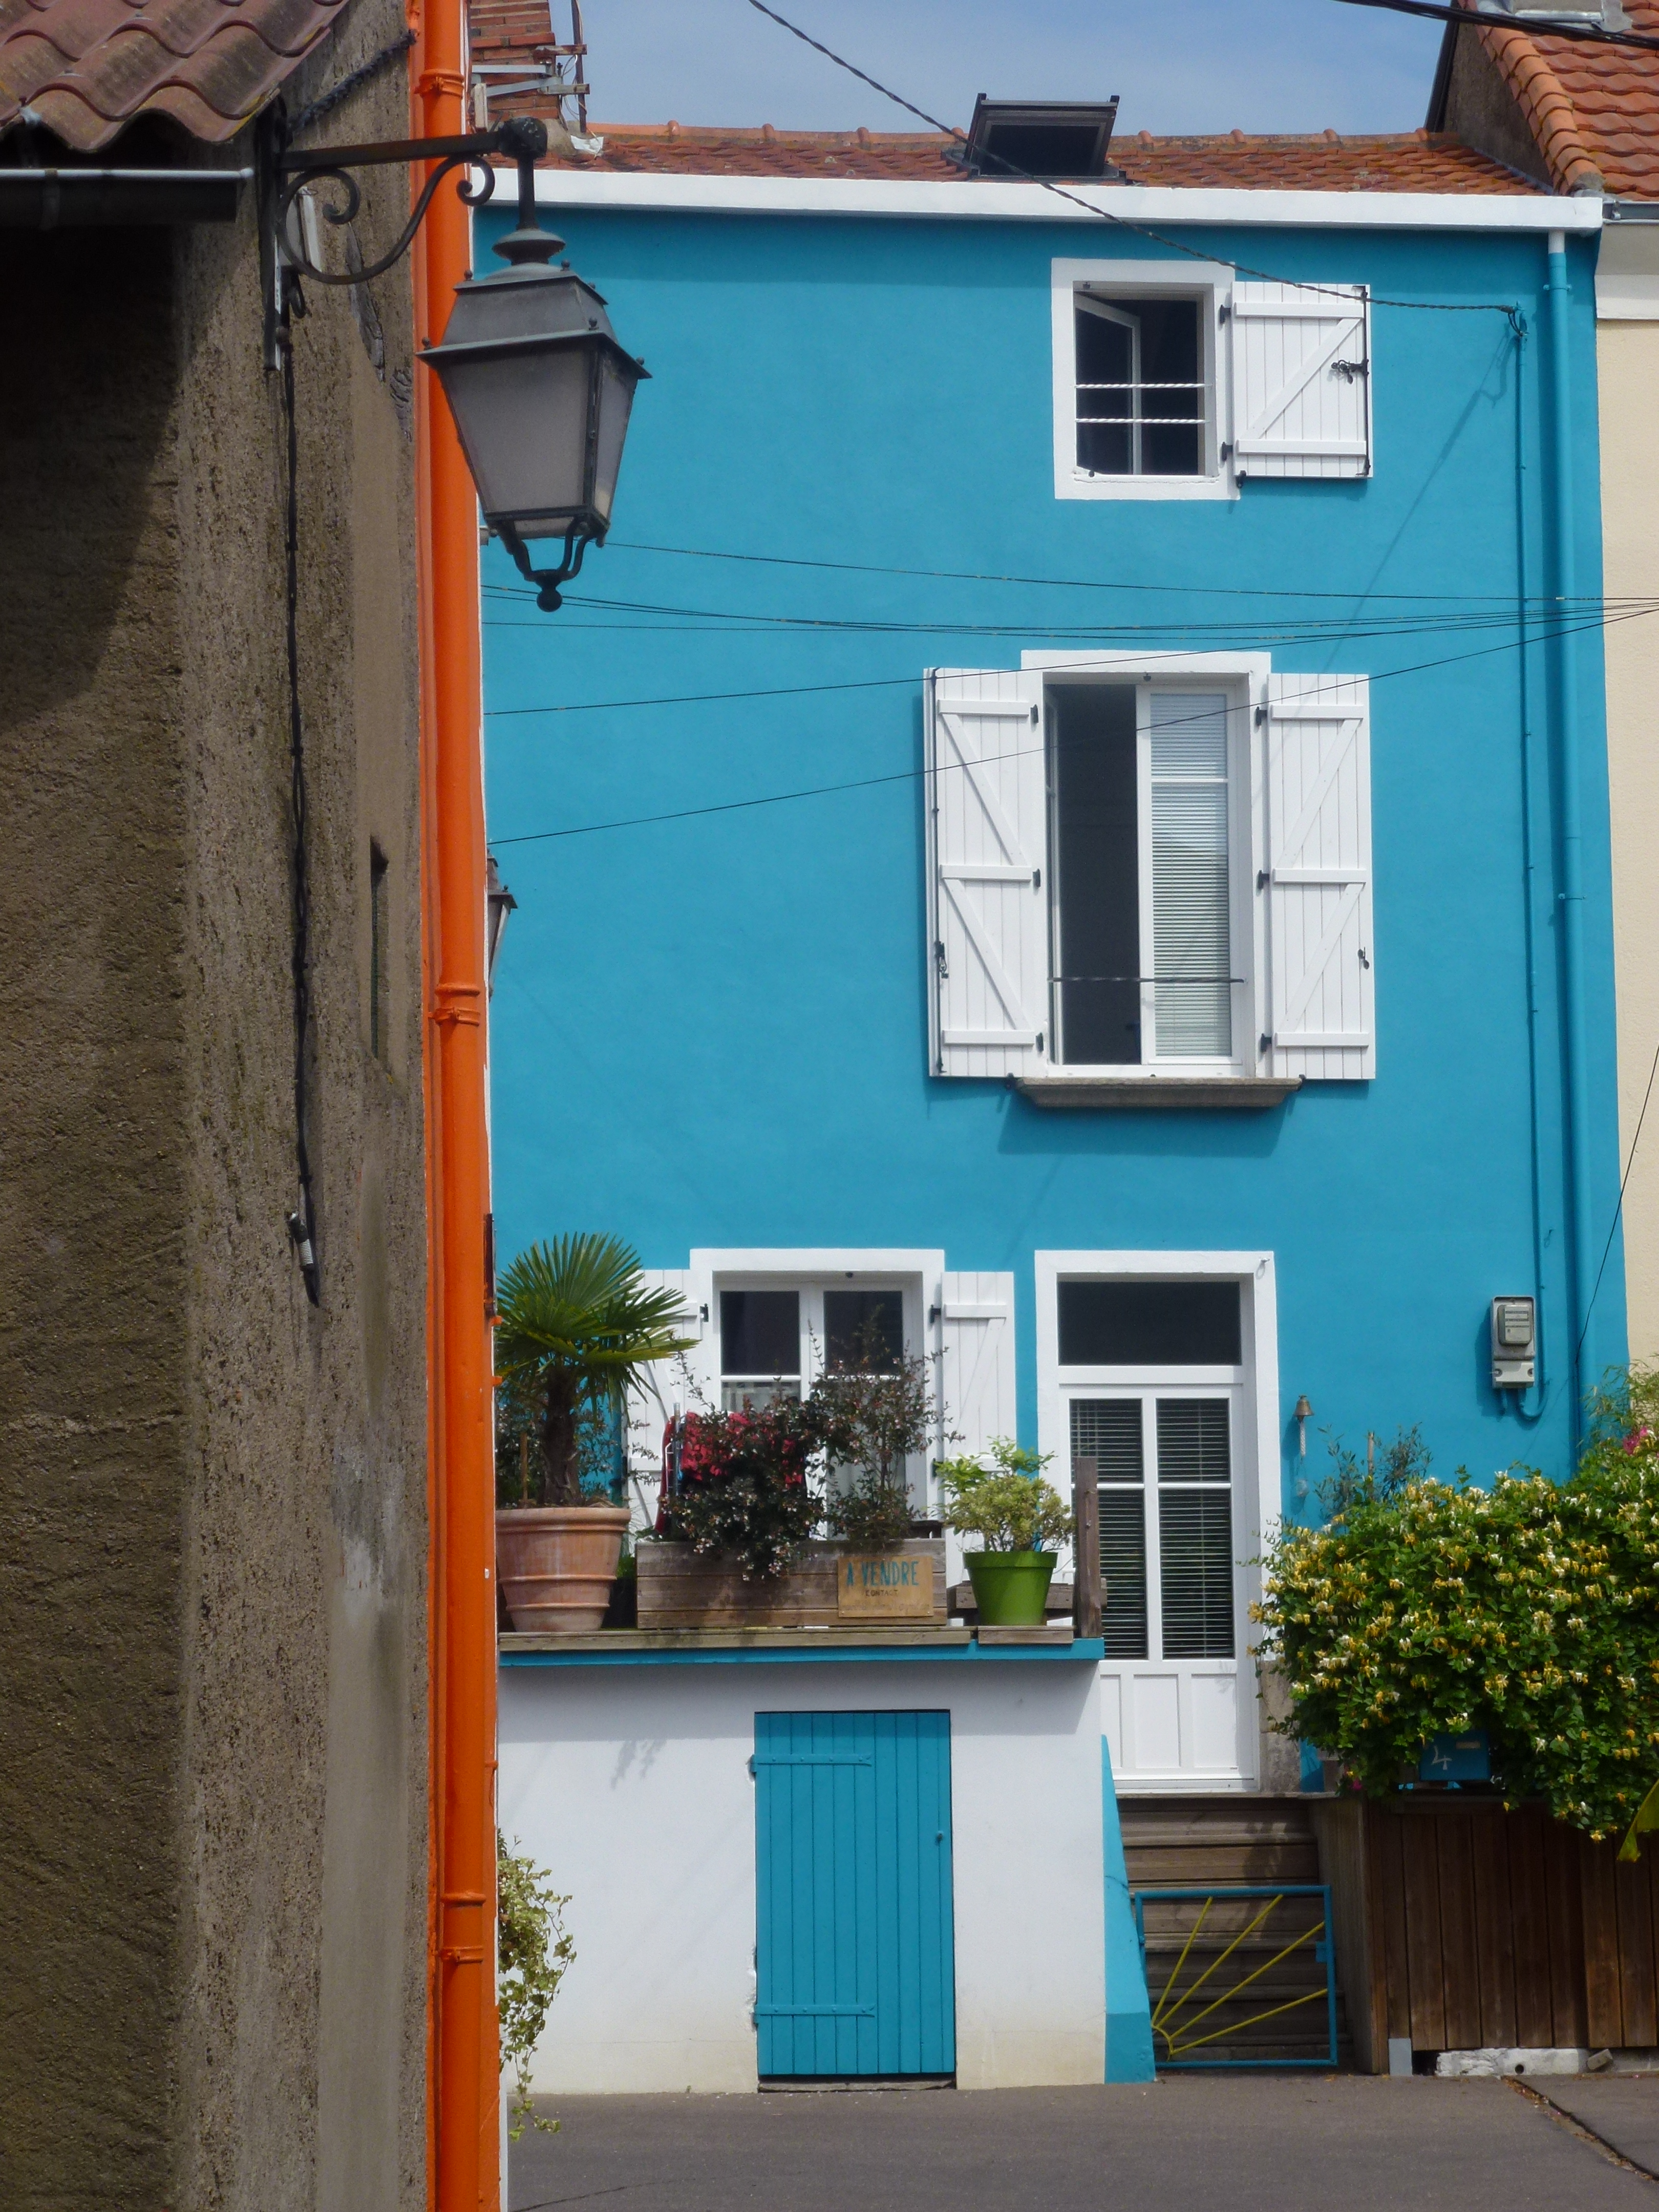
While the students were with their families, my coworker and I got to explore Nantes on our own. I actually studied abroad in Nantes AND spent 8 months teaching there after college so I was ECSTATIC to be there again! One of the teachers I worked with took us all over the region in his car and had us over for dinner with his family and I also got to meet up with my friends! It was a really wonderful 5 days in Nantes (way too short though!).

161

143

155

070

IMG_0222

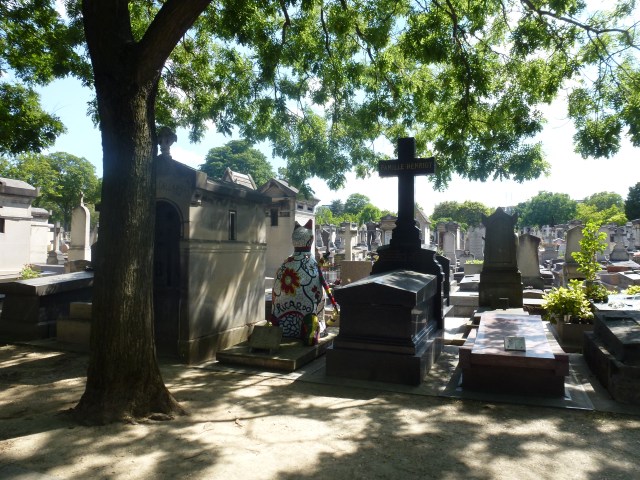
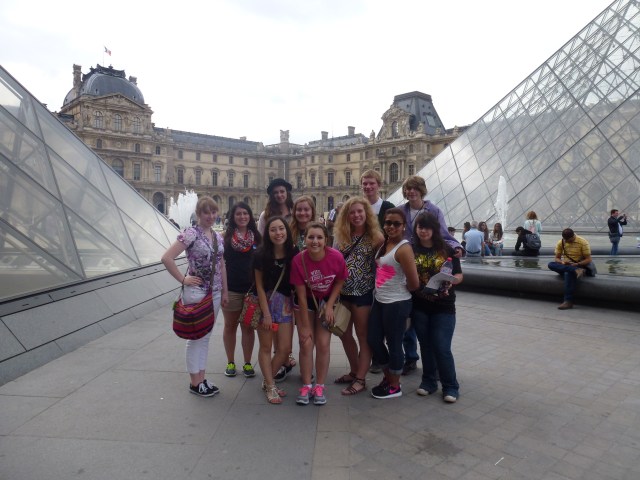
After the 5 days in Nantes, we met back up with the students and took the train to Paris. We spent 3 days in Paris as a big group site-seeing like crazy. There was so much to fit in in just 3 days so we had a very packed itinerary. Despite the complaining about feet hurting, a problem with some ATM cards, some lost luggage, and a run-in with some thieving gypsies, we had no major issues and overall we had a great time!

354

365

371

447

IMG_0344

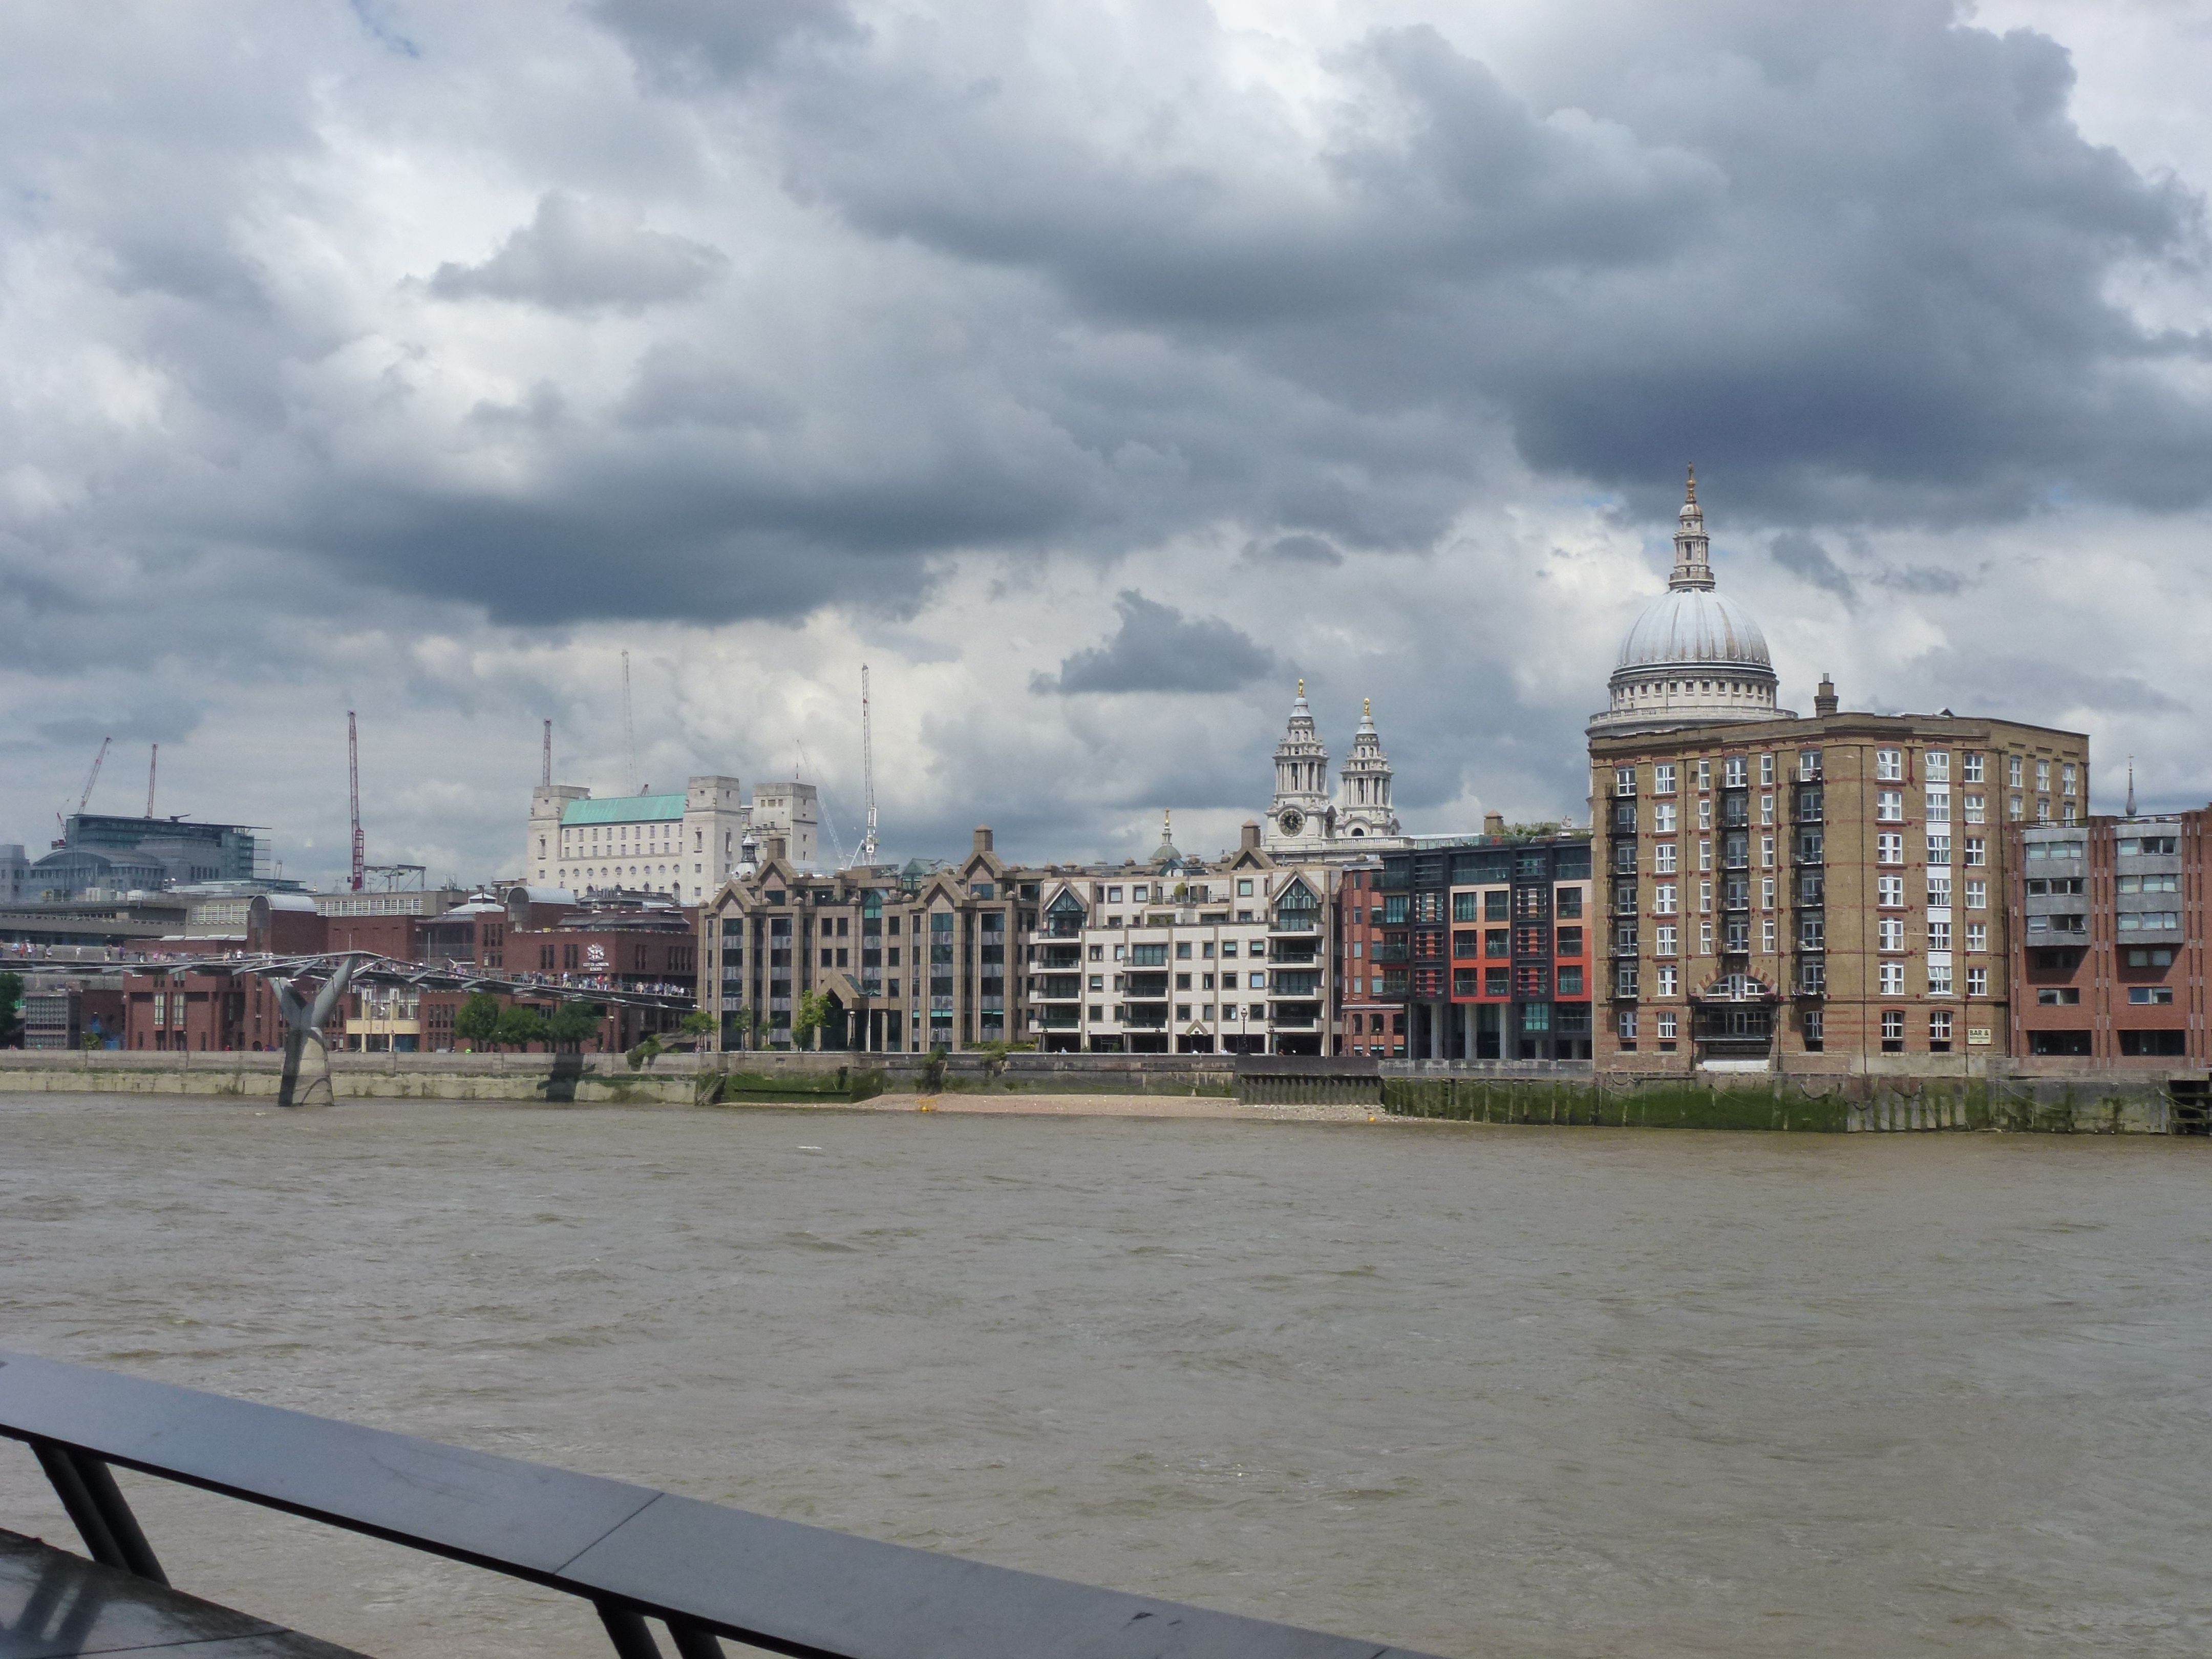
After the students went home with my coworker, I spent a few days in London visiting a friend I met during my time teaching in France. Since I’ve been to London twice before, I decided to forgo the typical site-seeing and instead spent my time wandering through different neighborhoods and sampling the unique cafes. I love London!

004 005 006 014


IMG_0101


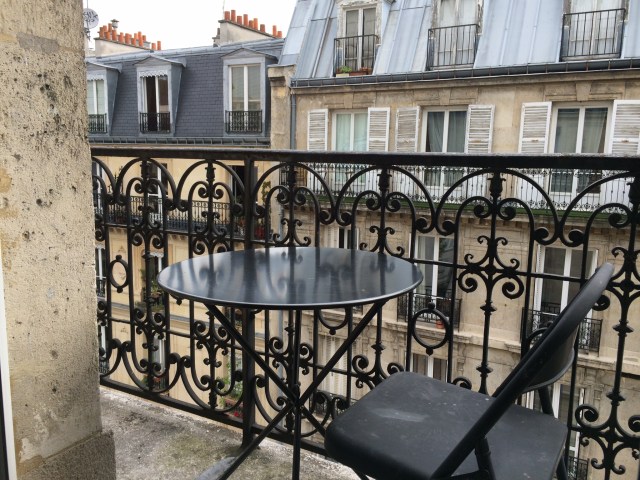
Finally, after London I spent another couple days in Paris where I relaxed on my hotel’s balcony, eating my way through a box of macaroons. I wish I could have taken that balcony (and the view that comes with it) home with me!!

IMG_0111

IMG_0157

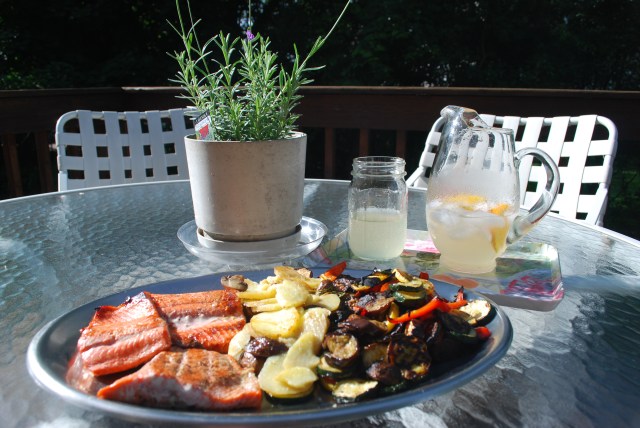
Now that I’m home and well-rested, I have a whole bunch of recipes that I’m dying to try. The first was Maple Glazed Salmon.

DSC_0793

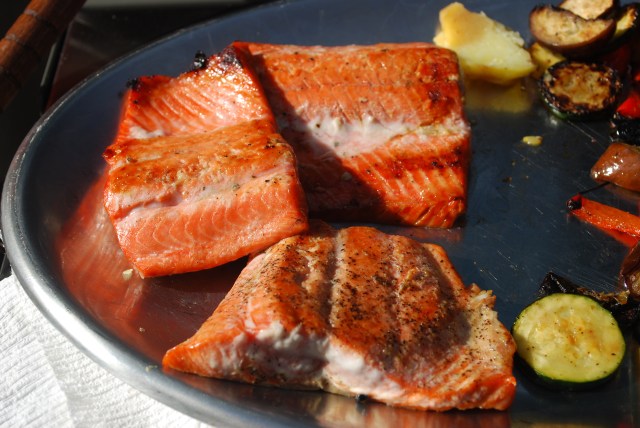
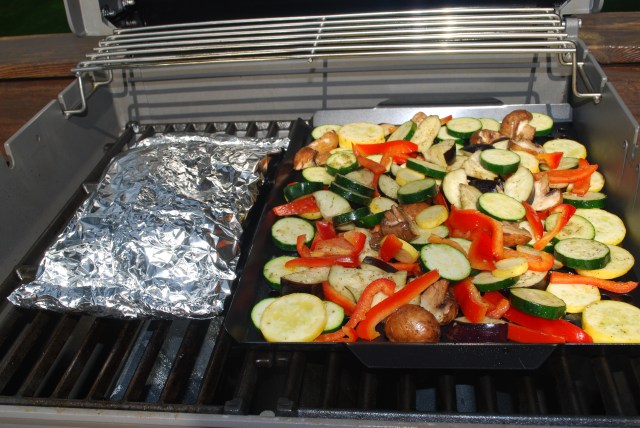
Since it’s been so nice out here, we’ve been grilling a lot and trying out some new grilling recipes. We had never grilled salmon outside before but this Maple Glazed Salmon did not disappoint! The marinade was light and flavorful but not too strong so it didn’t overpower the delicious taste of the fish itself. It was very easy too!

DSC_0796

Begin with the marinade. In a ziplock bag, combine 1/4 cup rice wine vinegar, 3 tablespoons maple syrup, and 2 tablespoons fresh squeezed orange juice. Add 4 salmon fillets into the mixture and marinate in the fridge for 1-3 hours.

Preheat grill to medium-high then pour marinade into a small sauce pan, bring to boil, and cook until reduced by half.

Spray grill  with cooking spray then place the salmon on the grill, skin side down. Grill 3-4 minutes, brushing it with the marinade every so often.

DSC_0790

Flip the salmon (spray with cooking spray first), then peel the skin back and discard it (you could leave it on if you want – the skin just grosses me out!) Grill it another 3-4 minutes or until cooked, brushing it with the marinade occasionally.

DSC_0791


Remove the salmon from the grill the season it with salt and pepper. We served ours with tons and tons of grilled veggies. Yum!

DSC_0792

DSC_0785


Maple Glazed Salmon
Serves 4
From myrecipes.com 

Ingredients: 

1/4 cup rice wine vinegar
3 tablespoons maple syrup
2 tablespoons fresh orange juice 
4 (6-ounce) salmon fillets
cooking spray 
salt
pepper

Directions: 

  1. In a ziplock bag, combine rice wine vinegar, maple syrup, and fresh squeezed orange juice. Add 4 salmon fillets into the bag and marinate in the fridge for 1-3 hours.
  2. Preheat grill to medium-high then pour marinade into a small sauce pan, bring to boil, and cook until reduced by half.
  3. Spray grill  with cooking spray then place the salmon on the grill, skin side down. Grill 3-4 minutes, brushing with marinade every so often.
  4. Spray salmon with cooking spray then flip. Peel the skin back and discard it (or leave it on if you prefer). Grill fish another 3-4 minutes or until cooked, brushing it with the marinade occasionally.
  5. Remove the salmon to a plate the season it with salt and pepper.

DSC_0795

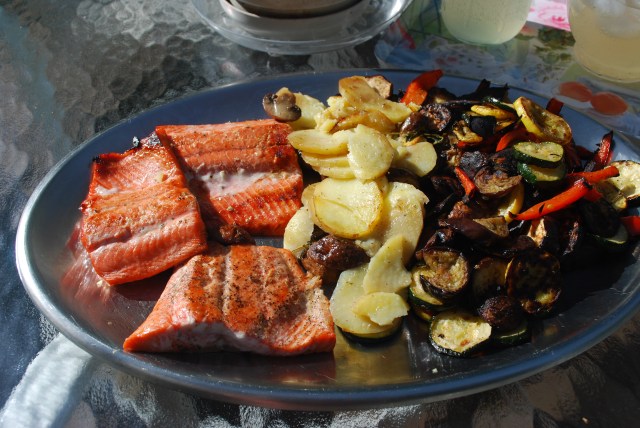
The glaze is sweet from the maple syrup but tangy from the rice wine vinegar and orange juice. You are going to love this Maple Glazed Salmon!

DSC_0794

DSC_0789

Posted in Dinner, Grill, Healthy, Travel | Tagged , , , , , , , | Leave a comment

Chicken Tacos with Black Beans and Mango Salsa

Taco 2

Guess what! It’s finally SUMMER BREAK!!! Woohoo!!

Unfortunately, I haven’t really been able to celebrate (or do very much at all for that matter) because before school ended I managed to contract an illness from one of my students (I assume) and it’s also the reason I wasn’t able to update my blog for so long. Somehow I got hand, foot, and mouth disease which is pretty bizarre because apparently it’s really uncommon for anyone over the age of 10.

It started with a really bad fever then followed with blisters all over the palms of my hands, fingers, bottoms of my feet, and toes that itched and burned like crazy. I couldn’t walk or touch anything and the itching made it impossible to sleep at night. The worst was having to grade my final exams while barely being able to grip the pen! I also got the blisters in my mouth so eating and drinking also became difficult. There’s no treatment for it – it just goes away by itself, so I just had to ride it through. I did get some prescription strength Benadryl from the doctor so it knocked me out pretty well at night and I was able to sleep finally.

Luckily, I am feeling a lot better today! My hands and feet don’t itch at all (thank God) but the blisters are still there so they are still a little tender and I can’t walk too far. Hopefully I’ll be completely better in a few days.

So since I was unable to cook in recent days, today I’m going to recount the meal I made Memorial Day weekend with Dan! The Saturday of Memorial Day weekend I had to be at my school’s graduation to announce the names of my homeroom students who were graduating (I was SO nervous!) so Sunday was my day for fun and relaxation. The weather was absolutely gorgeous so Dan and I spent the day at Colectivo by the Lake and taking a stroll by the Lakefront. It really was a perfect day.

photo 1

photo 2

photo 3

photo 4

When dinner came along we decided we wanted something fresh and a little summery. Dan thought tacos sounded good and I thought why not make our own variation. So we made Chicken Tacos with Black Beans and Mango Salsa.

Ingredients

Ummmm they were amazing!!!!!! Delicious, fresh, and summery: just like we wanted. We scarfed these down like crazy – they were so good!

I apologize for the pictures by the way. Since we cooked at Dan’s and it was a little spur of the moment, I didn’t have my good camera with me so these were taken on my phone. Okay, here we go!

First, get your chicken cooking. Sprinkle 2 large chicken breasts with some salt, pepper, and taco seasoning then saute them in a skillet in some oil.

While the chicken is cooking, heat up your black beans on the stove. First drain them well, then add them into a pot with a little bit of water and add some taco seasoning. Turn heat on low and let simmer on the stove till warm.

Next, prepare the mango salsa. Peel and dice 1 mango and 1/2 cup cucumber. Finely chop 1 tablespoon jalapeno. Dice 1/3 cup red onion. Mix ingredients together and squeeze in 1 tablespoon lime juice and sprinkle on some salt and pepper. Finally, roughly chop 1/3 cup fresh cilantro leaves and mix into the salsa. Mix everything together well, then set aside.

photo 5

Finally, make the guacamole. You could make a real guacamole, or you could go the easy route like we did! Just mash 2 avocados with a couple squeezes of lime juice, garlic powder, and salt and pepper.

Guac

When the chicken is cooked, shred it and add a little more taco seasoning if you would like.

Chicken

Line up all your ingredients and enjoy assembling your tacos! We have: flour tortillas (that we heated up in the microwave for 10-15 seconds), shredded chicken, black beans, mango salsa, guacamole, Mexican shredded cheese blend, and Greek yogurt (in place of sour cream). Assemble and enjoy!

Ingredients 2

Taco 1

These were delicious as well as healthy! They also kept us nice and full. I definitely recommend these!!!

Taco 3

Chicken Tacos with Black Beans and Mango Salsa
Serves 4

Ingredients: 

2 large chicken breasts
1 can black beans
1 pack flour tortillas
taco seasoning
1 container Greek yogurt
1 bag Mexican shredded cheese blend
salt and pepper

Ingredients for Mango Salsa: 

1 mango, peeled and diced
1/3 cup cucumber, peeled and diced
1 Tablespoon jalapeno, finely chopped
1/3 cup red onion, diced
1/3 cup fresh cilantro, roughly chopped
1/2 a lime
salt and pepper

Ingredients for Guacamole: 

2 avocados
1/2 a lime
garlic powder
salt and pepper

Directions: 

  1. Season chicken with salt, pepper, and taco seasoning. Cook in a skillet on medium-high heat.
  2. Drain 1 can black beans then add into a sauce pan with a splash of water and taco seasoning and heat on low until warm.
  3. Mango salsa: combine all ingredients and mix well.
  4. Guacamole: mash 2 avocados with lime, garlic powder, and salt and pepper.
  5. Shred chicken when it’s done cooking and add more taco seasoning if needed.
  6. Set all ingredients out for tacos: flour tortillas (heated in microwave), chicken, black beans, mango salsa, guacamole, Greek yogurt, and cheese blend. Assemble tacos and enjoy!


Posted in Dinner, Healthy, Lunch, Mexican | Tagged , , , , , , | Leave a comment

Spinach Salad with Caramelized Onions and Mushrooms

DSC_0776

I can’t believe how long it’s been since my last post! The end of the school year is such a crazy time. Luckily I’ll be done with classes in exactly one week! After that it’s 3 days of final exams then sweet, sweet summertime! Unfortunately, I have a crazy amount of things to get done before then. I just have to buckle down and work really hard the next week and a half.

I did get to take a little break last weekend and go to a Cubs vs. Brewers game on a rooftop at Wrigley Field. My friend Val had an extra ticket and invited me and it was so much fun!

Cubs Game

I’m not a huge baseball fan but I do really enjoy going to games – it’s a really fun environment. I had never been to a game on a rooftop before either and it was very cool!

Chicago 1 Chicago 2

Whenever I’m really busy, I find myself eating a lot of unhealthy foods. There’s just something about being stressed out that makes me reach for the quicker, less healthy options. It’s so much more appealing to come home from work and throw a box of Annie’s mac & cheese (my preferred mac & cheese from a box!) on the stove than cut up veggies or wait for chicken to cook.

However, I’ve been consciously trying to get better at this by coming up with meal ideas for lunch and dinner that I can prepare ahead of time on the weekends to allow me to eat healthier during the week with no excuses.

This week, I made a Spinach Salad with Caramelized Onions and Mushrooms and I was able to prepare the entire thing ahead of time for quick and easy lunches this week! What took very little time preparing over the weekend allowed me to choose healthier options this week since no further preparation was required.

To make the Spinach Salad with Caramelized Onions and Mushrooms:

Begin by hard boiling 2 eggs. Place them in a sauce pan, cover them with water, and bring them to a boil. Once they are boiling, remove them from the heat and set them aside, covered, for 12 minutes. After 12 minutes, put the eggs in an ice bath to stop them from cooking.

While your eggs are doing their thang, thinly slice 1/2 a large yellow onion (or 1 small one), sprinkle with salt, and cook them low and slow over the stove. Let them cook on low for a while, stirring occasionally, until they are soft and brown. (I absentmindedly started dicing my onion before I realized what I was doing so that’s why some are sliced and some are diced.)

DSC_0768

Meanwhile, slice 4 or 5 white button mushrooms. When the onions are almost ready, add the mushrooms (and a wee bit more oil if needed) into the pan and cook them until they are also fairly soft and brown.

DSC_0769

DSC_0770

While your onions and mushrooms are finishing up, chop a head of broccoli into florets.

When your eggs are cool, peel them and slice for the salad.

Finally, assemble all the ingredients! First, a couple big handfuls of baby spinach.

DSC_0771

Add in your broccoli.

DSC_0772

Then, add in the onions and mushrooms.

DSC_0773

Top with the sliced egg.

DSC_0774

Now add the dressing of your choice. I used Trader Joe’s Sesame Soy Ginger Vinaigrette – I’m obsessed. If you’re saving the salad for a meal during the week, don’t add the dressing until you plan on eating it since it’ll make the spinach soggy.

DSC_0775

One of the things I really like about this salad is that even though it involves some cooking, you can cook and prepare multiple things at once since the eggs and onions are not very “high maintenance.”

I had this salad the day I made it as well as a couple days later and it was just as good! I packed it into individual containers so I could just grab it in the morning for lunch and go.

This was a very delicious and filling salad – I highly recommend it!

DSC_0777

Spinach Salad with Caramelized Onions and Mushrooms 
Serves 2

Ingredients :

2 eggs, hard boiled then sliced
1 small yellow onion (or 1/2 a large one), sliced thin
4 or 5 white button mushrooms, sliced
1 head of broccoli, chopped into florets
2 big handfuls of baby spinach
dressing of your choice

Directions:

  1. Caramelize onions on the stove (cook them in a little oil on low until soft and brown). When onions are almost finished, add in the mushrooms and saute until mushrooms are also soft and brown.
  2. Combine spinach, broccoli, caramelized onions, mushrooms, and sliced hard boiled eggs. Toss with the dressing of your choice.
Posted in Healthy, Lunch, Salad | Tagged , , , , , , | Leave a comment

How to make delicious stove-top oatmeal

Hi there! I really dropped the ball on Cinco de Mayo… sorry! Though I love being a teacher, May is probably the craziest time of year for us. It’s nice being able to say we only have a few weeks left until summer, but at the same time we’re trying to get so much done in so little time and it gets really hectic. Even though I didn’t make anything for Cinco de Mayo, I did have Mexican food yesterday since Chipotle had a special deal for teachers during Teacher Appreciation Week (which is this week!) I basically only get Chipotle once a year during Teacher Appreciation Week since it gives me a reason to go, but I immensely enjoyed my burrito bowl yesterday so I think I will be going a lot more in the future.

I don’t have a super exciting recipe for you today, but I since I’m super crazy about oatmeal and many people do not share this same love, I thought I’d show you how I make mine as it’s super good and might make you change your mind! Though I love a good eggs and bacon breakfast, I feel a lot more energized and healthy when I start the day with a nice bowl of oats.

DSC_0764

Here’s what I do:

First, I actually use oat bran usually but oatmeal is just as good. I just like the creaminess of the oat bran.

DSC_0753
Instead of cooking in water like the directions on the box, I follow the same cooking guidelines, but substitute unsweetened vanilla almond milk. It gives it sooooooo much more flavor! Heat the oats and almond milk on the stove until it starts to boil, then cook for about one more minute while it’s boiling.

DSC_0755

Here’s my other “secret”: when the oats have only a couple minutes left to cook, I slice a banana and stir the banana slices into the oatmeal. The banana gets nice and soft and adds to the flavor of the oatmeal.

DSC_0756

DSC_0757

When it’s all cooked, pour oatmeal into a bowl. Mix in blueberries and sliced strawberries then top with a drizzle of honey and a dash of cinnamon.

DSC_0760

DSC_0763

DSC_0765

Mmmm I never get sick of eating oatmeal/oat bran like this! Also, cooking it over the stove is a lot better than in the microwave. I can never get the right creamy consistency from the microwave.


Posted in Breakfast, Healthy | Tagged , , , , , , | Leave a comment

Bunny Cupcakes

DSC_0733

DSC_0749

I hope everyone (who celebrates) had a wonderful Easter! I know, I’m a little late with this post… but I was sick so that’s my (lame) excuse. Actually, I was sick pretty much all of my spring break unfortunately. I didn’t even get to go to Eataly – the one thing I wanted to do over break! I just felt horrible but luckily, even though being sick stinks, I had the week off to get lots of rest.

DSC_0746

Anyways, now I’m feeling much better! Work started again Tuesday so I’ve been busy playing catch up but now I am finally ready for this blog post.

My mom and I made these adorable Bunny Cupcakes and I just had to share them with you! I know Easter is over, but you can pin them for next year or use them as fun Spring treats or even for a birthday.

DSC_0748

These are very easy to make and they’re so cute you won’t even want to eat them.

DSC_0743

DSC_0744

First, make cupcakes following the instructions from a box mix. They can be whatever type of cake you choose.

Once your cupcakes are cooked and cooled you can start making the bunnies. Spread each cupcake with white frosting. We used cream cheese frosting.

DSC_0736

Then, put some shredded coconut in a bowl and roll the edges of your cupcake in the coconut. Don’t cover all the frosting with coconut because then the other goodies won’t stick to it! Just do the sides so that it looks like fur.

DSC_0737

For the ears, you will need large marshmallows. Take one and cut it diagonally to make 2 ears. You may need to stretch it out a little bit to make it look more like a bunny ear. Then place the marshmallows on the cupcake to look like ears. We sprinkled the middle of ours with some little red sprinkles to make them a little more colorful.

DSC_0738

DSC_0739

For the eyes, place 2 M&Ms (M&M side down) on the cupcake.

DSC_0740

Finally, cut up pull-n-peel Twizzlers for the whiskers. We experimented with 2 and 3 whiskers so you can decide what you prefer!

DSC_0741

We thought they looked cute without noses so we only made a couple with little marshmallow noses. It occurred to me afterwards that pink jellybeans would make really good noses for these bunnies as well.

DSC_0742

Adorable!

DSC_0752

DSC_0747

It’s a cute little cupcake bunny army.

DSC_0750

DSC_0751

DSC_0734

Posted in Desserts | Tagged , , , , , , , | 2 Comments