Cool Ranch Roasted Chickpeas

DSC_0728

Woohoo it’s Spring Break!!!! Anyone else on Spring Break this week? It came just in time; since it was so late this year it’s been a while since the students have had any sort of break and you could see how tired both students and teachers were lately. I don’t have any big plans except relaxing, lesson planning, and a trip to Mario Batali’s super grocery store in Chicago called Eataly (I had a fun time explaining the name to my parents who both thought I was planning on going to Italy). I’ve been wanting to go ever since it opened but haven’t had a chance yet so I am extremely excited to finally see it!! I’ll let you know how I like it!

DSC_0727

Today I decided to try out this recipe I found a few weeks ago for Cool Ranch Roasted Chickpeas. It’s from a vegan blog and the original recipe uses nutritional yeast (which I’ll admit I had never even heard of) in place of real cheese, so I modified the recipe since I am not vegan and enjoy cheese (probably a little too much) and tried it out and it turned out great! It’s a great flavorful snack for when you want something with a crunchier texture but don’t want the calories and unknown ingredients that come with chips or other snack foods. I’ll definitely make these again!

DSC_0730

To make Cool Ranch Roasted Chickpeas: 

Begin by preheating your oven to 350. Then, drain and rinse 2 cans of chickpeas (garbanzo beans) then let them dry.

Add the beans into a large bowl and mix in 2 tablespoons extra virgin olive oil, 1 tablespoon apple cider vinegar, 1 teaspoon fine sea salt, 1/2 teaspoon garlic powder, 1/2 teaspoon onion powder, and 1/2 teaspoon dried dill.

DSC_0718

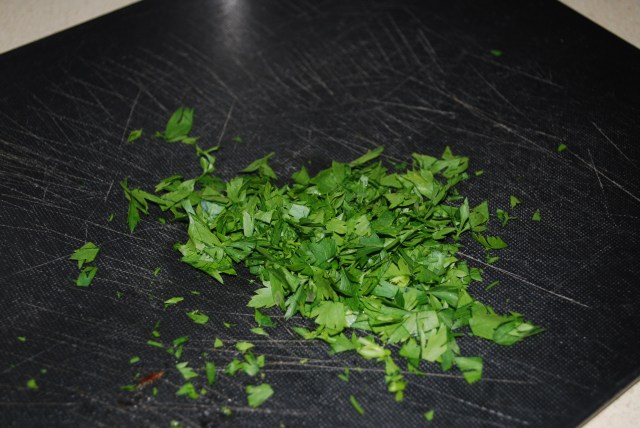
Chop 1 tablespoon fresh parsley and 2 tablespoons fresh chives and mix both into the chickpeas.

Finally, add in 2 tablespoons of parmesan cheese and mix well.

DSC_0719

Line a baking sheet with parchment paper and spread the chickpeas onto it in an even layer. Bake for 35-40 minutes or until crispy, stirring once after 20 minutes. You may need to keep the chickpeas in a little longer depending on your oven if they are not crispy.

DSC_0720

DSC_0722

Let them cool a little bit, then start snacking! I didn’t have enough self-control to wait until they were completely cool so I risked burning my fingertips to munch on them while they were still hot. It was worth it!

DSC_0723

You could store these in the fridge if you want them to keep for a few days, but they will probably soften in there so if you want them crispy you may need to reheat them again in the oven.

DSC_0729

Cool Ranch Roasted Chickpeas
Adapted from Amanda Maguire 

Ingredients: 

2 cans chickpeas, drained, rinsed, and dried
2 Tablespoons extra virgin olive oil
1 Tablespoon apple cider vinegar
1 teaspoon fine sea salt
1/2 teaspoon garlic powder
1/2 teaspoon onion powder
1/2 teaspoon dried dill
1 Tablespoons fresh parsley, chopped
2 Tablespoons fresh chives, thinly chopped
2 Tablespoons parmesan cheese

Directions: 

  1. Preheat the oven to 350 degrees F. In a large bowl, combine chickpeas, extra virgin olive oil, apple cider vinegar, sea salt, garlic powder, onion powder, dill, parsley, chives, and parmesan cheese. Mix together until chickpeas are well-coated.
  2. Line a baking sheet with parchment paper and spread chickpeas evenly on the sheet. Bake for 35-40 minutes (or until crispy), stirring after 20 minutes. You may need to keep them in the oven a little longer until they are crispy. Let cool, then enjoy!

DSC_0726


Posted in Sides, Snacks | Tagged , , , , , | Leave a comment

Goat Cheese Gnocchi with Bacon, Dates, and White Wine Sauce

DSC_0716

Last weekend, I was watching Food Network and the show “Southern at Heart” came on. I’d never seen it before and the episode was called “Southern Italian” which sounded a little weird, but I decided to give it a shot. I then watched Damaris Phillips make the most incredible looking dish I have ever seen and I’m ashamed to say I may or may not have caught myself drooling…

It sounded like it might be a lot of work, but I decided I needed to try out this recipe. I invited Dan over and together we made Goat Cheese Gnocchi with Bacon, Dates, and White Wine Sauce.

DSC_0712

We both had fairly high hopes, but occasionally I’ve tried out Food Network recipes that haven’t come out as good as they were supposed to so I wasn’t getting my hopes up toooo much. Though it took longer to make than we anticipated because we had to refrigerate the dough for a half hour and it took us a while to roll all the gnocchi, it was completely worth it! This dish was seriously AMAZING!!!! We were both head over heels for it! Dan went as far as to say it may have been the greatest meal I’ve ever made. I think I might have to agree!

Here’s how to make this Goat Cheese Gnocchi with Bacon, Dates, and White Wine Sauce.

DSC_0717

First take 12 ounces of fresh goat cheese that is room temperature and combine it in a large bowl with 4 ounces ricotta (recipe says goat cheese ricotta but my grocery store didn’t carry it – cow milk ricotta worked just as well!) and 2 large eggs, also at room temperature. Mix until smooth.

DSC_0691
Add 1/2 cup flour and stir until combined. Add more flour, 2 tablespoons at a time, until the dough is smooth and supple but not too sticky. Be careful not to add too much flour or overwork the dough. Add just enough so that it’s not sticky. Wrap the dough in plastic wrap and store in the refrigerator for 30 minutes.

DSC_0694

While the dough is chilling, prepare the bacon, dates, and parsley. Dice 6 ounces slab bacon and set aside. Pit and dice 8-10 large dates and set aside as well. Finally, chop 1/4 cup parsley.

DSC_0701

DSC_0692

DSC_0693

When you’re ready to take the dough out of the fridge, put a large pot of water on the stove to boil.

On a lightly dusted surface, press and shape the dough into an 8-by-14-by-1/2-inch rectangle.

DSC_0695


Sprinkle flour onto a sharp knife and cut the rectangle into 1-by-1/2-inch pieces.

DSC_0696


Making sure your surface is still floured, use a fork to shape the gnocchi by pressing a piece of the dough into the back of the fork slightly to create ridges, then rolling it down the fork. If the dough begins to stick, flour the fork and your fingers. Place the finished gnocchi on a floured cookie sheet. Repeat with the remaining dough.

DSC_0698

When your gnocchi are all ready and the water is boiling, prepare an ice bath. Season the boiling water with salt, then begin cooking the gnocchi in batches. Use a slotted spoon to place the gnocchi into the water and give them a stir to make sure they don’t stick to the bottom of the pot. Cook until all the gnocchi rise to the surface, then cook for an additional 1-2 minutes (about 4 minutes total). Immediately remove the gnocchi with a slotted spoon and place them into the ice bath to make sure they stop cooking. Repeat with the remaining gnocchi.

DSC_0700

When the gnocchi are cool, drain them.

DSC_0703

Next, heat a nonstick pan over medium heat. Add in the bacon and cook until crisp. Using a slotted spoon, remove the bacon to a paper towel-lined plate and set aside.

DSC_0704

Add the gnocchi into the pan and saute in the bacon fat about 2 minutes per side. Transfer the gnocchi to a plate.

DSC_0706

DSC_0708

Add the dates into the pan. Whisk in 1/2 cup white wine and 1/2 cup vegetable stock. Simmer until reduced by 1/2, about 2-3 minutes. Whisk in 1 tablespoon unsalted butter.

DSC_0707

DSC_0709

Finally, add in the gnocchi, bacon, and salt and pepper to taste. Stir in 3 tablespoons of parsley and toss to combine. Use the remaining parsley to garnish.

DSC_0710

DSC_0711

Find the original recipe here at www.foodnetwork.com

DSC_0714

I cannot get over how good this meal was. Dan and I were talking about it for days. And he had to fight me for the leftovers (I tried to eat all of them!)

Even though this dish takes a while to make (took me about an hour and 45 minutes), it isn’t difficult and it’s well worth the time. It’s perfect for a weekend meal when you’ve got a little more time to spend cooking.

I will most definitely be making this again!!! And again. And again. I have to hand it to Damaris Phillips… this is one incredible dish!

DSC_0715


Posted in Dinner | Tagged , , , , , | Leave a comment

Egg and Kale Breakfast Wrap

DSC_0686

Hi! Happy (belated) Greek Independence Day! It was on the 25th, which was when I had planned on writing my next post, but failed. The past few days I haven’t been sleeping well and I’ve been completely wiped after work so I haven’t been very productive. Also, a friend showed me this app called “Quiz Up” where you can play quiz games against other people and it has not helped my productivity at all.

Sunday morning, I was watching Food Network and Giada’s show “Giada at Home” came on and I watched her make this Egg and Kale Breakfast Wrap and knew immediately I needed to try it. Not only did it look delicious, but it was also part of her segment on healthy, feel-good dishes. So I did try making it, and it was awesome! It’s not my typical breakfast, but I had it for dinner and lunch the next day and I really enjoyed it both times.

DSC_0685

Egg and Kale Breakfast Wrap

Start with 6 small kale leaves. I used Lacinato Kale, but I imagine you could use any type of kale (any kale experts out there?). Wash the kale then cut the stems away from the leaves. Chop the kale into 1-inch pieces.

DSC_0664 DSC_0665

Next, you’ll need to cut 1 1/4 cup grape tomatoes into halves, chop 1 teaspoon fresh thyme, chop 2 cloves garlic, and chop 1 large shallot.

DSC_0670

Heat 2 tablespoons extra virgin olive oil in a large nonstick skillet on medium heat and add in the tomatoes, thyme, garlic, and shallots. You can also add 1/8 teaspoon red pepper flakes. It doesn’t make the dish spicy, it just gives it a tiny kick. Saute about 4 minutes, until the tomatoes and shallots soften.

DSC_0671

Add in the kale and sprinkle with 1/2 teaspoon kosher salt. Toss for about 2 minutes, or until the kale softens, but is still bright green.

DSC_0672

DSC_0674

Stir in 1/4 cup chopped basil then remove skillet from heat.

Next, you’ll need to prepare a pan for poaching your egg. Find one that is wide and shallow and fill it with about 2-3 inches of water. Bring the water to a simmer (NOT a boil!).

While you’re waiting for the water to simmer, take a wrap-sized tortilla and microwave it for about 20-30 seconds. Spread it with a tablespoon of store-bought (or homemade!) hummus.

DSC_0677

Add 1/4 of the kale mixture onto the tortilla.

DSC_0678

When your water is simmering, you can poach your egg. I will admit this was my first time ever poaching an egg so I was a little nervous! I messed up 3 eggs but after that I got the hang of it and my 4th was perfect. Here is what worked for me when poaching. If you have a lemon, you can add some lemon juice to the water. It helps keep the whites together but is not necessary. Don’t salt the water! Take a wooden spoon and stir the water to create a vortex in the middle. Don’t be really aggressive, it should be more of a gentle swirl. Take your egg and break it into a small bowl. Slowly and gently pour the egg into the middle of the vortex. Stir the water around the egg gently again and make sure your egg isn’t stuck to the bottom of the pan. When the egg white looks set and the yolk is still soft, about 2-3 minutes, use a slotted spoon to remove the egg from the water. Dab the egg very gently on a paper towel to remove some of the excess water, then place it on top of the kale mixture on the tortilla. This recipe makes 4 servings so you can go ahead and make 3 more eggs (feel free to cook more than one at once, just be careful not to crowd them).

DSC_0679

Slit the yolk with a sharp knife and press down a little so that the yolk starts to drip down. Fold up the bottom of the tortilla then fold in the sides and serve with the top open.

DSC_0681

DSC_0682

DSC_0683

I loved this wrap! I thought spinach would also work really well and I might try that next time I make it.

DSC_0688
You can find Giada’s recipe here on foodnetwork.com.

DSC_0689

Posted in Breakfast, Dinner, Healthy, Lunch | Tagged , , , , , , , | Leave a comment

How to Make California Rolls

DSC_0658

Happy St. Patrick’s Day!!! Though I’m not Irish (100% Greek here!), I still have fun celebrating. Plus when I visited Ireland, everyone I met was very friendly and welcoming so I can’t help but love the culture. Also I happen to live next to an Irish pub and hotel so it’s hard not to join in on the celebration! Unfortunately, my recipe for you today is not remotely Irish (due to my poor planning)… but you are still going to love it!

Outside of Temple Bar in Dublin during my trip to Ireland in 2012

Outside of Temple Bar in Dublin during my trip to Ireland in 2012

 First, I want to update you on the Sophomore retreat I chaperoned on Thursday and Friday. It was wonderful! I’m not going to go into too much detail, but the students were really well-behaved and I was really impressed with their insights and thoughtfulness. Overall it was a really great experience and I’m happy I volunteered. I also had a nice, relaxing weekend which made me well-rested for today. We had staff development today at school so we actually finished at 1 pm which was really nice because it’s not often we get out early! I am definitely enjoying my extra free time. 

DSC_0659

Now back to today’s recipe. Yesterday I decided I would try my hand at making California Rolls. I’ve never made any type of sushi before so I wasn’t sure how it was going to go, but I was pleasantly surprised that it’s a lot easier than it looks! So without further ado, here is… 

DSC_0653


How to Make California Rolls


DSC_0656

First, you will need to prepare the rice. You should buy “Sushi Rice” which is a specific type of rice that sticks together really well. You can get it at most grocery stores and it will say sushi rice on it. Cook 1 1/2 cups rice according to the package directions and once it’s cooked, move it into a bowl. With 1 1/2 cups rice, I made 4 rolls. 

DSC_0629

In a different bowl, combine 2 tablespoons rice vinegar, 2 tablespoons sugar, and a dash of salt. Heat it up in the microwave for about 15-20 seconds then stir into the hot rice. 

While the rice is cooking, you can prepare the rest of your ingredients. For California Rolls, you will need cucumber, avocado, and crab sticks (or real crab if you prefer). Cut them into strips and set aside. How many you use is up to you – I used about 1/2 a cucumber, 3 crab sticks, and 1/2 an avocado and made 4 rolls. 

DSC_0630

Once your rice is cool and your ingredients are ready, you can start rolling. If you have a sushi mat, lay it out on the counter and cover it with plastic wrap. A sushi mat is not necessary, it just makes rolling the sushi easier. 

DSC_0631

DSC_0633

You should also fill a little bowl with warm water to wet your fingers and hands to keep the rice from sticking to them. You will also need it to seal the seaweed at the end of the rolls. 

DSC_0635

Next place the nori (seaweed) on the sushi mat. I got my nori from a Japanese supermarket, but I’ve seen it at Whole Foods and other grocery stores. 

DSC_0636

Take about 1 cup of rice and spread it evenly across the seaweed, leaving about an inch uncovered at the top. You’ll want to wet your hands with warm water before you do this so the rice doesn’t stick to your hands. 

DSC_0638

Place 2 strips of cucumber, crab, and avocado on the bottom third of the seaweed. 

DSC_0643

Now, begin to roll the sushi. Use the sushi mat to make one complete roll, tightening it to make sure that the filling inside is tight. 

DSC_0644

DSC_0645

Hold on to the mat and the plastic wrap and continue rolling the mat until you get to the end of the seaweed. 

DSC_0647

Use your finger to wet the edge of the nori that is not covered with rice then make one final roll to seal it. 

DSC_0646

DSC_0641

Once your roll is finished, cut off the edges and use a sharp knife to slice it into 1/2″ pieces. If your knife is sticking to the sushi, making it hard to cut, wet your knife with warm water in between cuts. 

DSC_0648

DSC_0649

DSC_0650

And that’s it! It looks very impressive but it’s not hard at all! The best part is that it’s sooooo much cheaper making it yourself than getting it from a restaurant. Since my California Rolls turned out so wonderfully, I think I’ll give Philadelphia rolls or other types of sushi a try soon. 

DSC_0651

Give it a shot and let me know how it turns out! 🙂 

DSC_0655


DSC_0660


DSC_0661

Posted in Appetizers, Asian Inspired Food, Dinner, Lunch | Tagged , , , , , | Leave a comment

Green Mango-Banana Smoothie

Hi! How is your week going? Mine has been good so far. I had Friday off due to parent-teacher conferences Thursday night so I spent the weekend with my parents. We saw “The Monuments Men” Saturday and we all really enjoyed it. It was interesting, exciting, and really well-made. I recommend it if you’re looking for a good adventure movie to see.

Tomorrow through Friday I am chaperoning my school’s Sophomore Retreat and I’m really looking forward to it! I’ve never been on a retreat before, but I think it will be fun to see the students in a new light. I’ll let you know how it goes. Wish me luck!

I have a delicious healthy smoothie recipe for you today. A Green Mango-Banana Smoothie to be exact! Now that Spring is on its way I just couldn’t wait to try out new smoothies with my favorite tropical fruit: mango!

DSC_0625

In a blender, combine 1 cup milk (Unsweetened Vanilla Almond Breeze for me!), 1 mango flavored Greek yogurt, a big handful of washed baby spinach, 1/2 a frozen banana, 1 cup chopped mango (fresh or frozen), and a tablespoon of peanut butter or almond butter for a little extra protein.
DSC_0626

I always keep frozen bananas, strawberries, blueberries, and mango in my freezer for smoothies. Just chop them ahead of time, freeze in containers or on baking sheets, then store in the freezer in freezer-safe plastic bags. If you don’t have any frozen fruit, use fresh banana and mango but then you should also add ice to the smoothie.

Blend like crazy until it’s smooth, then sip and enjoy!

Not so sure about adding spinach to your smoothie? Try it! I swear, you can’t taste it AT ALL. It just makes it green and adds many health benefits.

DSC_0627

Green Mango-Banana Smoothie 

Ingredients: 

1 cup milk (I use unsweetened vanilla almond milk)
1 mango flavored Greek yogurt
1 handful washed baby spinach
1/2 frozen sliced banana (can use fresh – just add ice)
1 cup frozen chopped mango (can use fresh – just add ice)
1 tablespoon peanut or almond butter

Directions: 

  1. Add all ingredients into blender then blend until smooth.

DSC_0623

Posted in Breakfast, Drinks, Healthy, Lunch | Tagged , , , , , | Leave a comment