


I have been having such a wonderful Fall! So far it’s been filled with things like apple picking, participating in a bloody mary and chili cook-off (just tasting),

and hiking through the woods to see the colorful foliage.


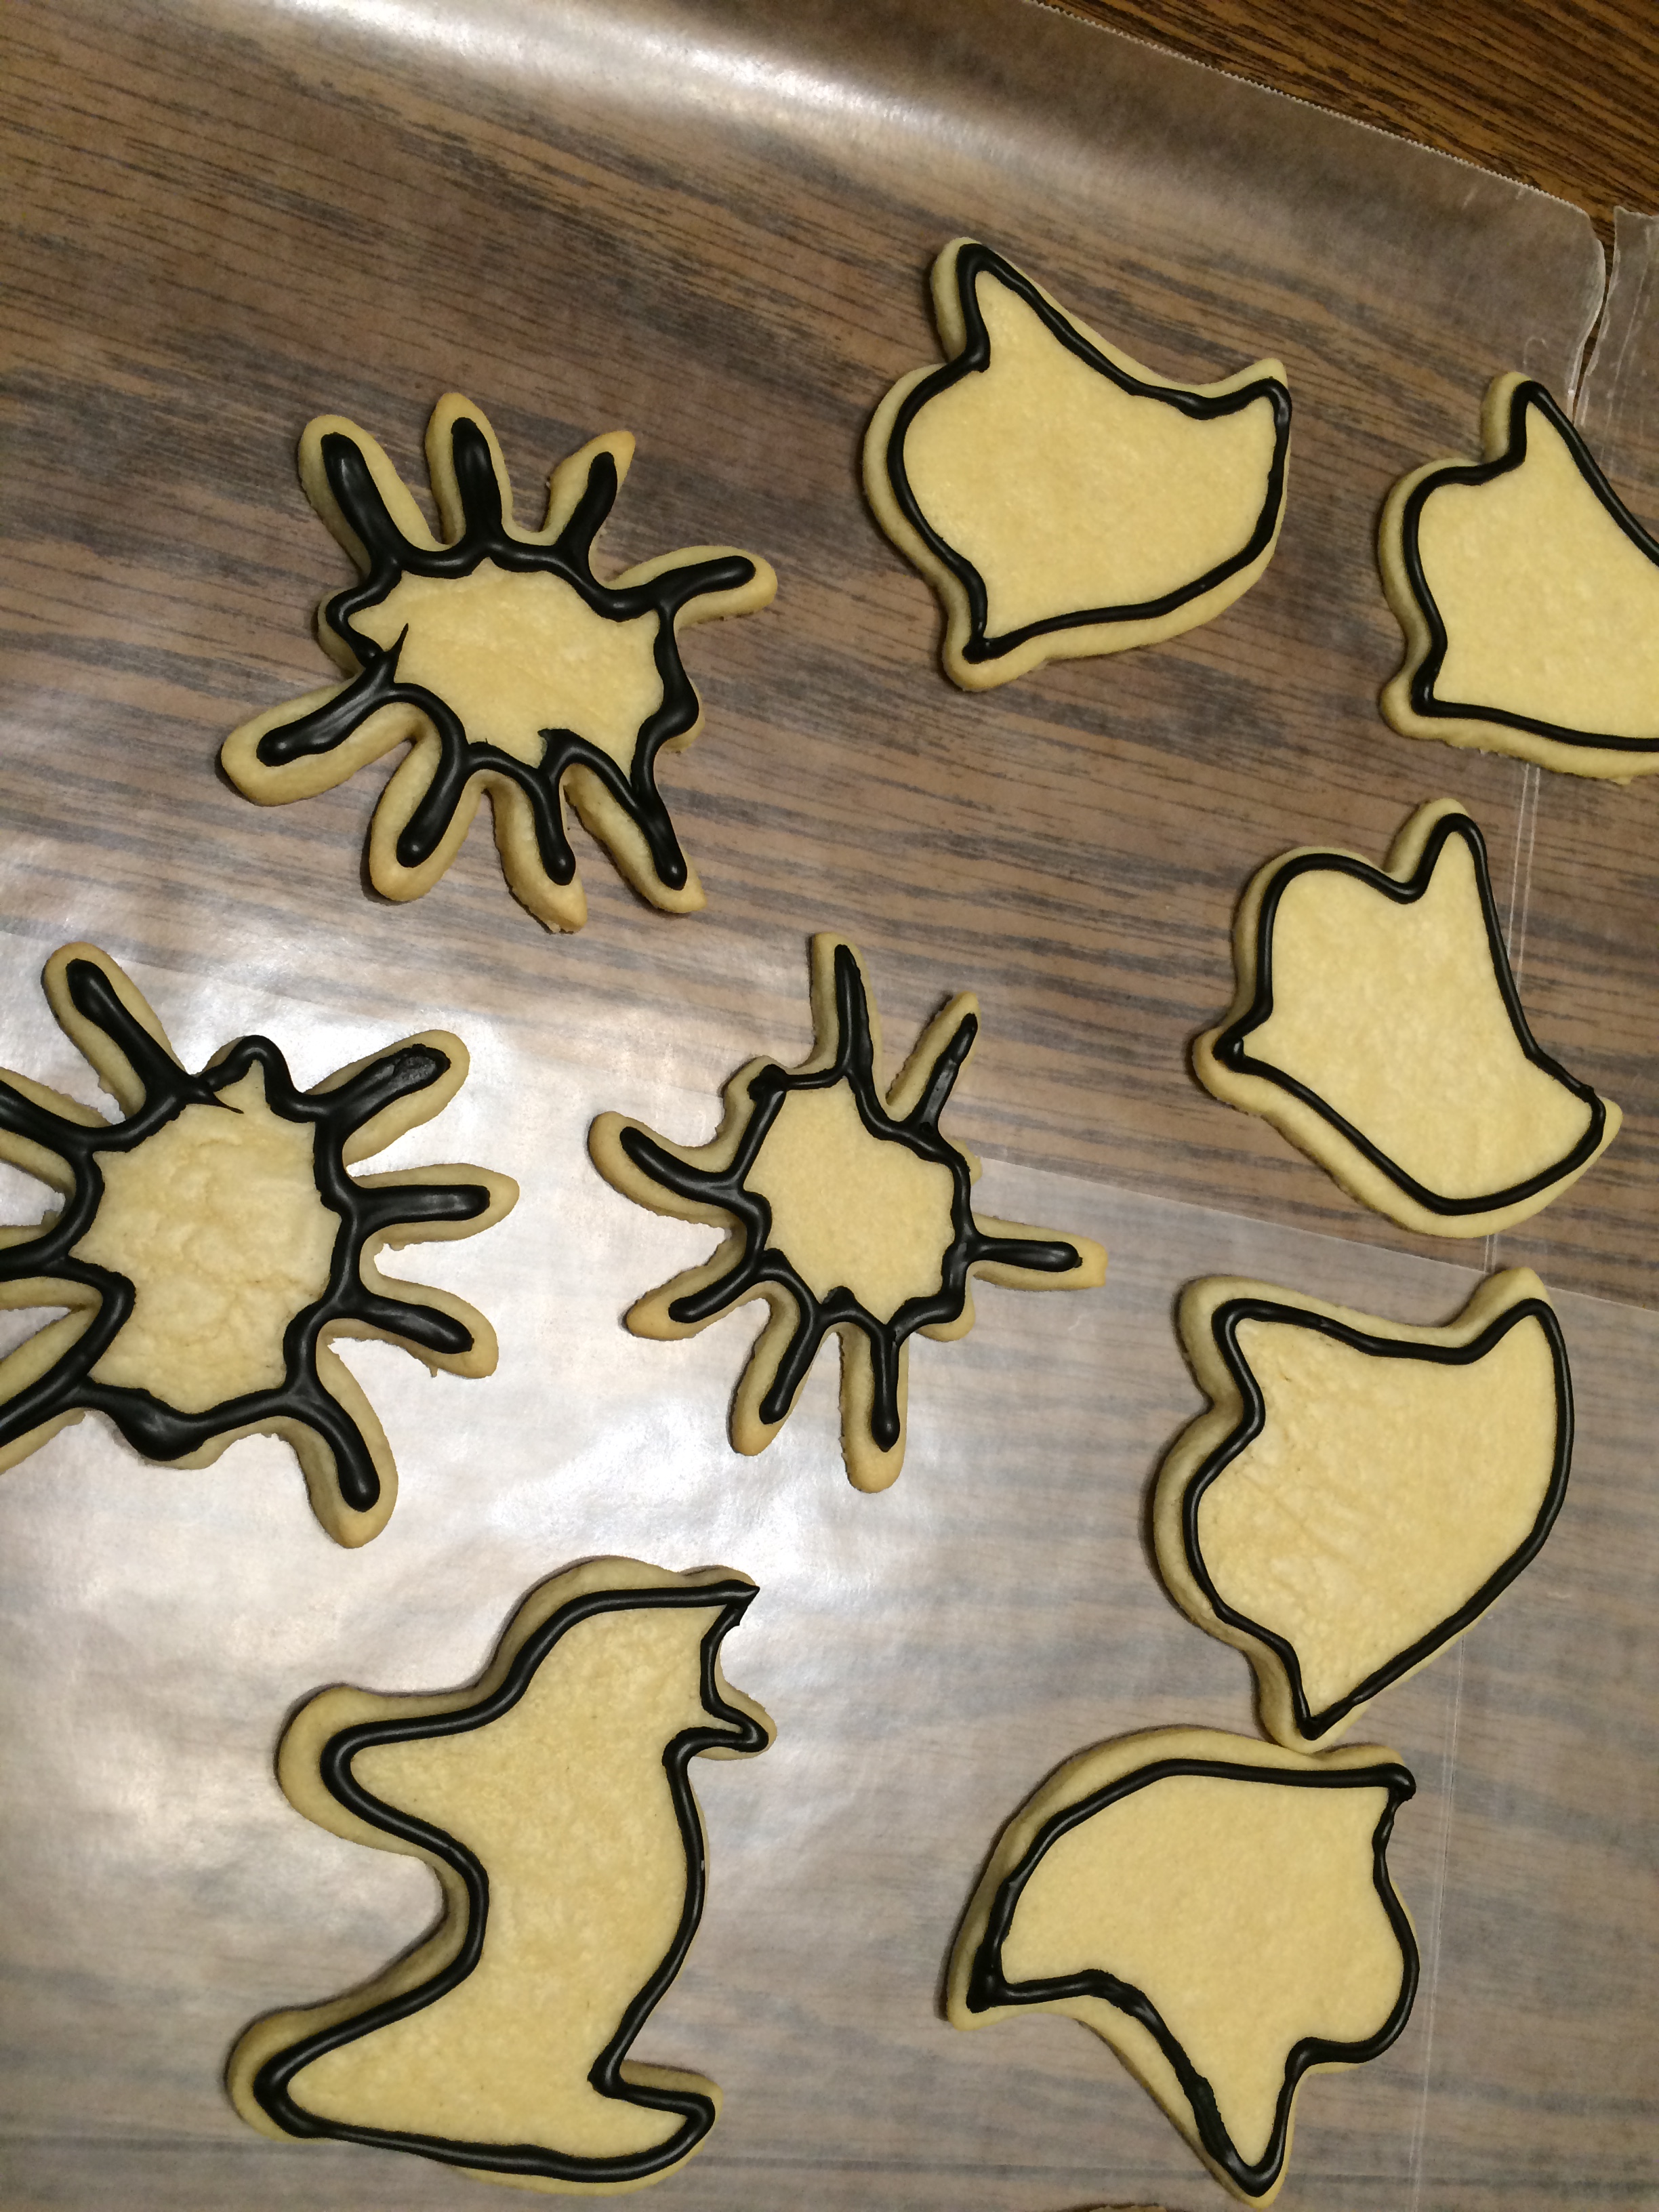
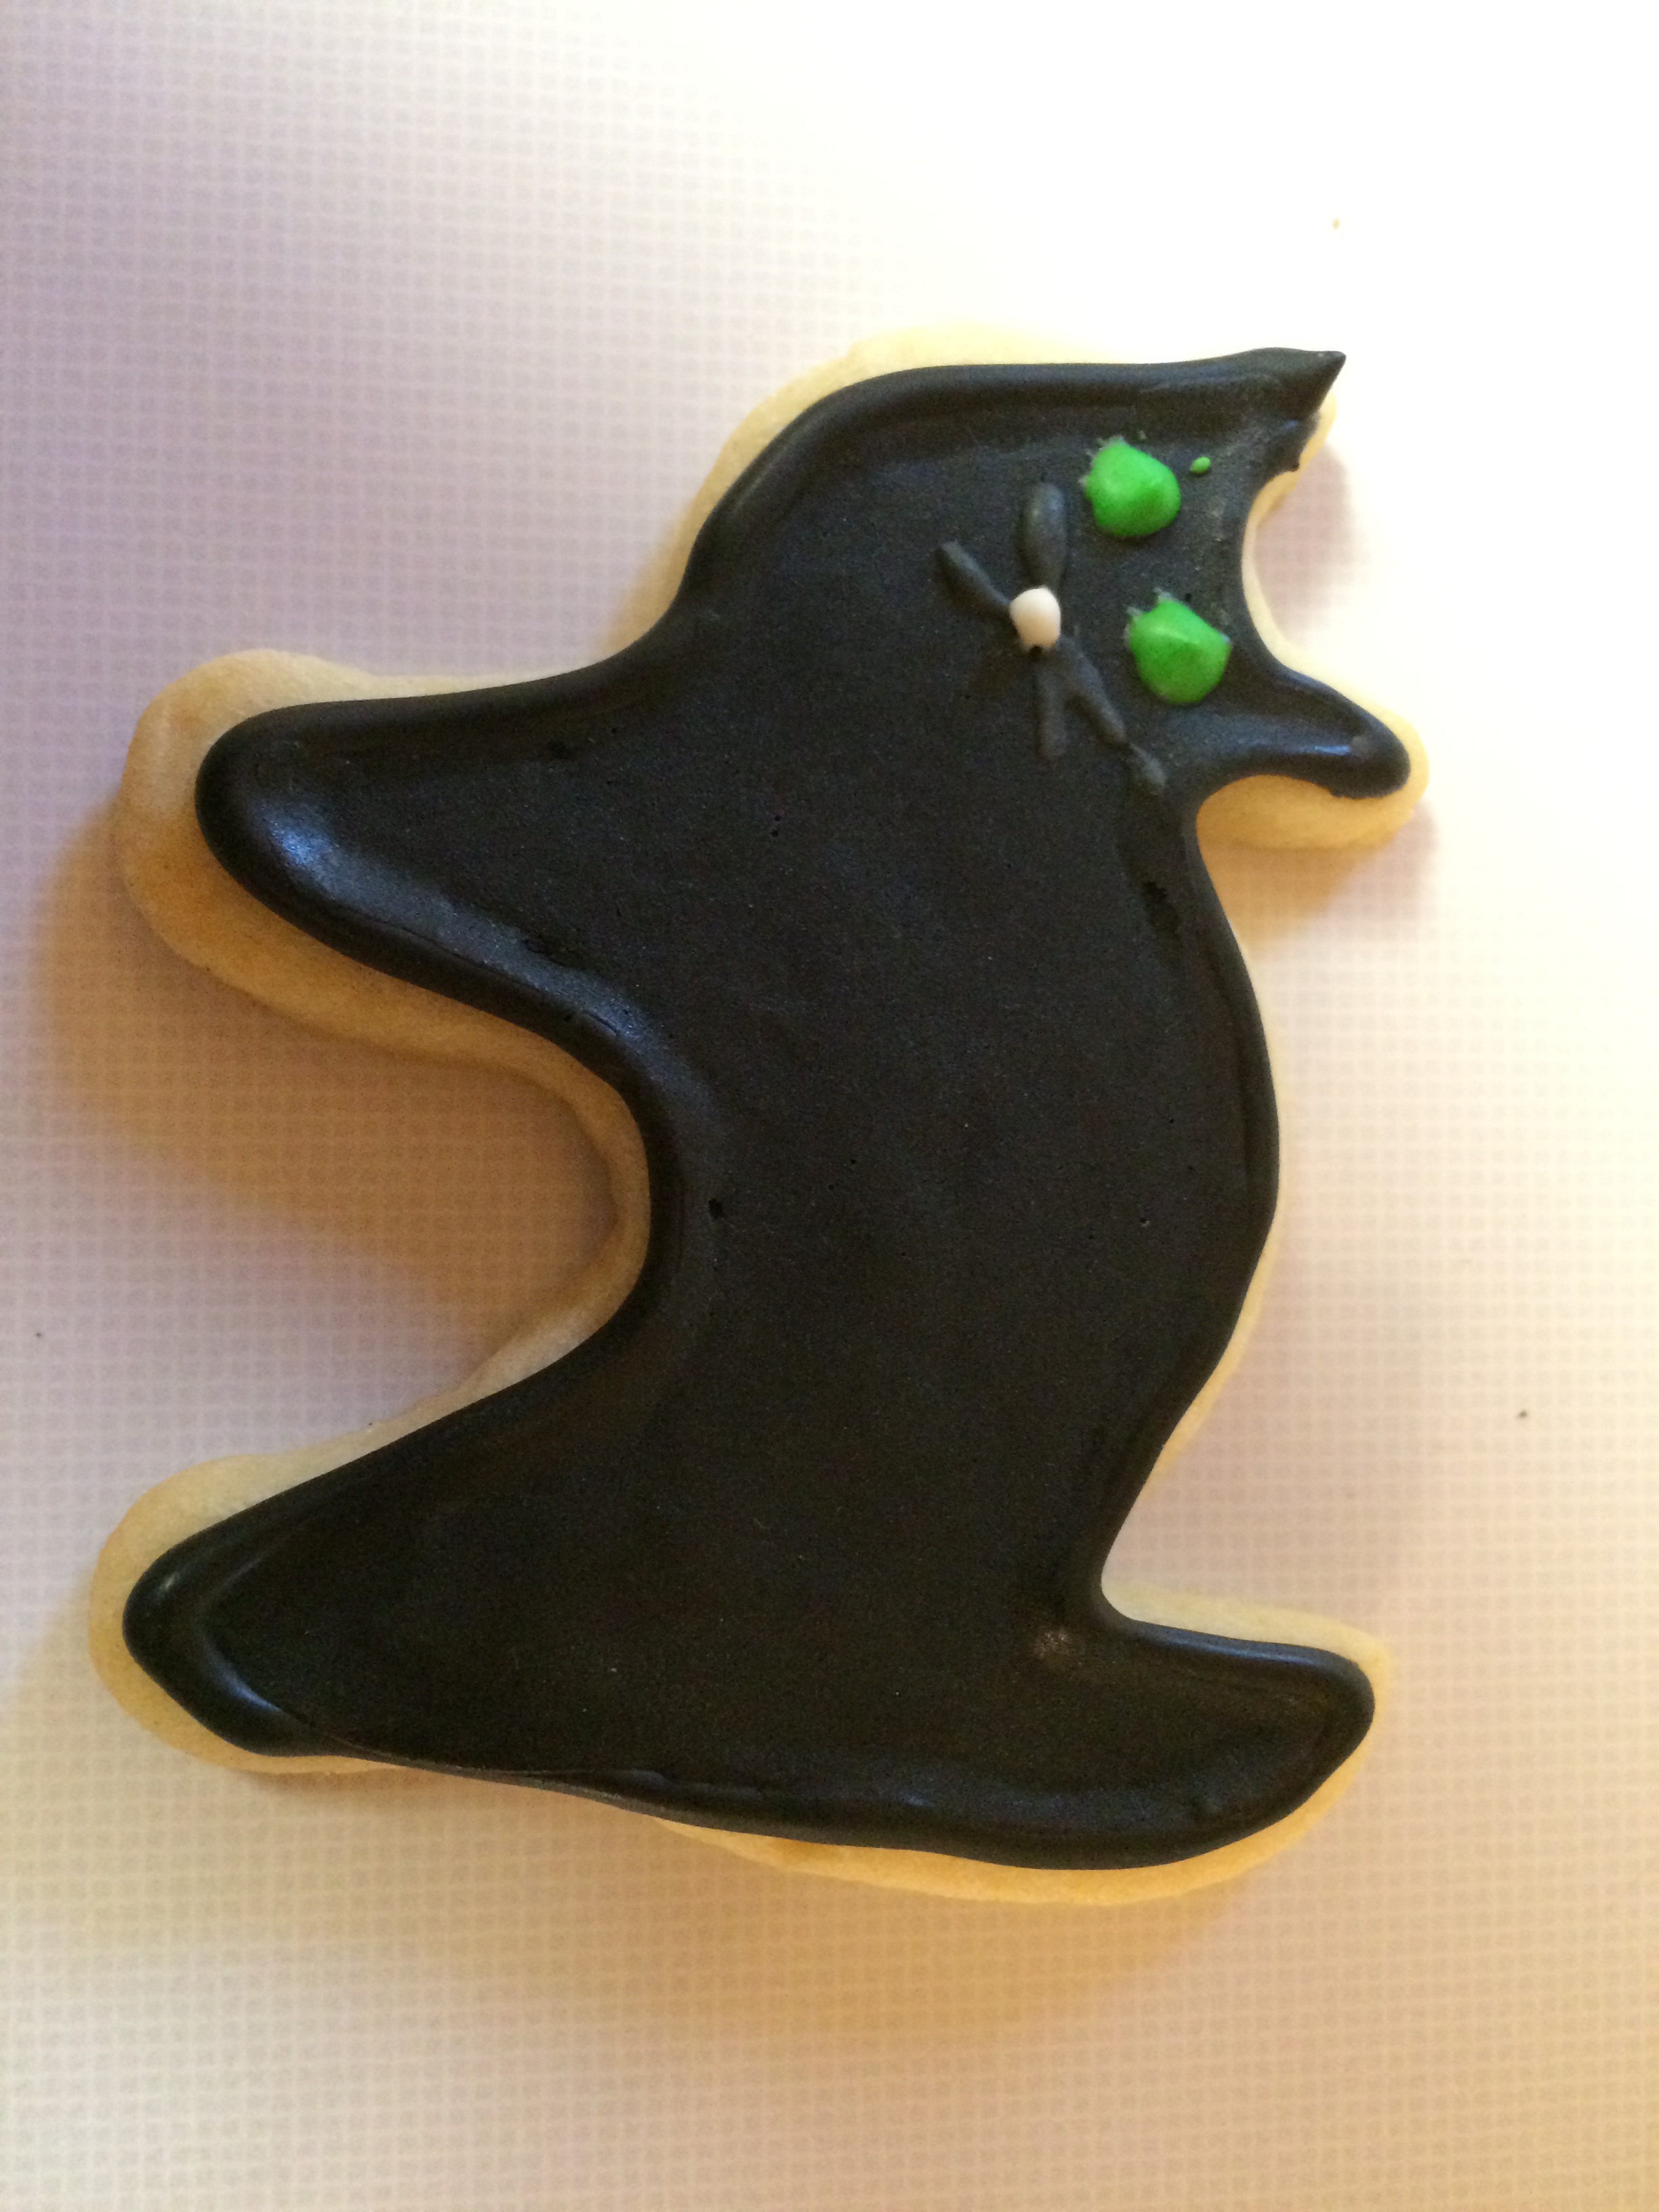
I also made and decorated these Halloween sugar cookies!


Aren’t they adorable? It was my first time making these and though it was a bit time consuming, I really enjoyed decorating them. I have to admit that for my first attempt, these turned out pretty darned good!

You’ll never buy sugar cookies from the grocery store again after you read this how-to and have the ability to make your own professional-looking sugar cookies.


Step 1: Bake the sugar cookies and let them cool completely before icing. The recipe I used for the cookies is below this how-to.


Step 2: Gather your equipment and figure out what colors you will be using (for borders and designs and for flooding the middle). It will go a lot more smoothly if you have all of this prepared before you begin. Here is a list of the equipment I used:
- 12″ disposable pastry bags. You could use ziplock bags, but these are a lot easier and you can buy them in big packs if you bake a lot.
- Decorating tips. I used a size 3 tip for outlining the cookies and making the designs.
- Couplers. These keep the tips on the pastry bags and make it easier to transfer the tips to other bags.
- Squeeze bottles. I use these for the thin icing I flood my cookies with. It makes it a lot easier to control where the icing ends up and keeps it from dripping out when I’m not using it. You could also use a spoon or another pastry bag, but the squeeze bottles are a lot neater.
- Small bowls for different colors of icing.
- Toothpicks.
Step 3: Make the royal icing. I use Alton Brown’s recipe, which is:
- 3 ounces pasteurized egg whites (the liquid kind in the carton)
- 1 teaspoon vanilla extract
- 4 cups confectioners sugar
With a stand mixer, beat the egg whites and vanilla until frothy then gradually add in the confectioners sugar and mix on low until the sugar is incorporated and the mixture is shiny. Turn the speed up to high and beat until the icing forms stiff, glossy peaks – about 5-7 minutes. Add more confectioners sugar if necessary. You don’t want the icing too liquidy at this point since you will be using it for the borders.
Step 4: Color the icing. Divide the icing into different containers for each color you will be using. I used gel coloring but any will work. Remember that a little bit goes a long way! The colors will also darken when the dry. After mixing the colors, place a damp paper towel over each bowl to keep the icing from drying out.
Step 5: Outline the cookies. Place the color icing you will be using in a pastry bag fitted with a coupler and tip (I use #3). Hold and squeeze the bag near the top with your dominant hand, and guide the tip with your non-dominant hand (thank you Martha Stewart for this tip!). Using this trick will give you much better control over the icing. Outline the cookies and wait until they dry to flood them. By the time I had outlined all of them, the first ones were already dry and ready to be flooded.
Step 6: Flood the cookies. Take whatever color icing you want to fill the cookies with and slowly start adding drops of water into it until it forms an almost liquid consistency. You should be able to drizzle it easily, but just be careful not to make it too watery. Place the icing into a squeeze bottle then squeeze it onto the middle of the cookie, almost completely covering it. Use a toothpick to spread it out over any empty spots. The icing should look very smooth and even – if not, you may need to add another drop or 2 of water.


Step 7: Add designs. Let the cookies dry completely before adding any designs with icing. Wait at least a couple hours in order to avoid the colors bleeding. I used the same pastry bag and #3 tip that I used for the borders to make my designs. This is where you can be really creative and make them fun!

Step 8: Let dry completely, then enjoy!


I hope you’ll find these steps helpful! It is a little time consuming, so my suggestion is to spread it out over a couple days. Make the cookies one day and decorate them the next if you can.
Let me know how they turn out! I’d love to see your pictures!! 🙂


Sugar Cookies
Recipe from Baking: From My Home to Yours by Dorie Greenspan
Makes approximately 50 2-inch cookies
Ingredients:
2 cups all-purpose flour
½ teaspoon salt
½ teaspoon baking powder
1 stick plus 2 tablespoons (10 tablespoons) unsalted butter, at room temperature
1 cup sugar
1 large egg
1 large egg yolk
1 teaspoon pure vanilla extract
Optional: sugar and cinnamon for dusting (don’t use these if you will be icing cookies)
Directions:
- Whisk the flour, salt and baking powder together.
- Working with a stand mixer fitted with a paddle attachment, or with a hand mixer in a large bowl, beat the butter at medium speed for a minute or so, until smooth. Beat in the sugar and continue to beat for about 2 minutes, until the mixture is light and pale. Add the egg and yolk and beat for another minute or two; beat in the vanilla. Reduce the mixer speed to low and steadily add the flour mixture, mixing only until it has been incorporated – because this dough is best when worked least, you might want to stop the mixer before all the flour is thoroughly blended into the dough and finish the job with a rubber spatula. When mixed, the dough will be soft, creamy and malleable.
- Turn the dough out onto a counter and divide it in half. Shape each half into a disk and wrap in plastic. Chill the dough for at least 2 hours. (Well wrapped, the dough can be refrigerated for up to 3 days or frozen for up to 2 months.)
- Getting Ready to Bake: Center a rack in the oven and preheat the oven to 350 degrees F. Line two baking sheets with parchment paper or silicone mats.
- Working with one packet of dough at a time, roll out the dough between sheets of plastic wrap or wax paper to a thickness of ¼ inch, lifting the plastic or paper and turning the dough over often so that it rolls evenly. Lift off the top sheet of plastic or paper and cut out the cookies. Pull away the excess dough, saving the scraps for re-rolling, and carefully lift the cutouts onto the lined baking sheets with a spatula, leaving about 1½ inches between the cookies. (This is a soft dough and you might have trouble peeling away the excess or lifting the cutouts; if so, cover the dough, chill it for about 15 minutes and try again.) After you’ve rolled and cut the second packet of dough, you can form the scraps into a disk, then chill, roll, cut and bake.
- Bake the cookies one sheet at a time for 9 to 11 minutes, rotating the sheet at the midpoint. The cookies should feel firm, but they should not color much, if at all. Remove the pan from the oven and dust the cookies with sugar or cinnamon sugar, if you’d like. Let them rest for 1 minute before carefully lifting them onto a rack to cool to room temperature.
- Repeat with the remaining dough, cooling the baking sheets between batches.
Storing: The cookies will keep at room temperature in a tin or container for up to 1 week. Wrapped well, they can be frozen for up to 2 months.
Royal Icing
Recipe from Alton Brown
Ingredients:
3 ounces pasteurized egg whites (the liquid kind in the carton)
1 teaspoon vanilla extract
4 cups confectioners’ sugar
More confectioners’ sugar as needed
Directions:
- Use a stand mixer to combine the egg whites and vanilla and beat until frothy.
- Gradually add confectioners’ sugar and mix on low speed until sugar is incorporated and mixture is shiny.
- Turn speed up to high and beat until mixture forms stiff, glossy peaks. This should take approximately 5 to 7 minutes. Add more confectioners’ sugar if needed.
- Add food coloring, if desired. Transfer to pastry bag for immediate use or store in airtight container in refrigerator for up to 3 days.


this is great thanks for the help!
Thanks! I’m glad you found it useful 🙂