The Best Spanakopita Ever

DSC_0317

Happy holidays! I had an excellent Christmas filled with good food, family, and friends. The star gift so far has been my mom’s Christmas gift for my dad: a Keurig brewer. We’ve all been obsessively making coffee in it – it’s so cool! I’m not even a huge coffee drinker but I had two cups today because it’s just so easy and delicious (once I add my peppermint mocha creamer of course). I got a couple new cookbooks for Christmas so I’m really excited that I have so many new recipes to try out!

Even though I took a little break from blogging the past few days due to holiday festivities, I have not taken a break from cooking and baking. I have so much that I can’t wait to share! First on my list is what is probably my favorite food in the entire world: Spanakopita. Not just any Spanakopita, but The Best Spanakopita Ever!
DSC_0314

As you have probably deduced from my blog’s name, I come from a Greek family. My parents were both born in Greece and my mom makes a lot of traditional Greek recipes. Her recipe for Spanakopita is absolutely incredible. It seems like a pretty big claim for me to make by saying her Spanakopita is the best Spanakopita ever when there are plenty of other Greeks out there who make the dish and probably think theirs is the best. However, I stick by my assertion since it’s the best I have ever tasted and if you make it, you will probably think so as well!

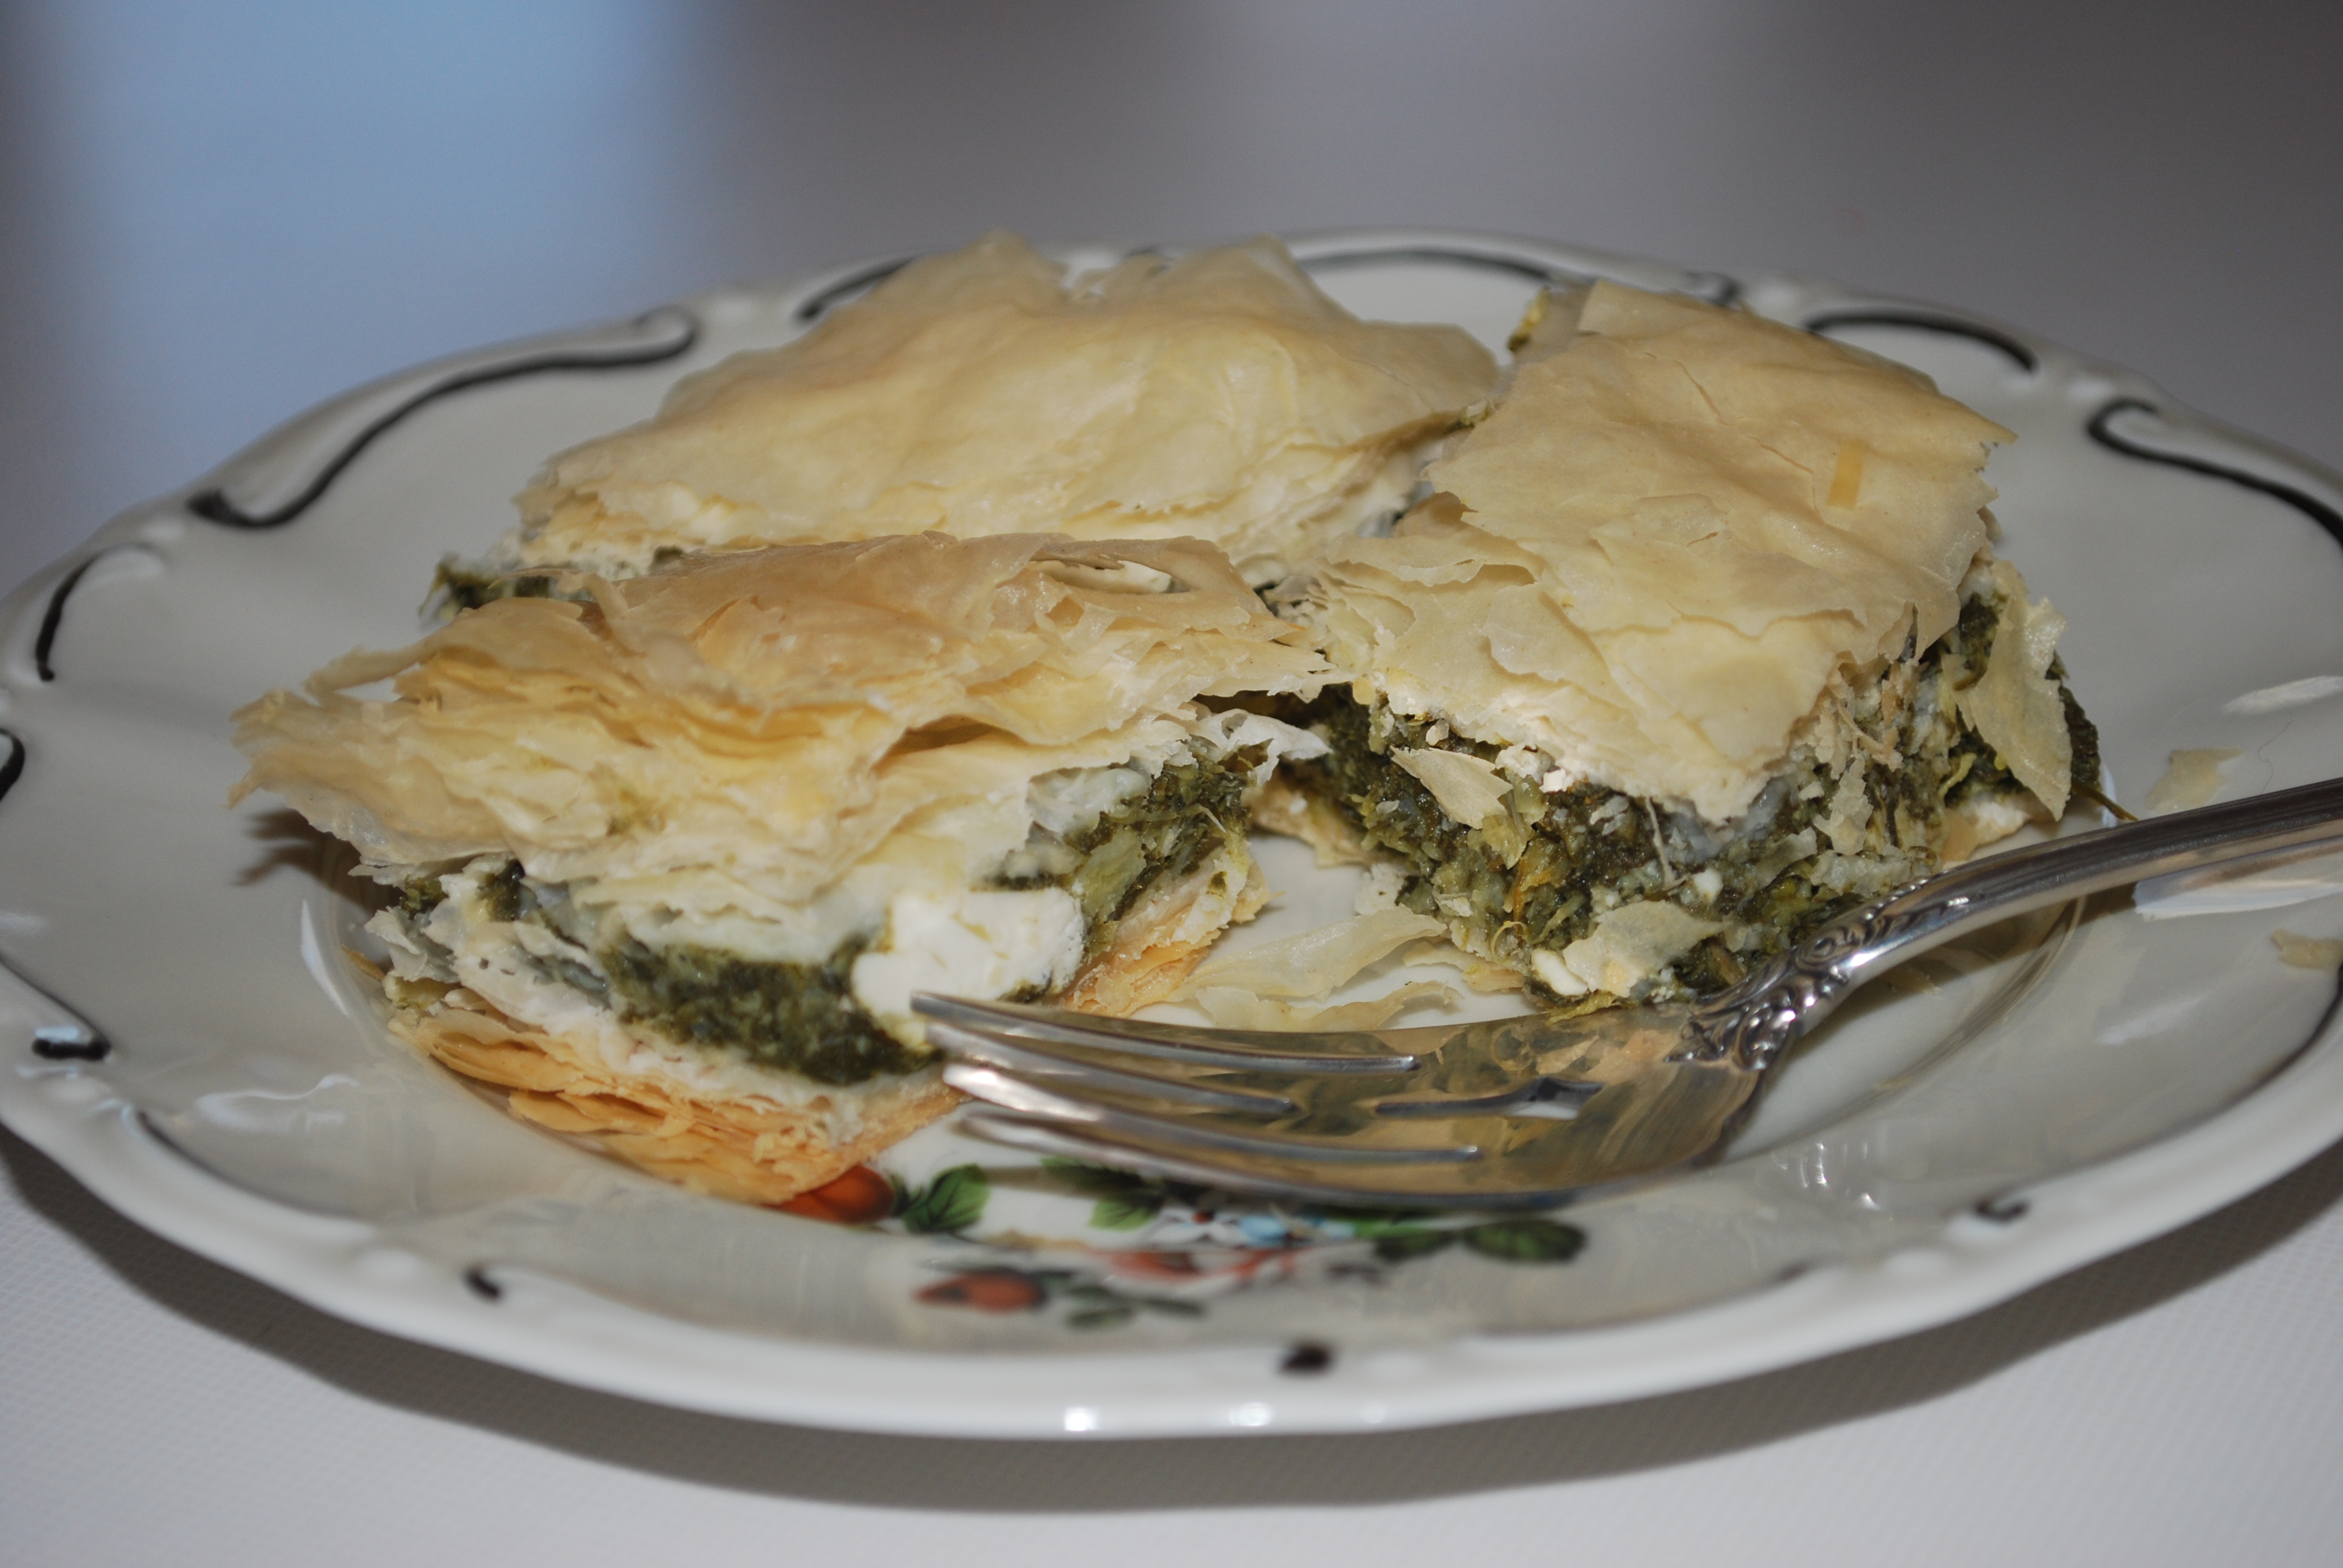
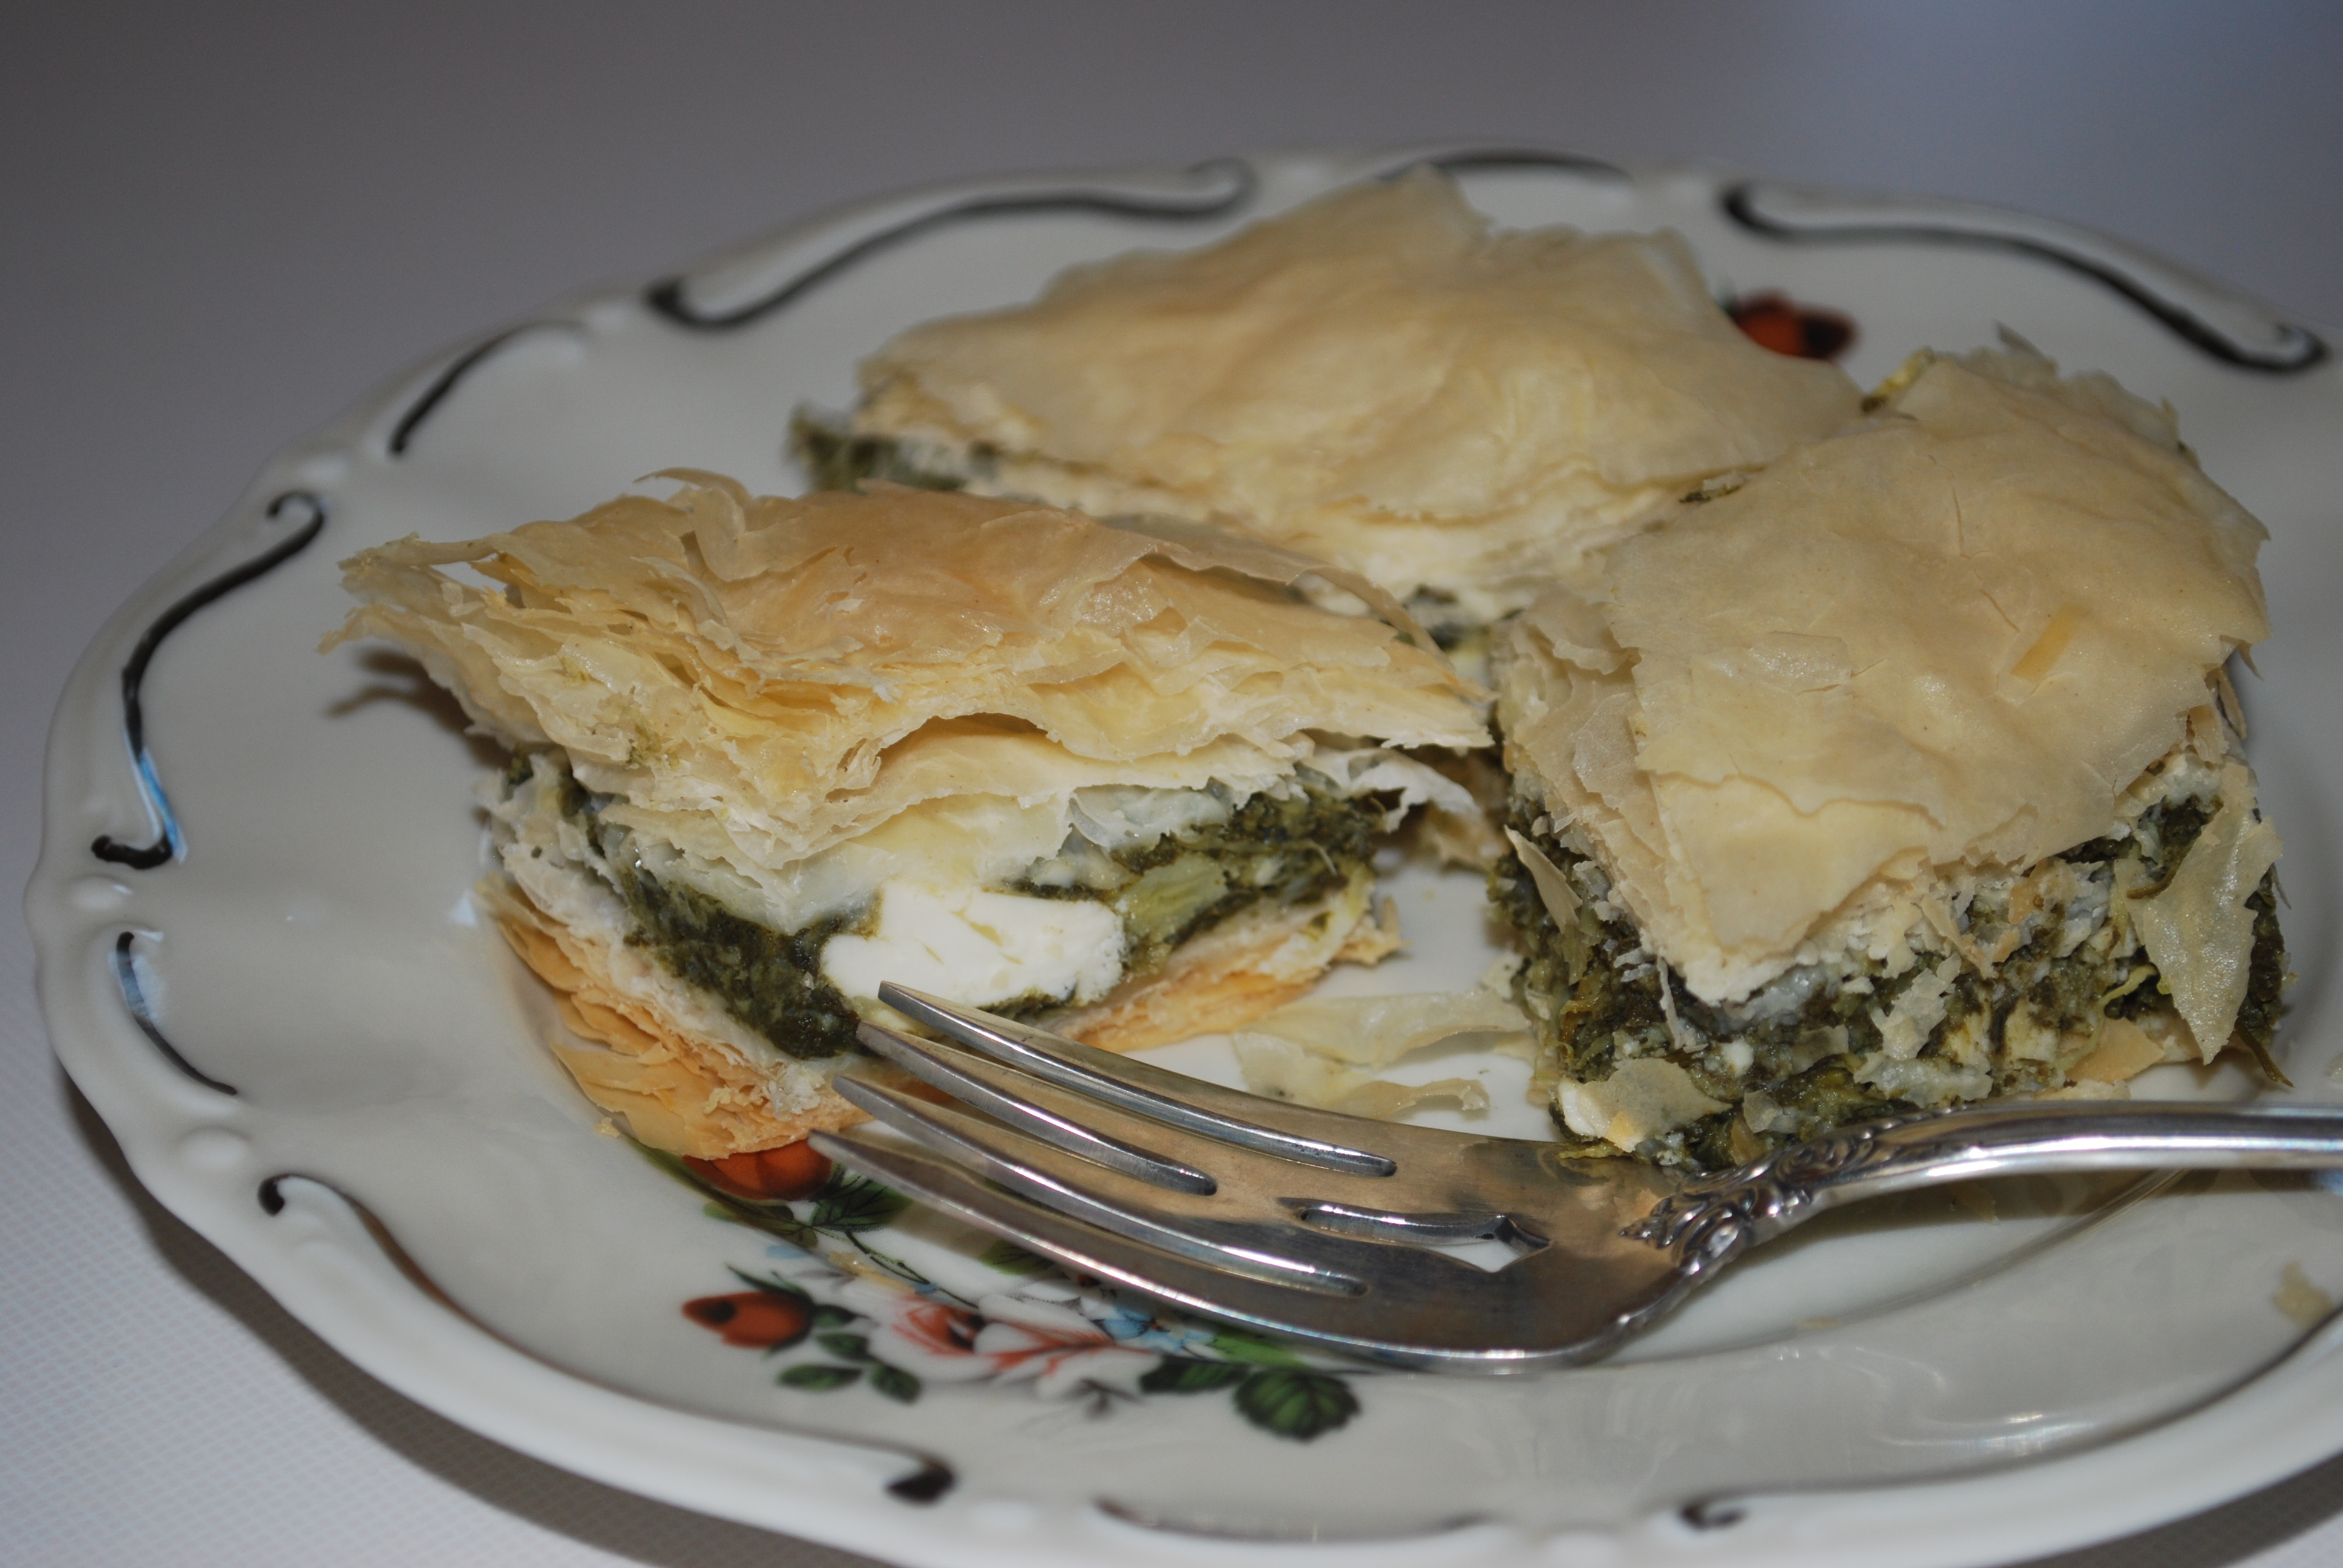
If you have never had Spanakopita, it translates in English to “Spinach Pie,” but honestly that doesn’t sound extremely appetizing. What it really is, is a spinach, onion, and feta  mixture in between buttery layers of fillo dough. It’s delicious!

DSC_0316

With that being said, here is my mom’s Spanakopita recipe, which in my opinion is THE BEST. I’d love to hear if you try it out!

DSC_0320

First, preheat your oven to 350. Next, take 3 10-ounce packages of frozen spinach that should be thawed and drain the spinach really well.

DSC_0261

DSC_0264

DSC_0268
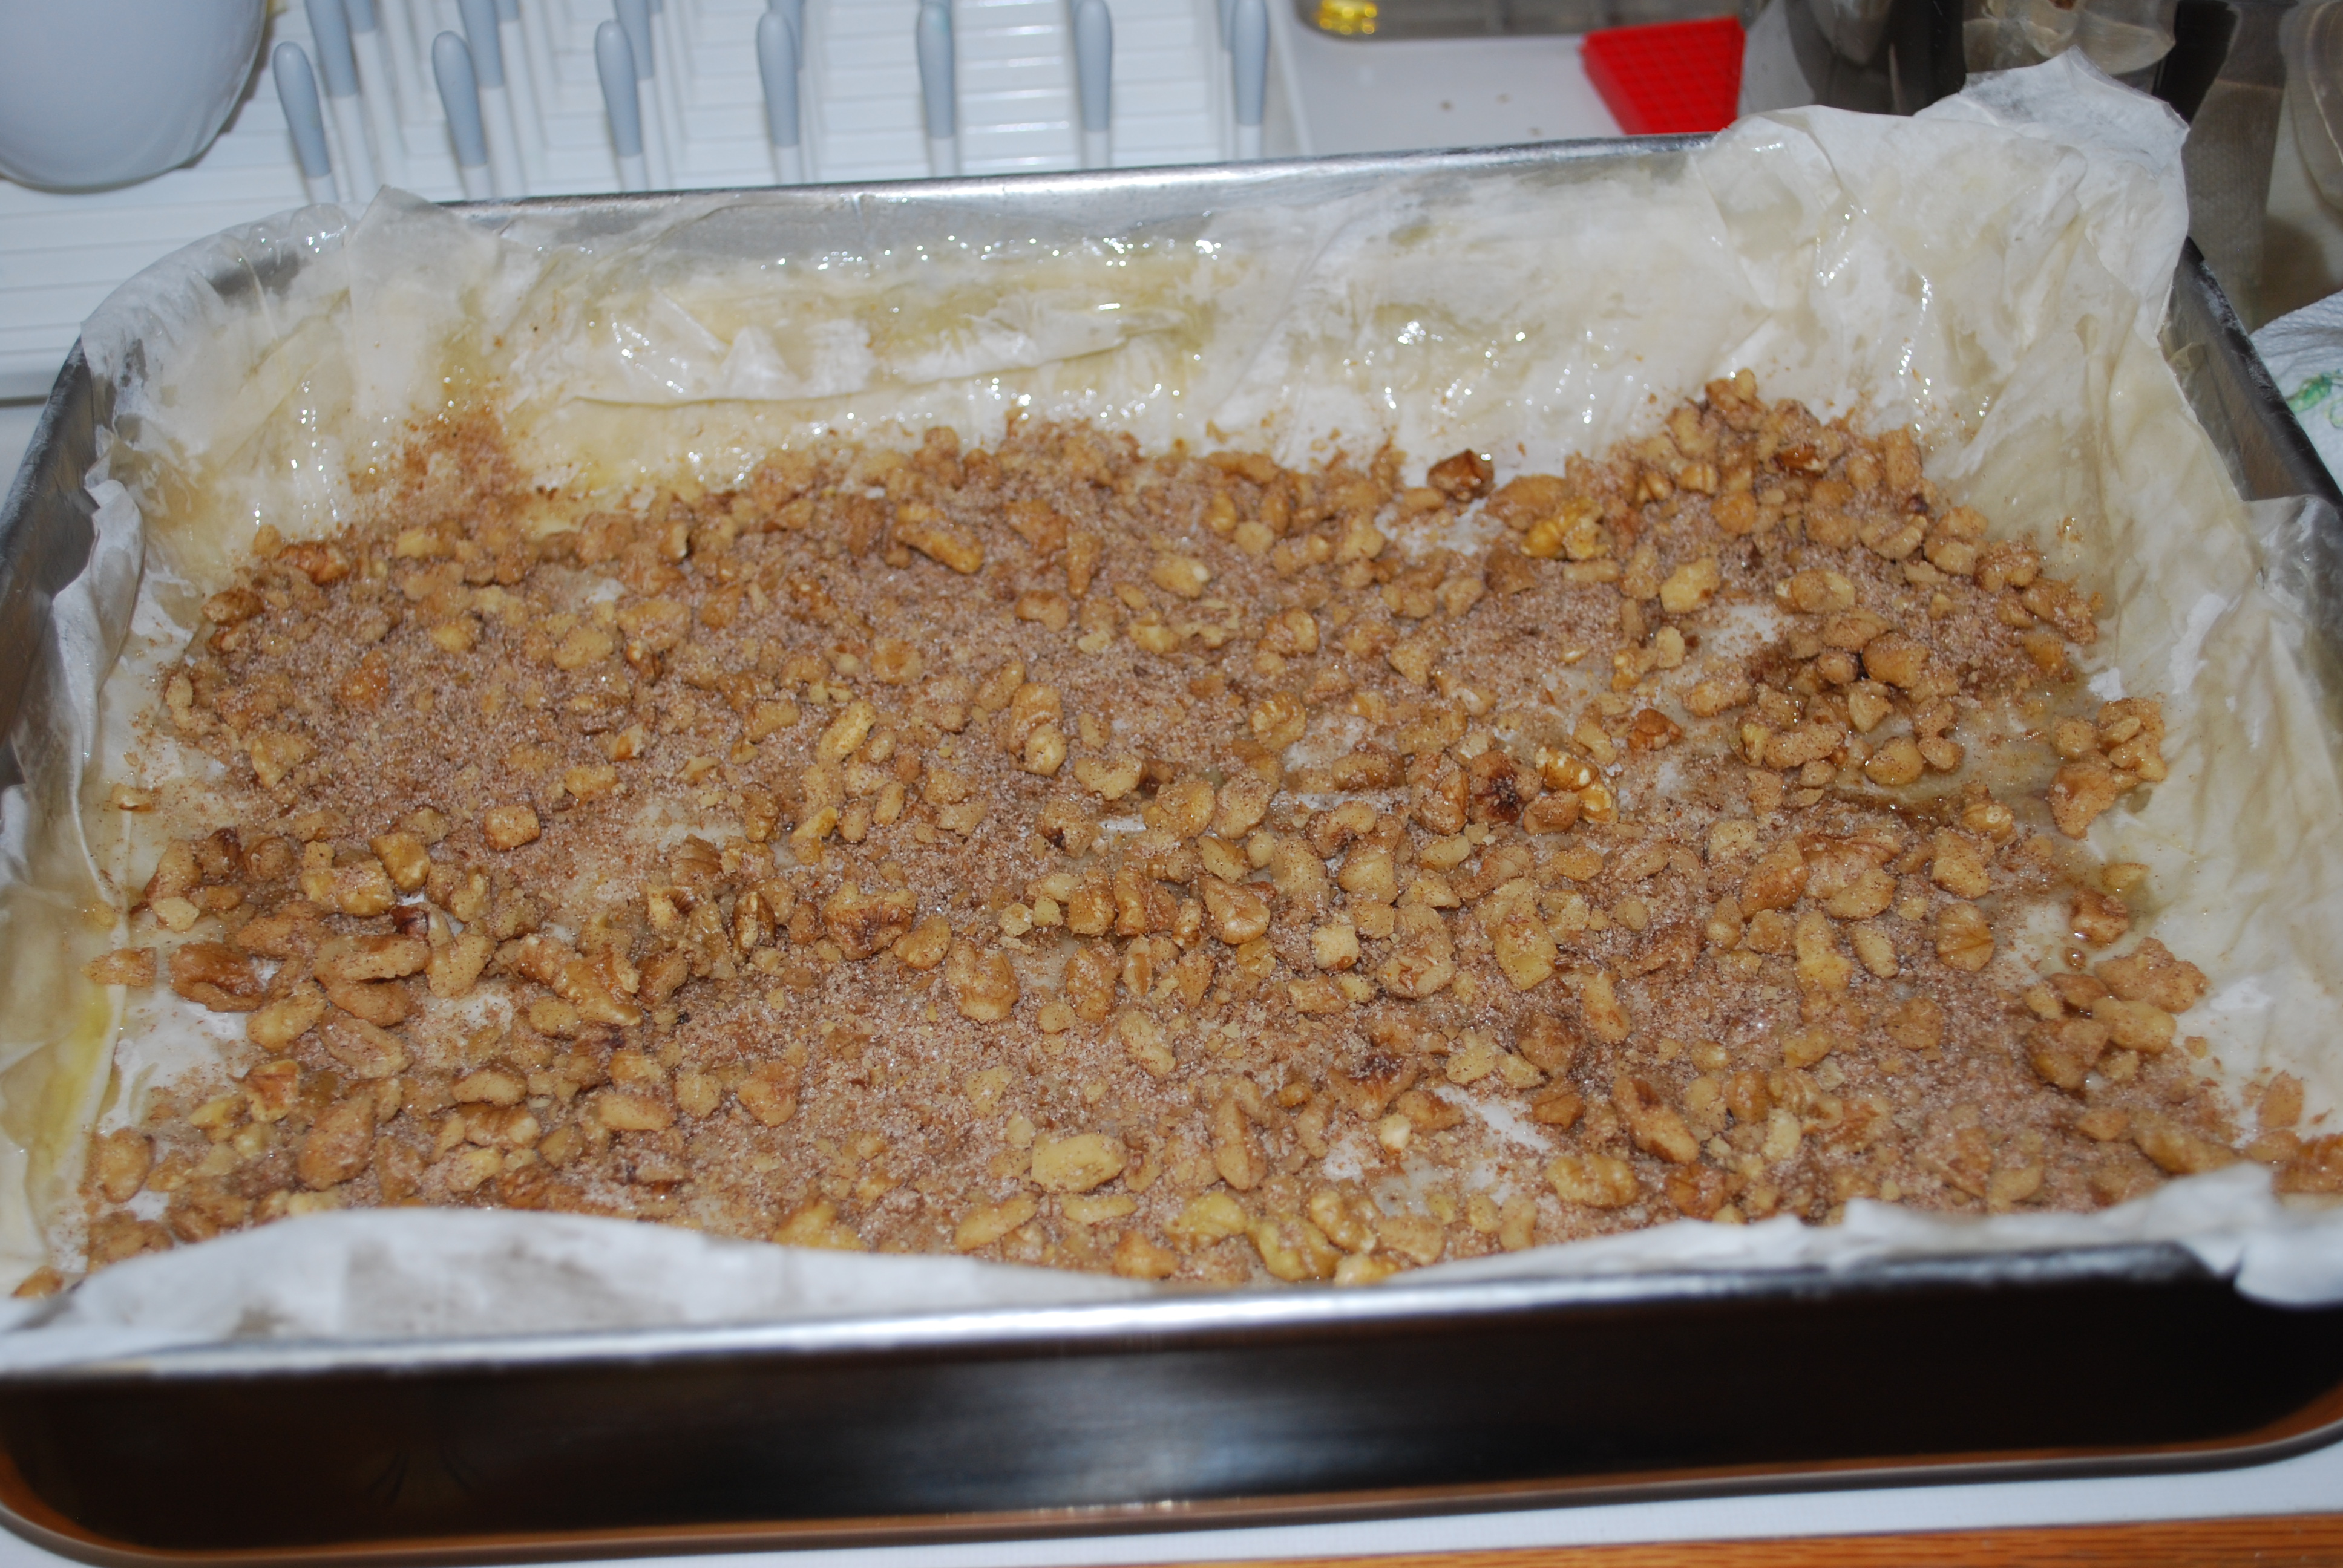
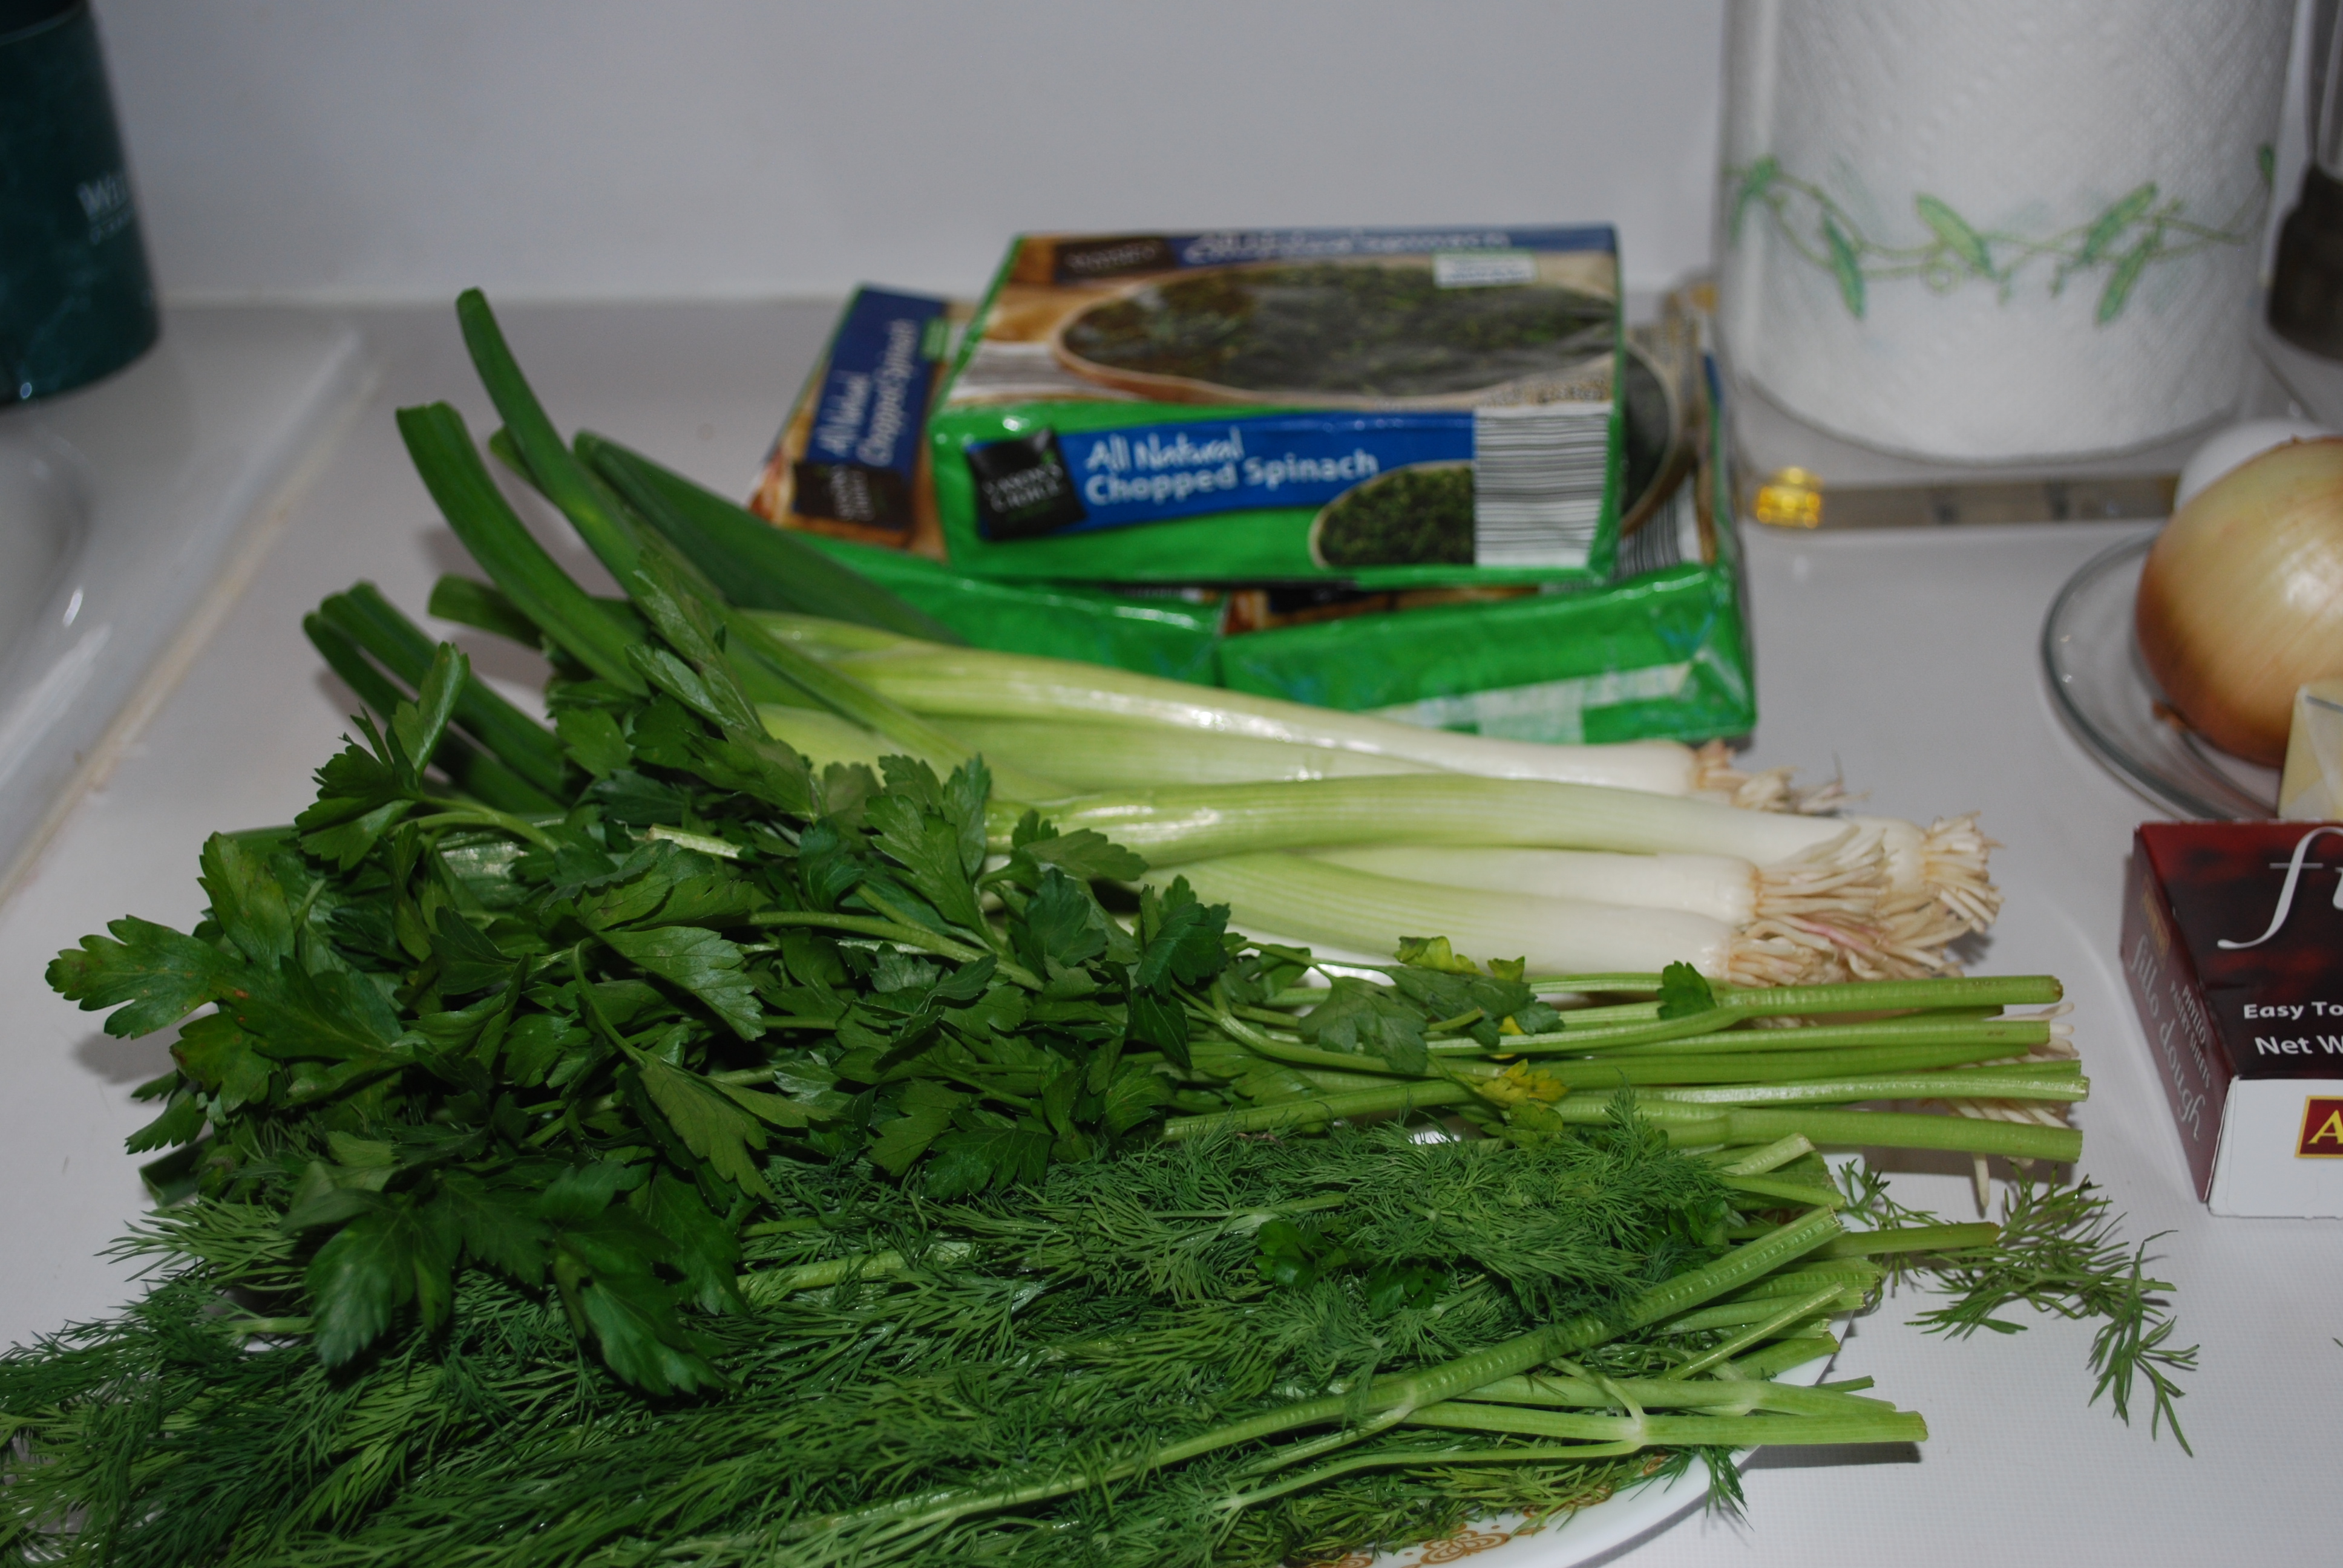
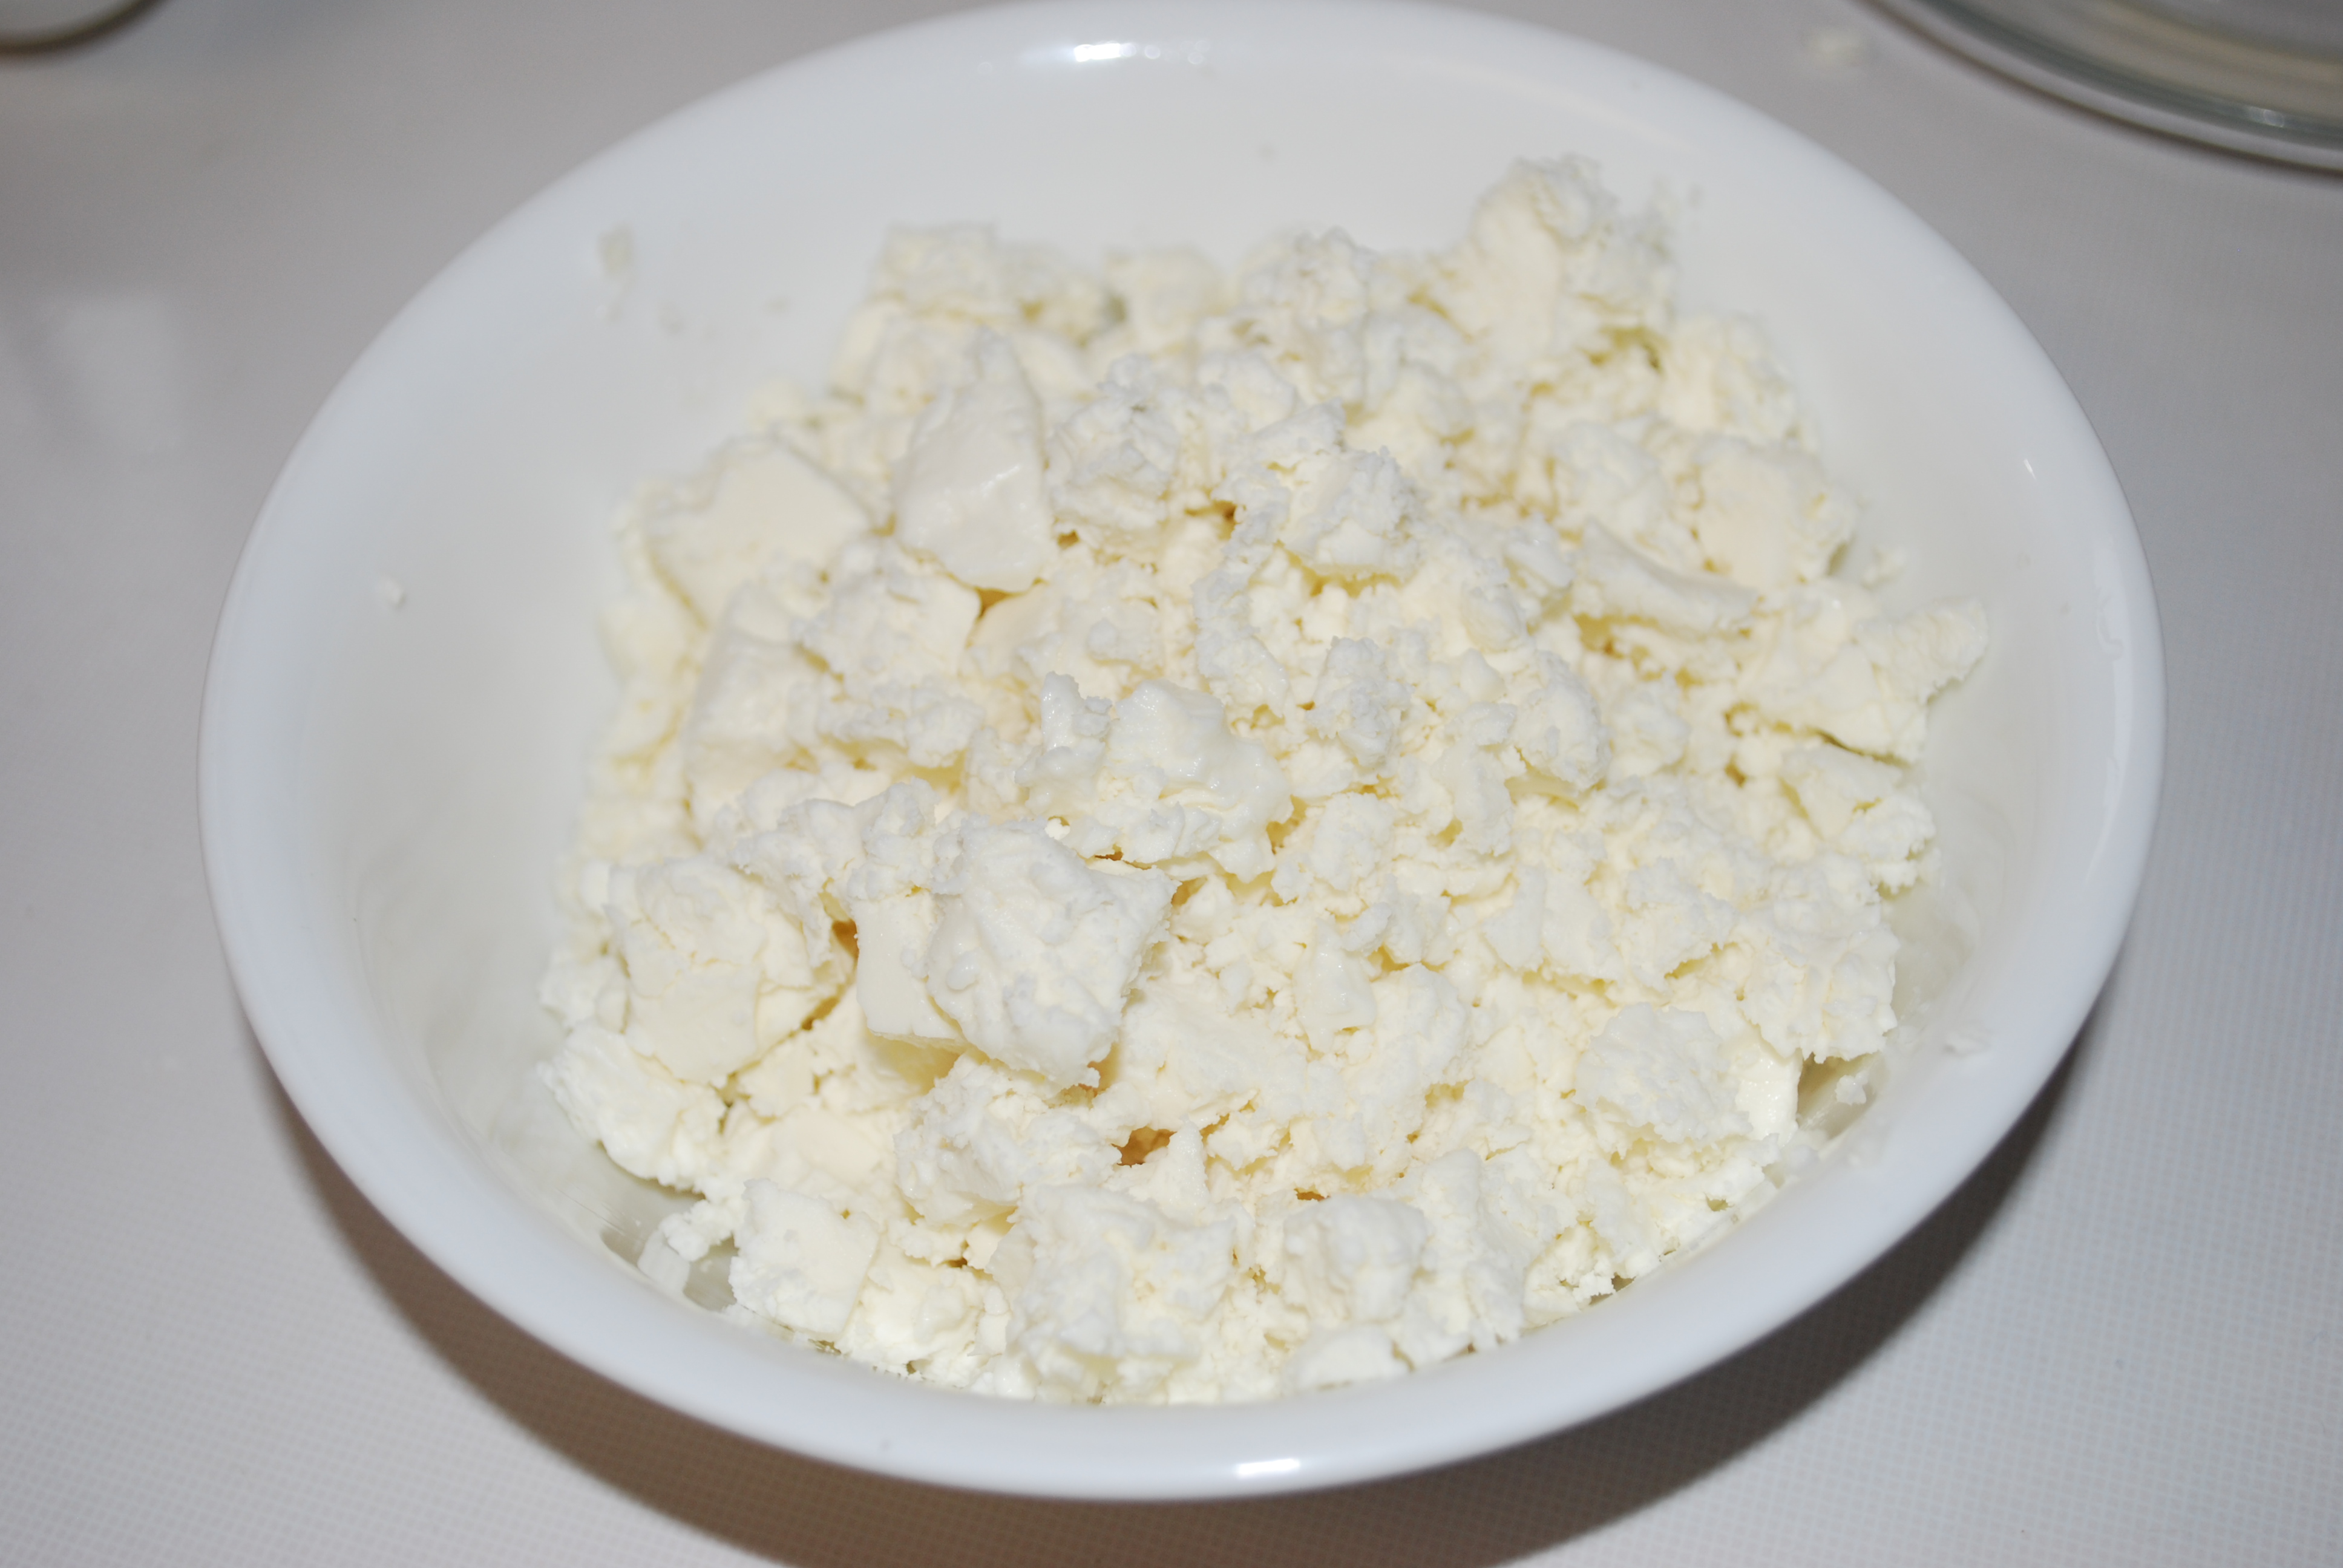
Now you can start chopping. You will need to finely chop 1 yellow onion, 1 bunch (about 2 cups) green onions, 1/2 cup parsley, and 1 cup dill. You should also crumble 1/2 pound Feta cheese to have it ready.

DSC_0262

DSC_0266

DSC_0276

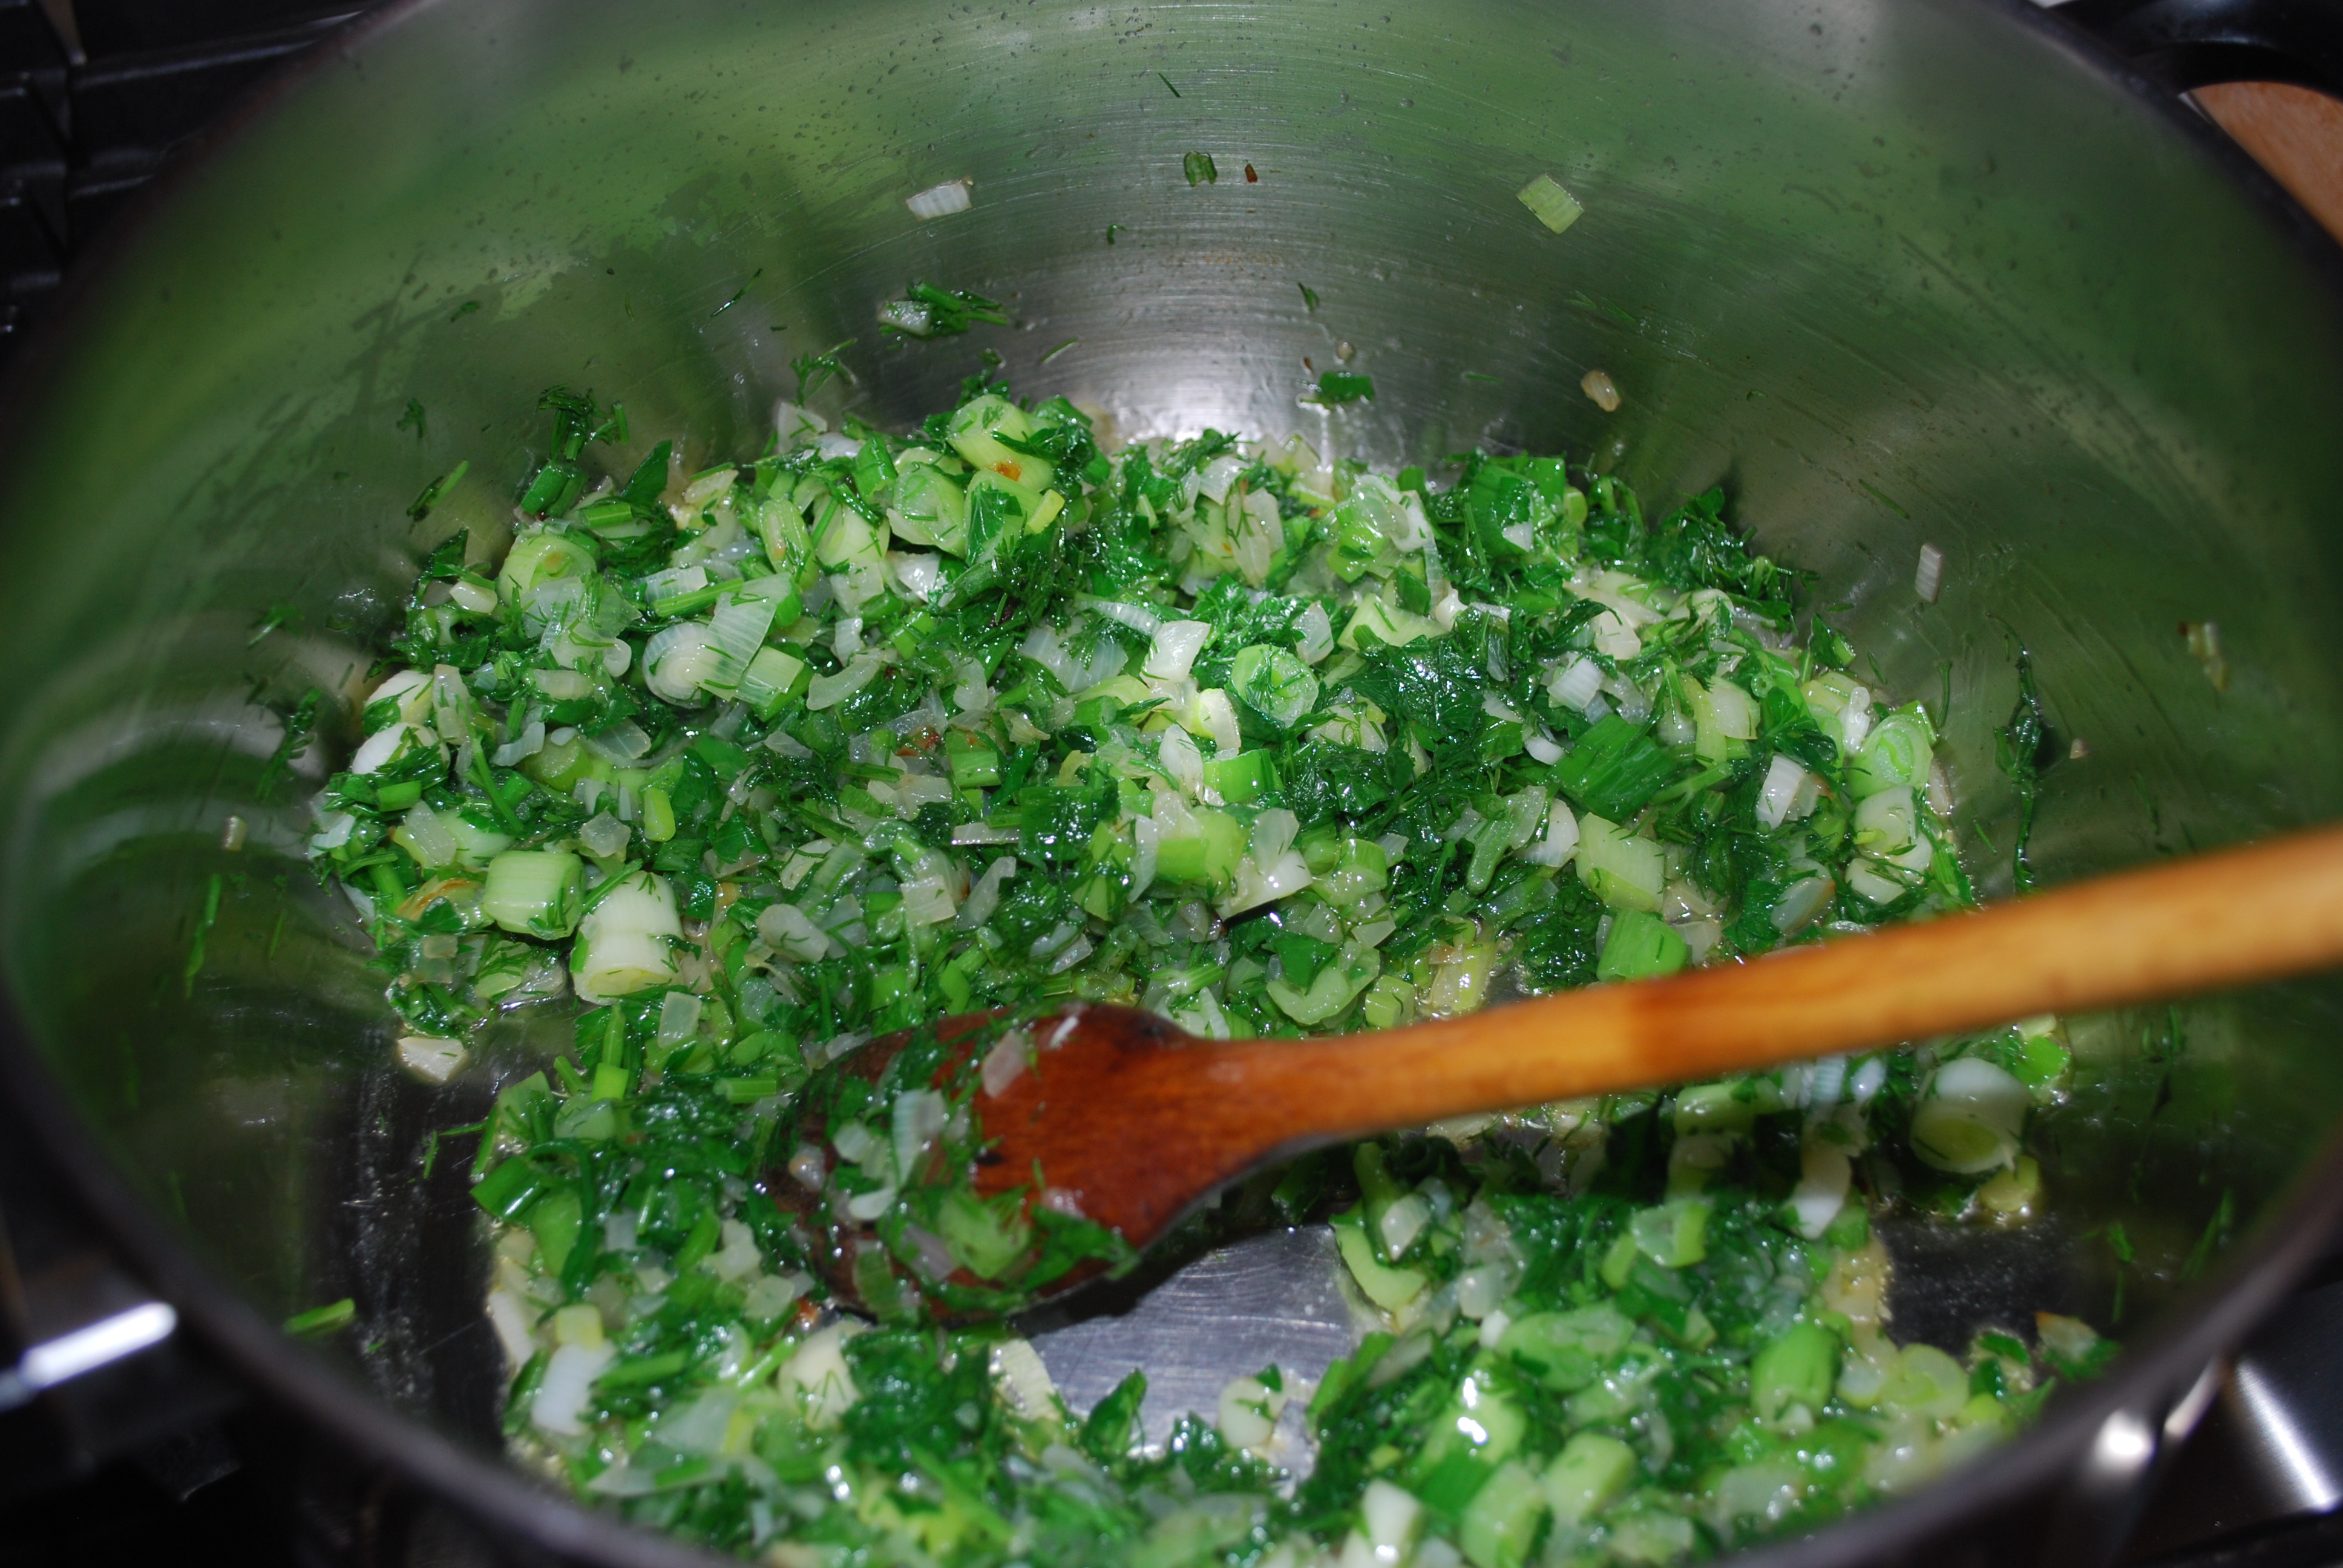
In a sauce pan, heat 1/3 cup extra virgin olive oil and saute yellow onion until golden, about 5 minutes.

DSC_0269

DSC_0270

Add in the green onion, parsley, and dill, and saute another 5 minutes.

DSC_0271

DSC_0272

Add in the drained spinach and stir for about 5 more minutes. Remove the sauce pan from heat.

DSC_0273

DSC_0275

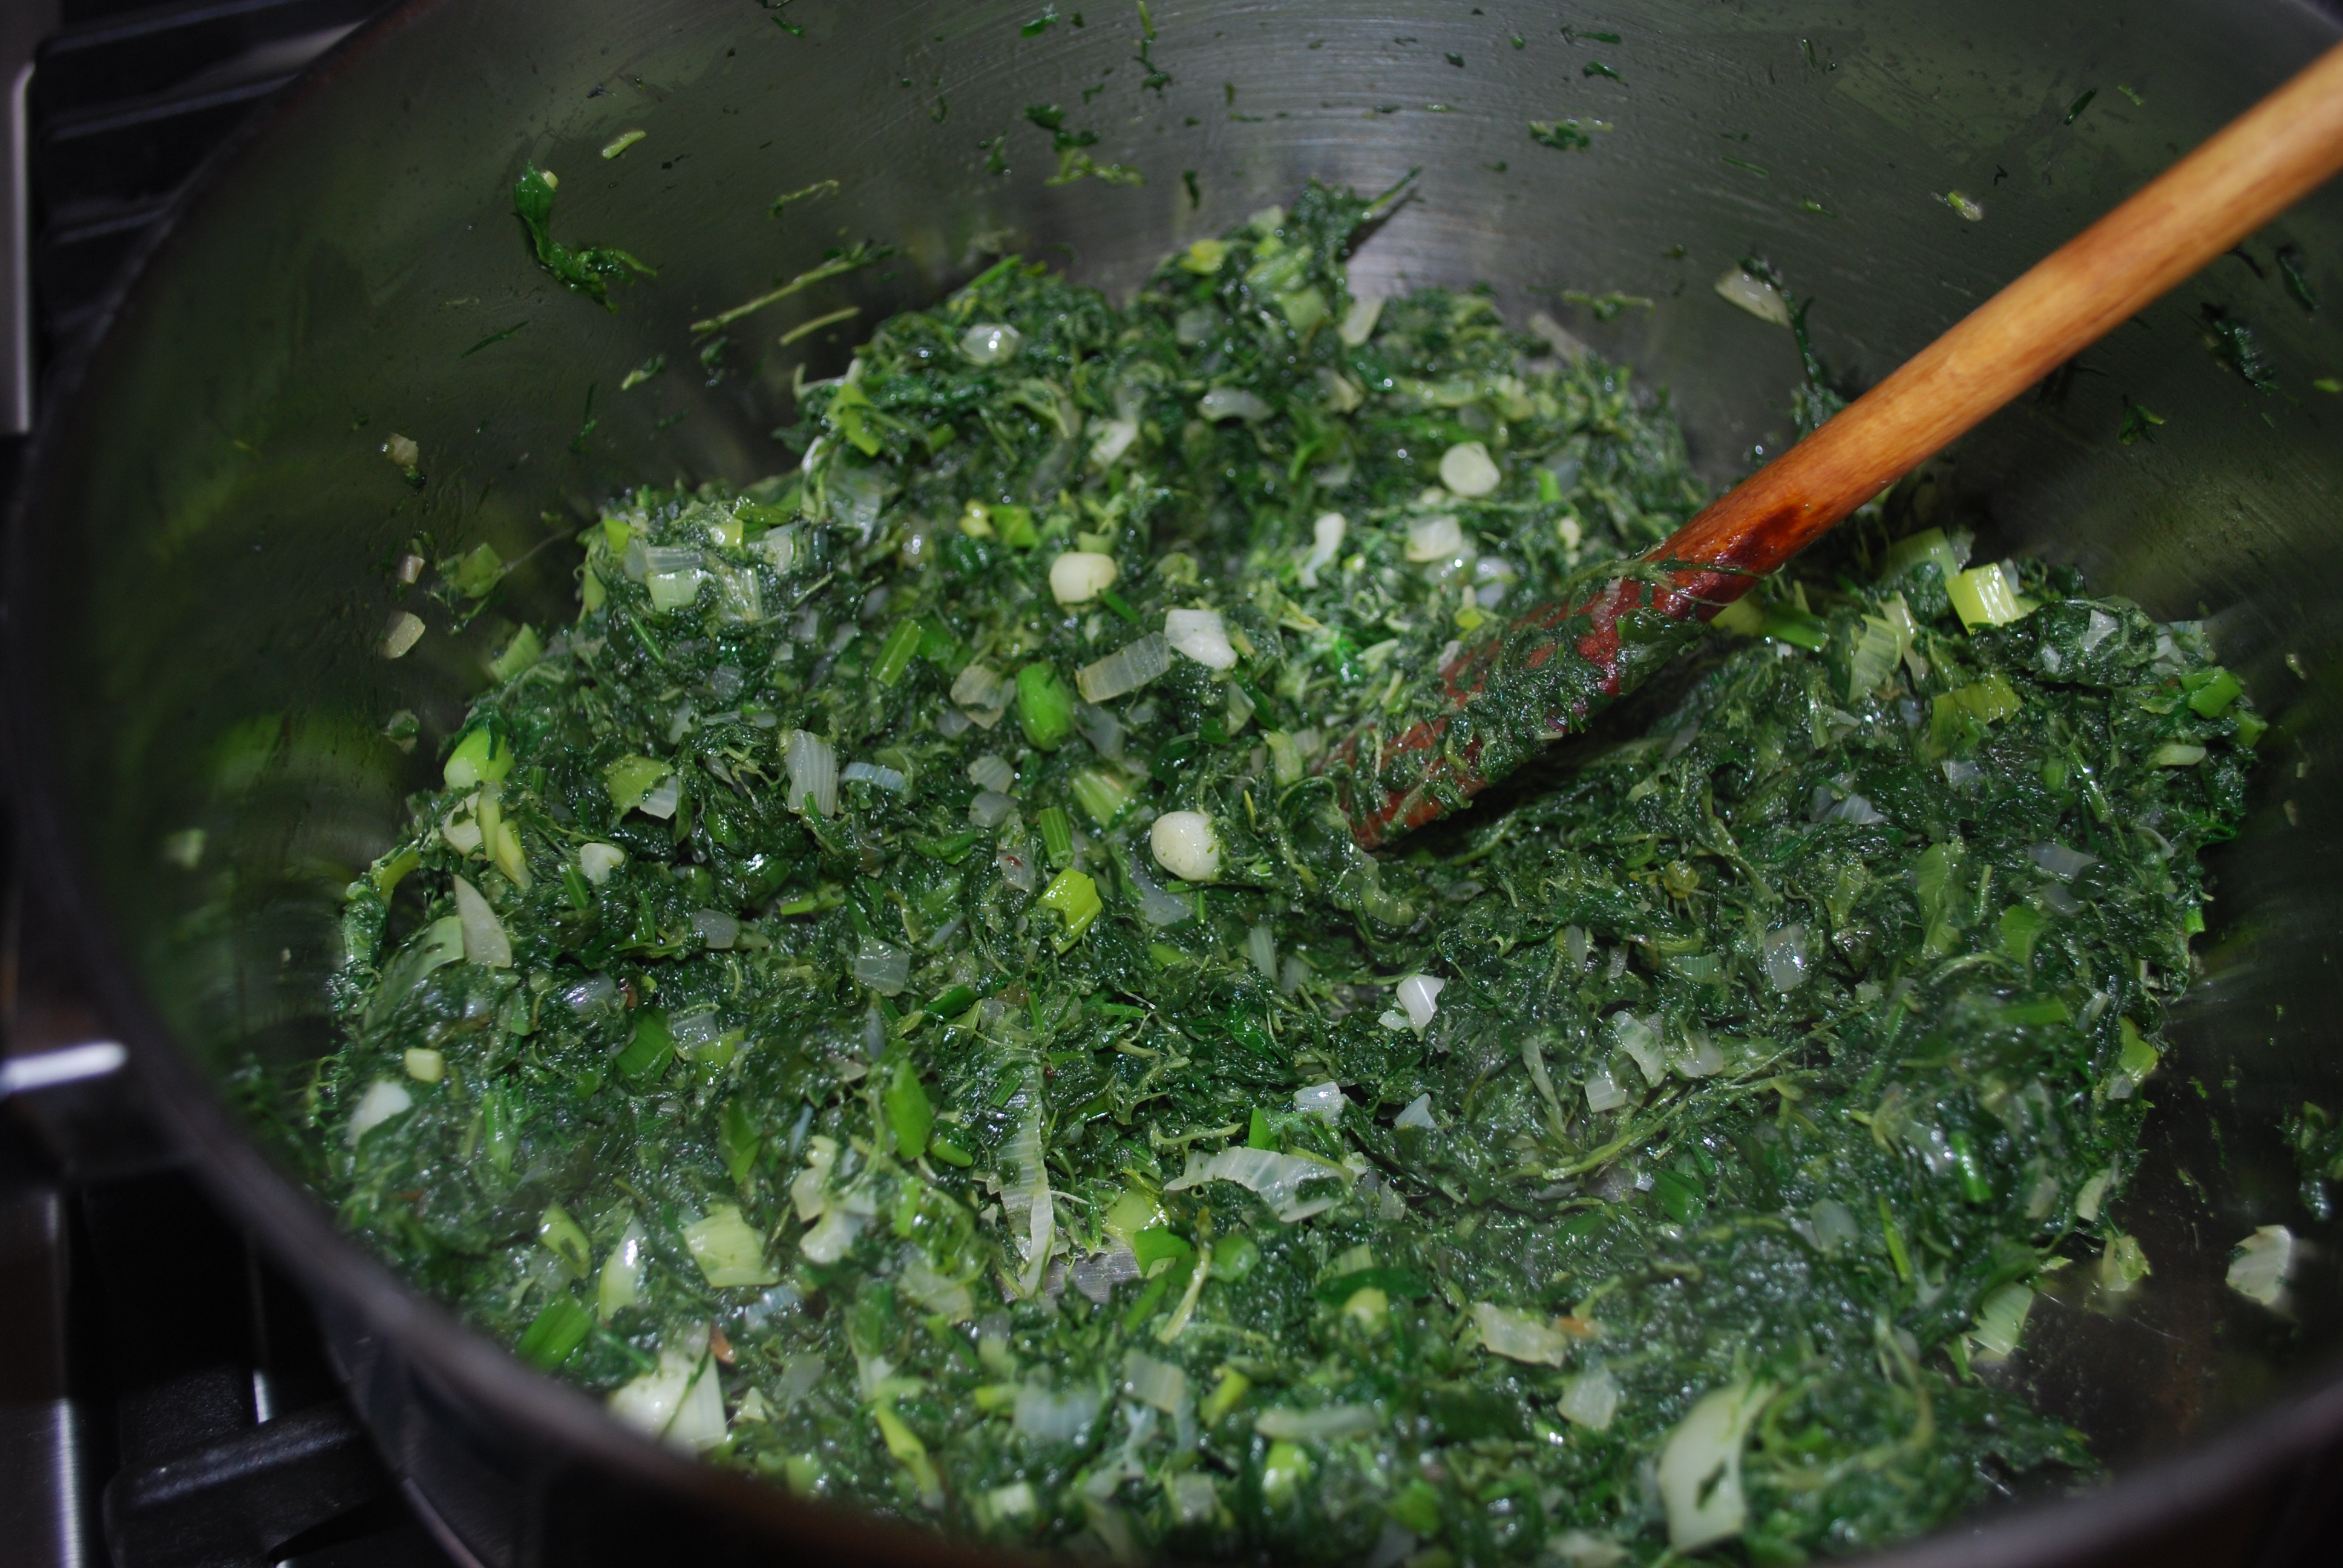
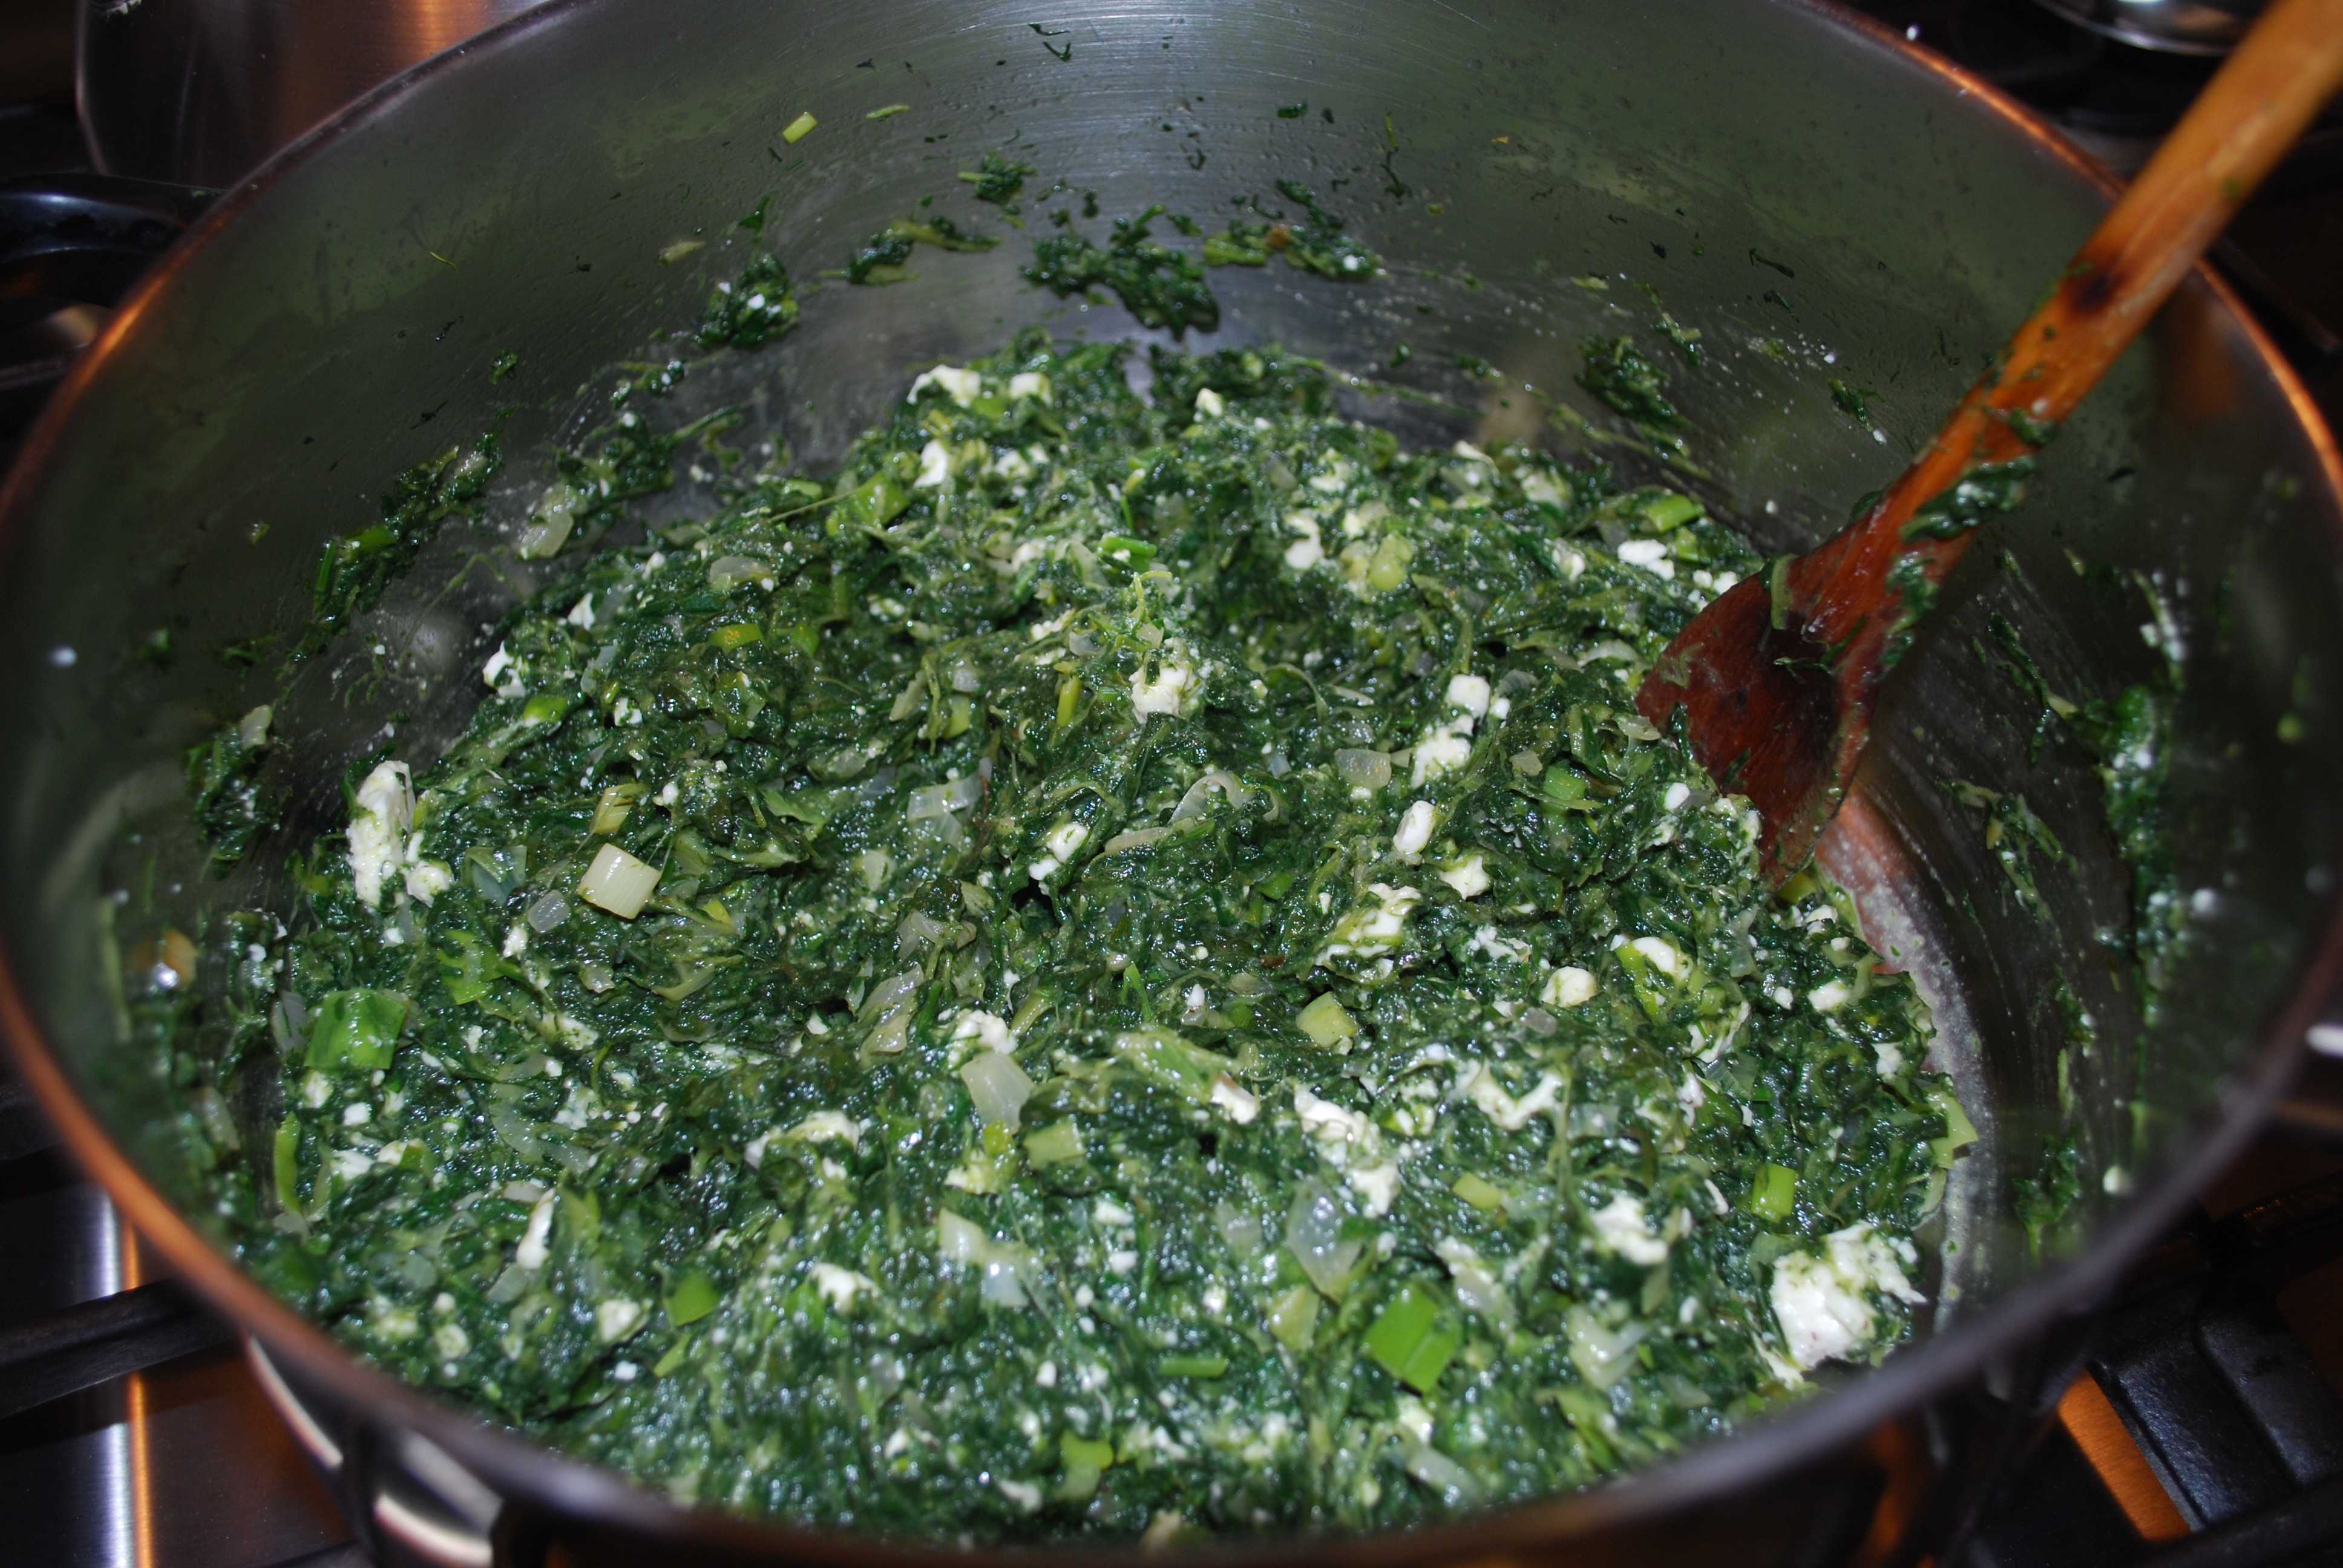
Once the pan is removed from the heat, mix in the crumbled Feta.

DSC_0279

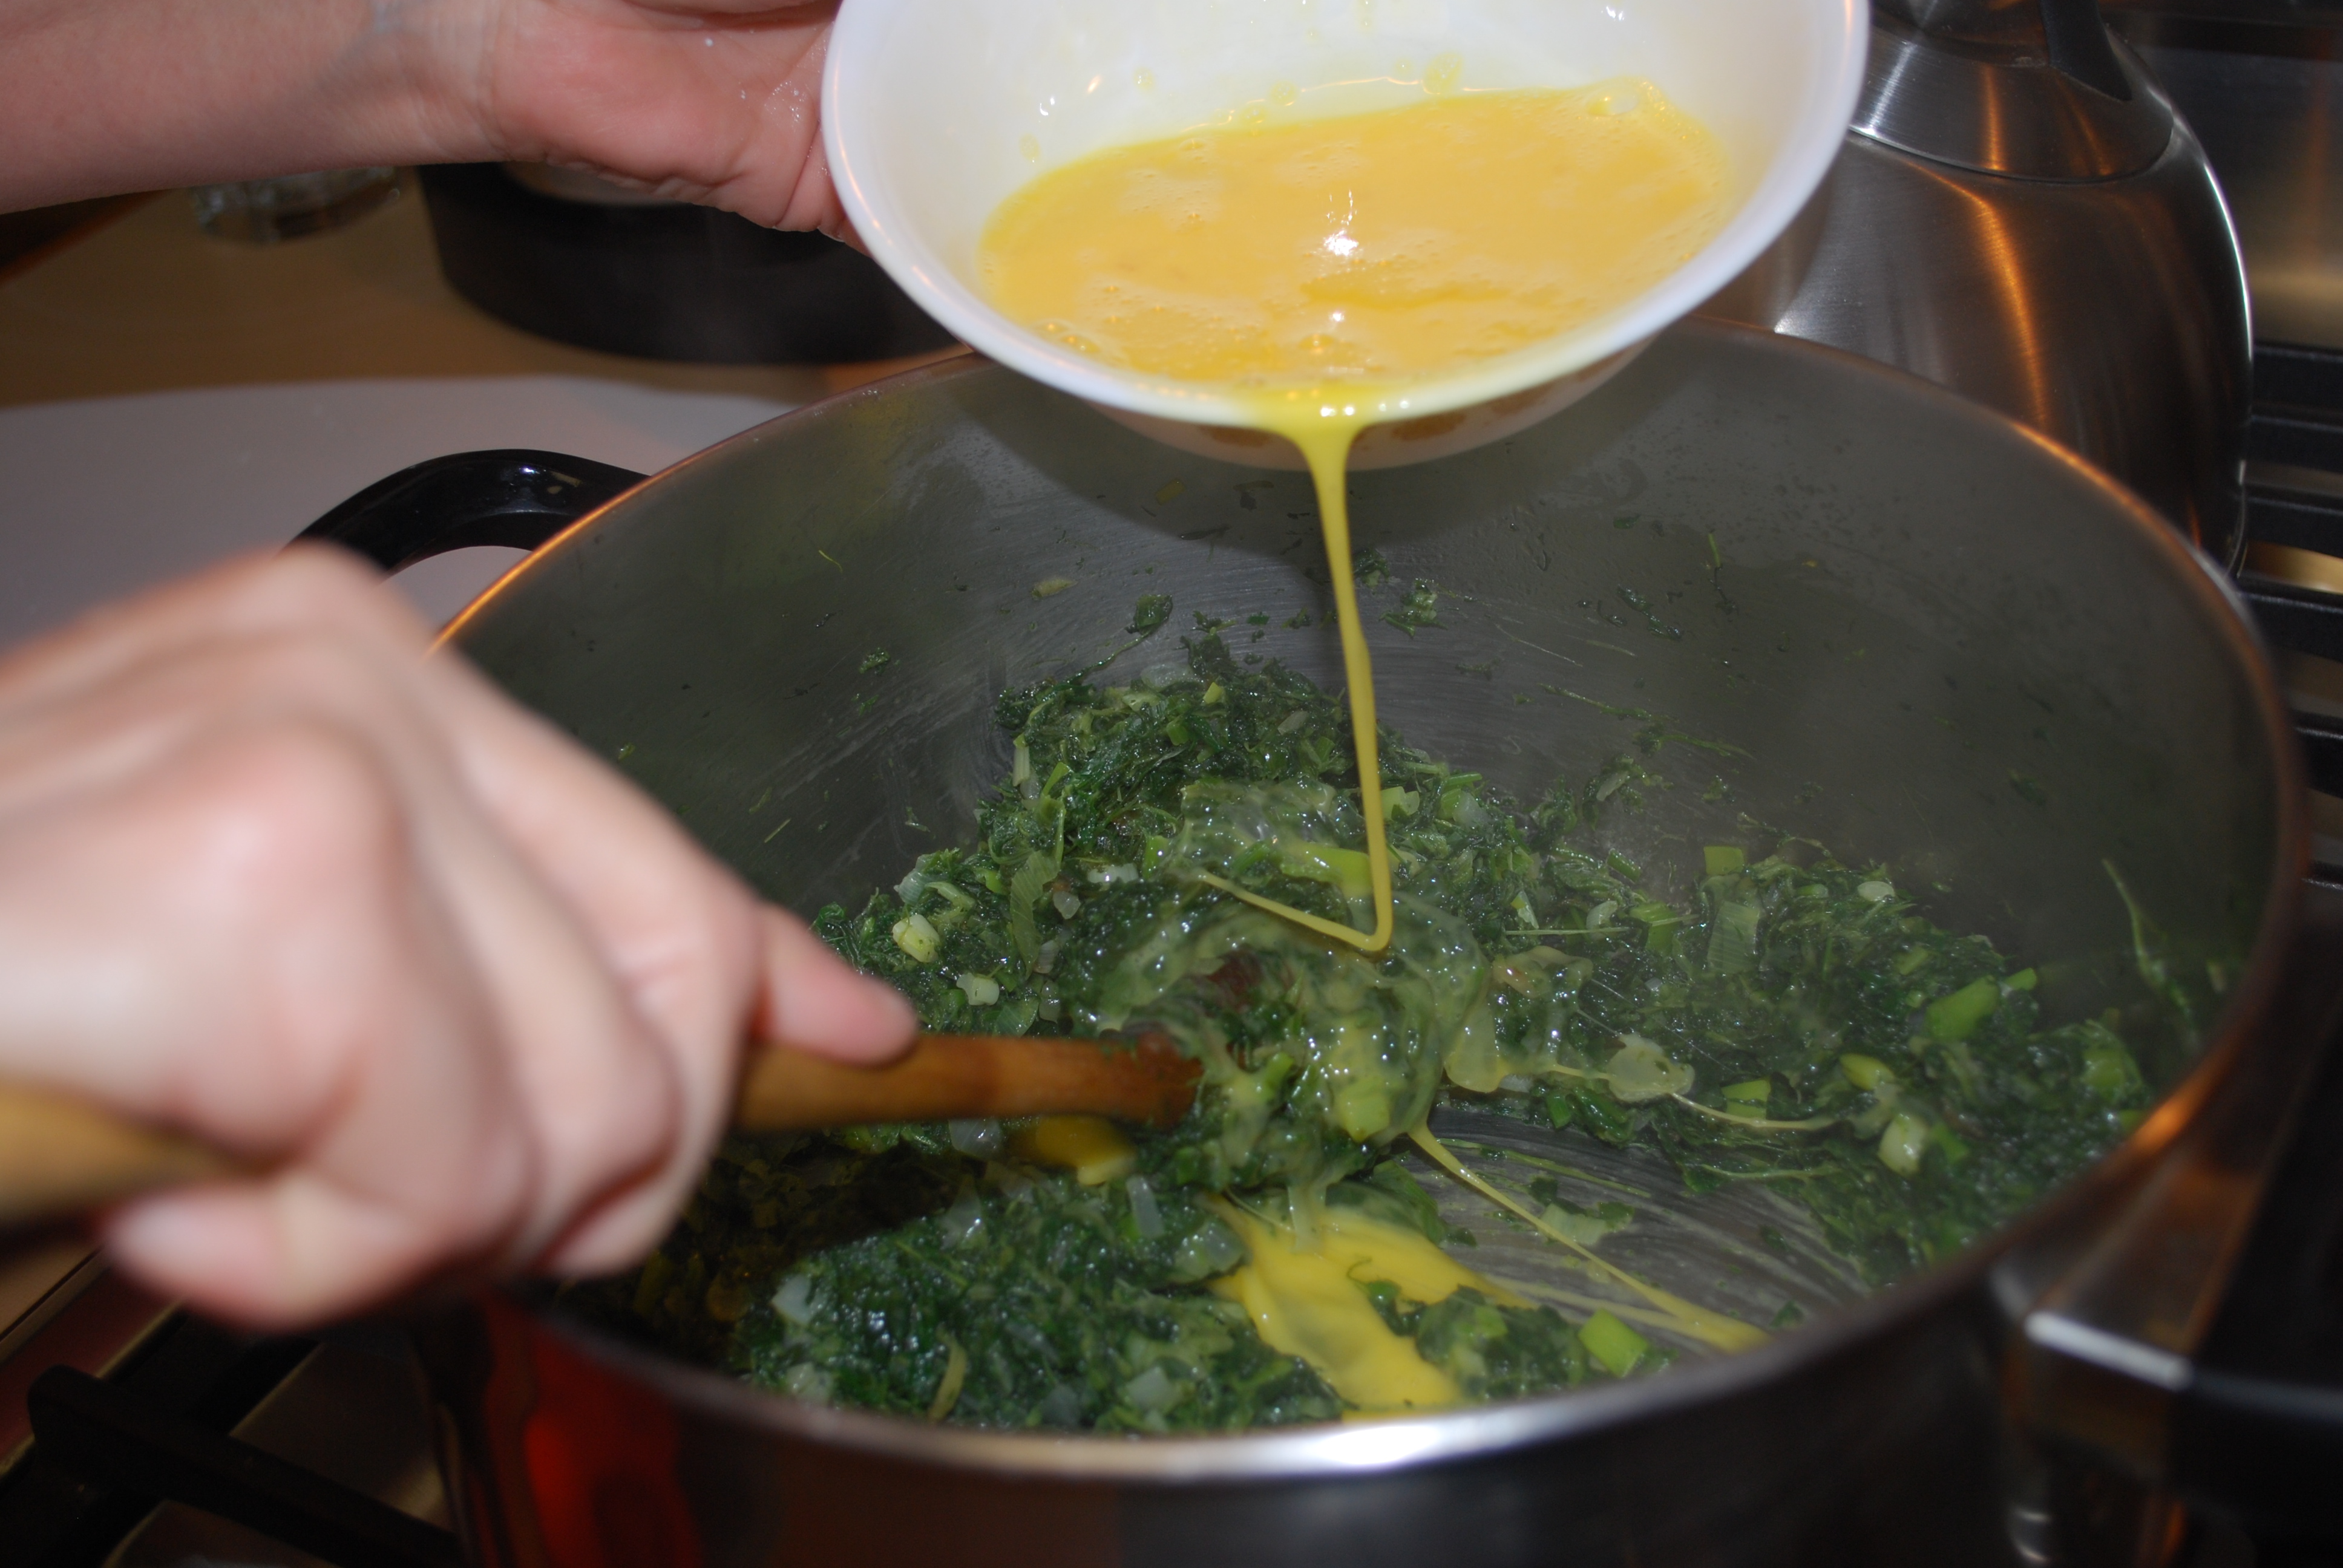
In a bowl, whisk together 3 eggs. Make sure to whisk them very well. Very slowly add the eggs into the spinach mixture, mixing it very well as you add them. You want to make sure the eggs aren’t cooking at the bottom of the pan before they get mixed into the spinach.

DSC_0277

Season your mixture with salt and pepper to taste.  You can be pretty liberal with the salt in here.

DSC_0282

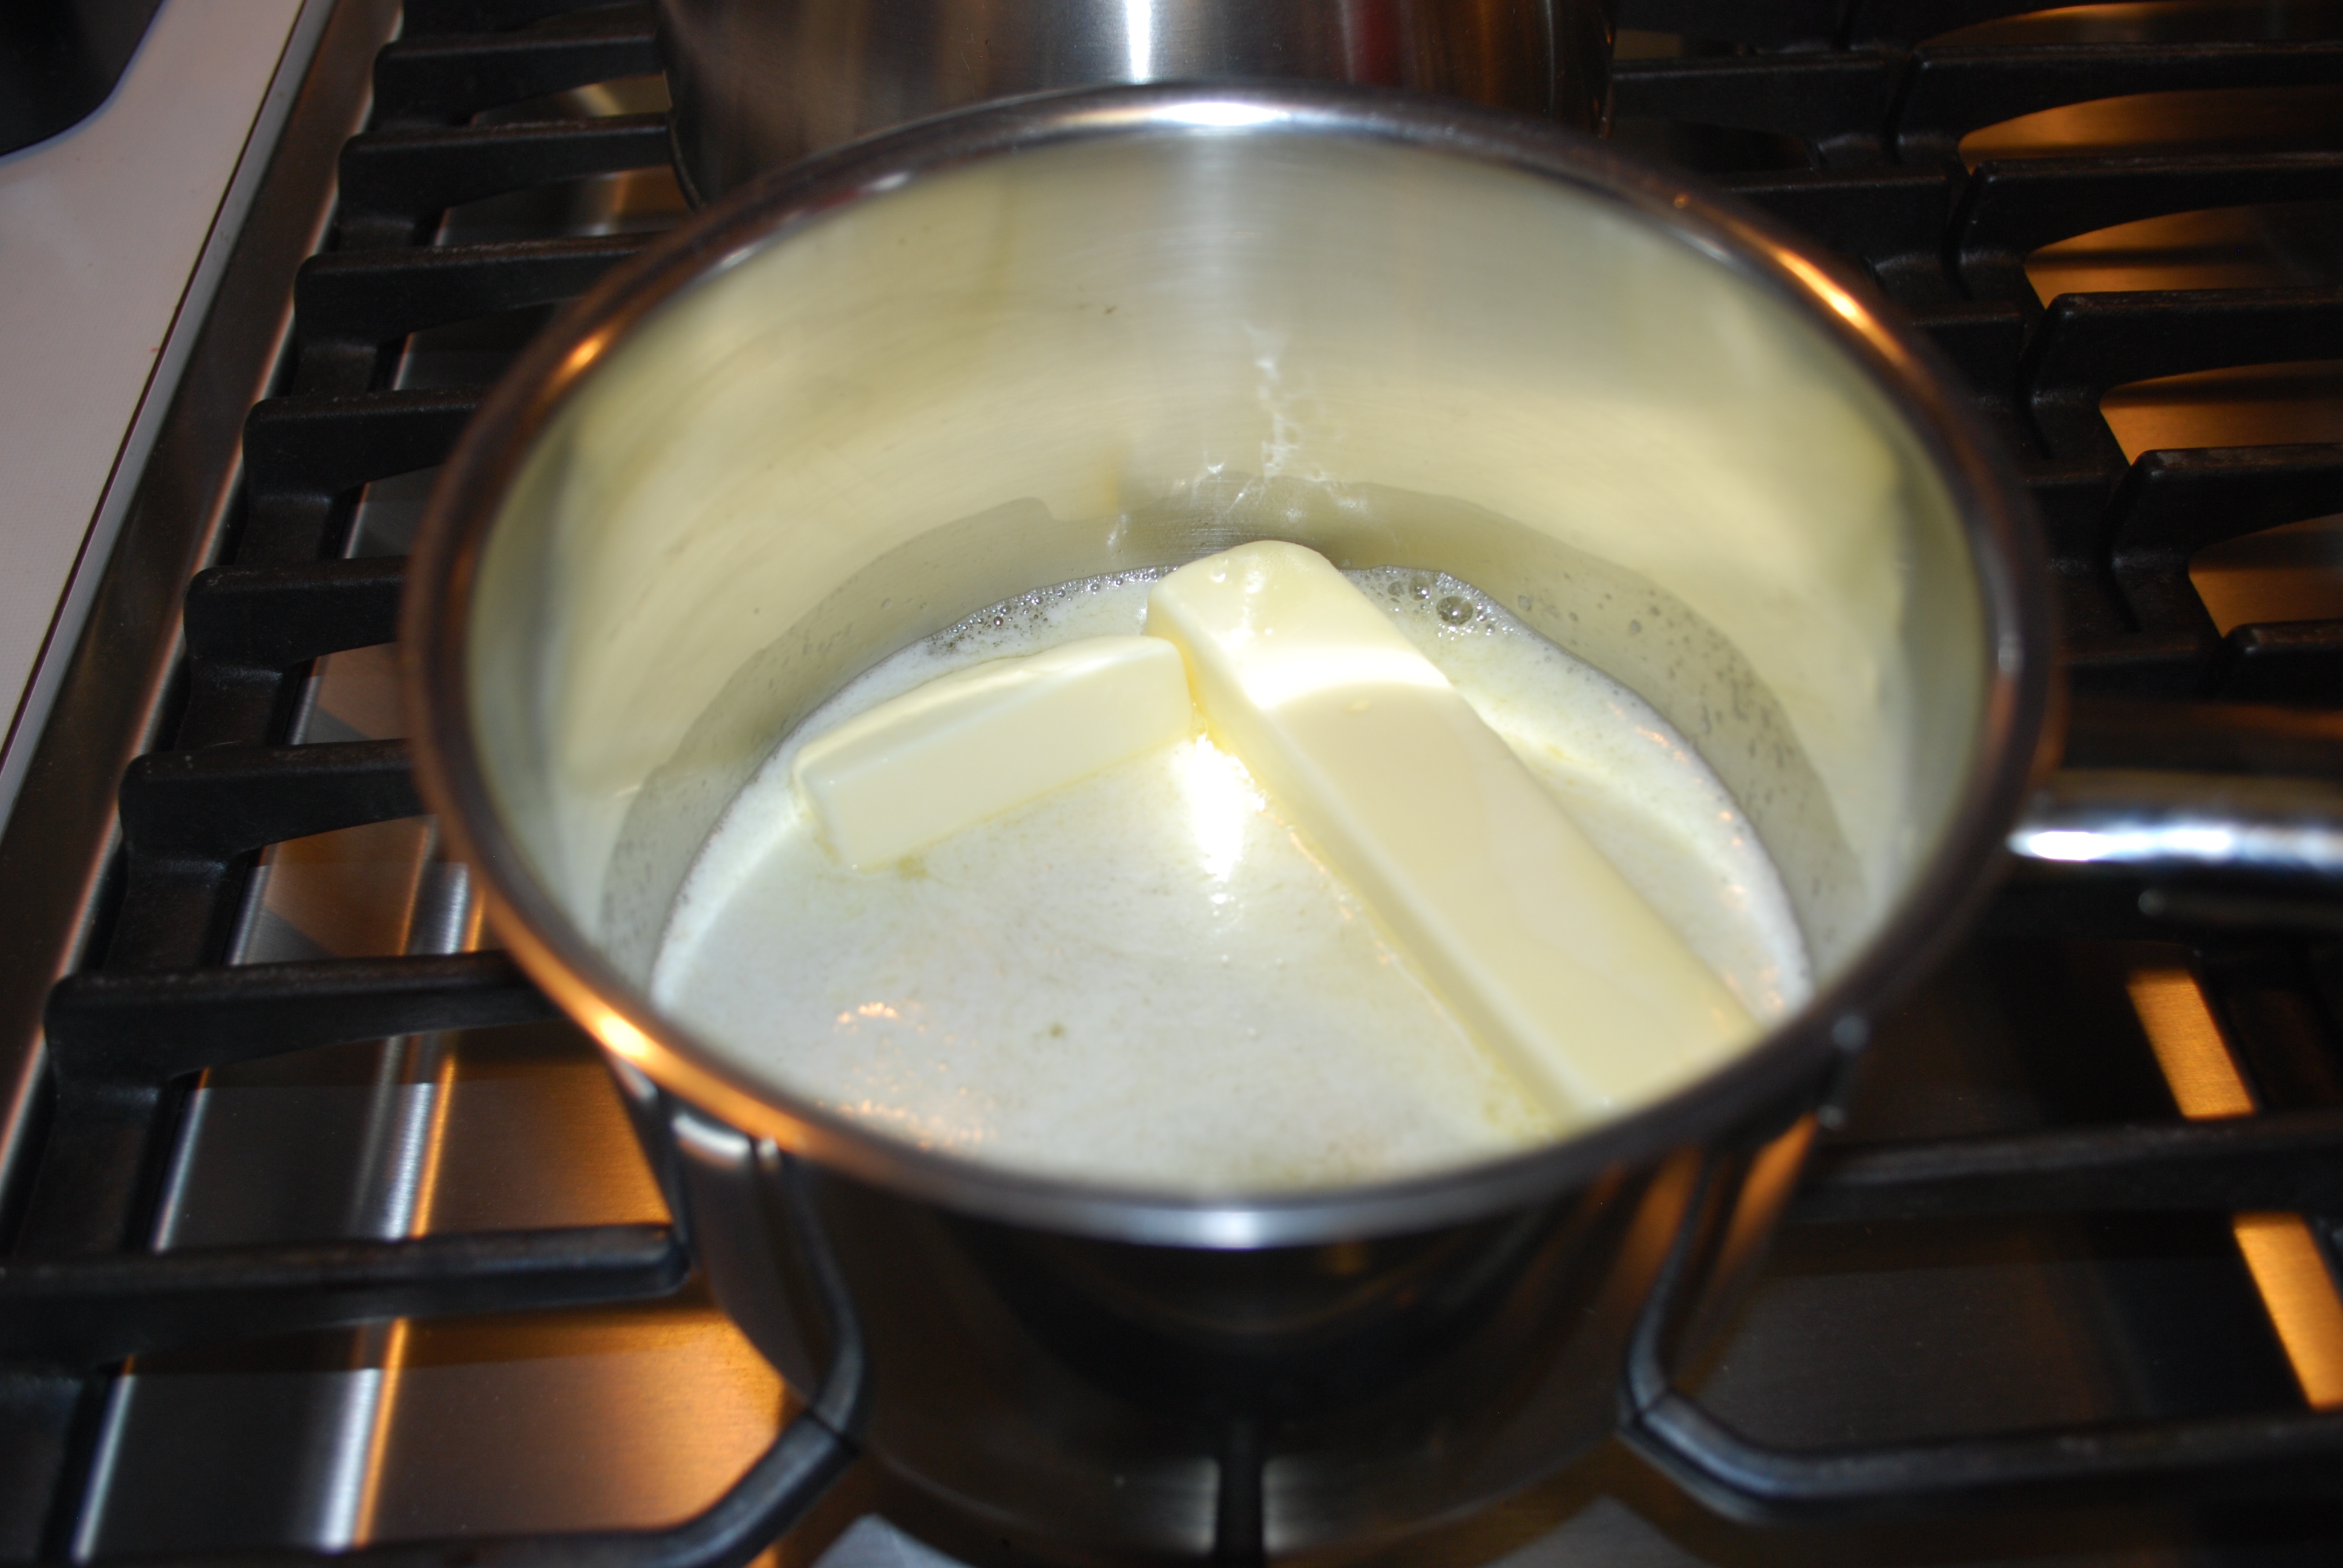
In a different sauce pan, melt 3 sticks of butter. You will use this butter on the fillo dough.

DSC_0283

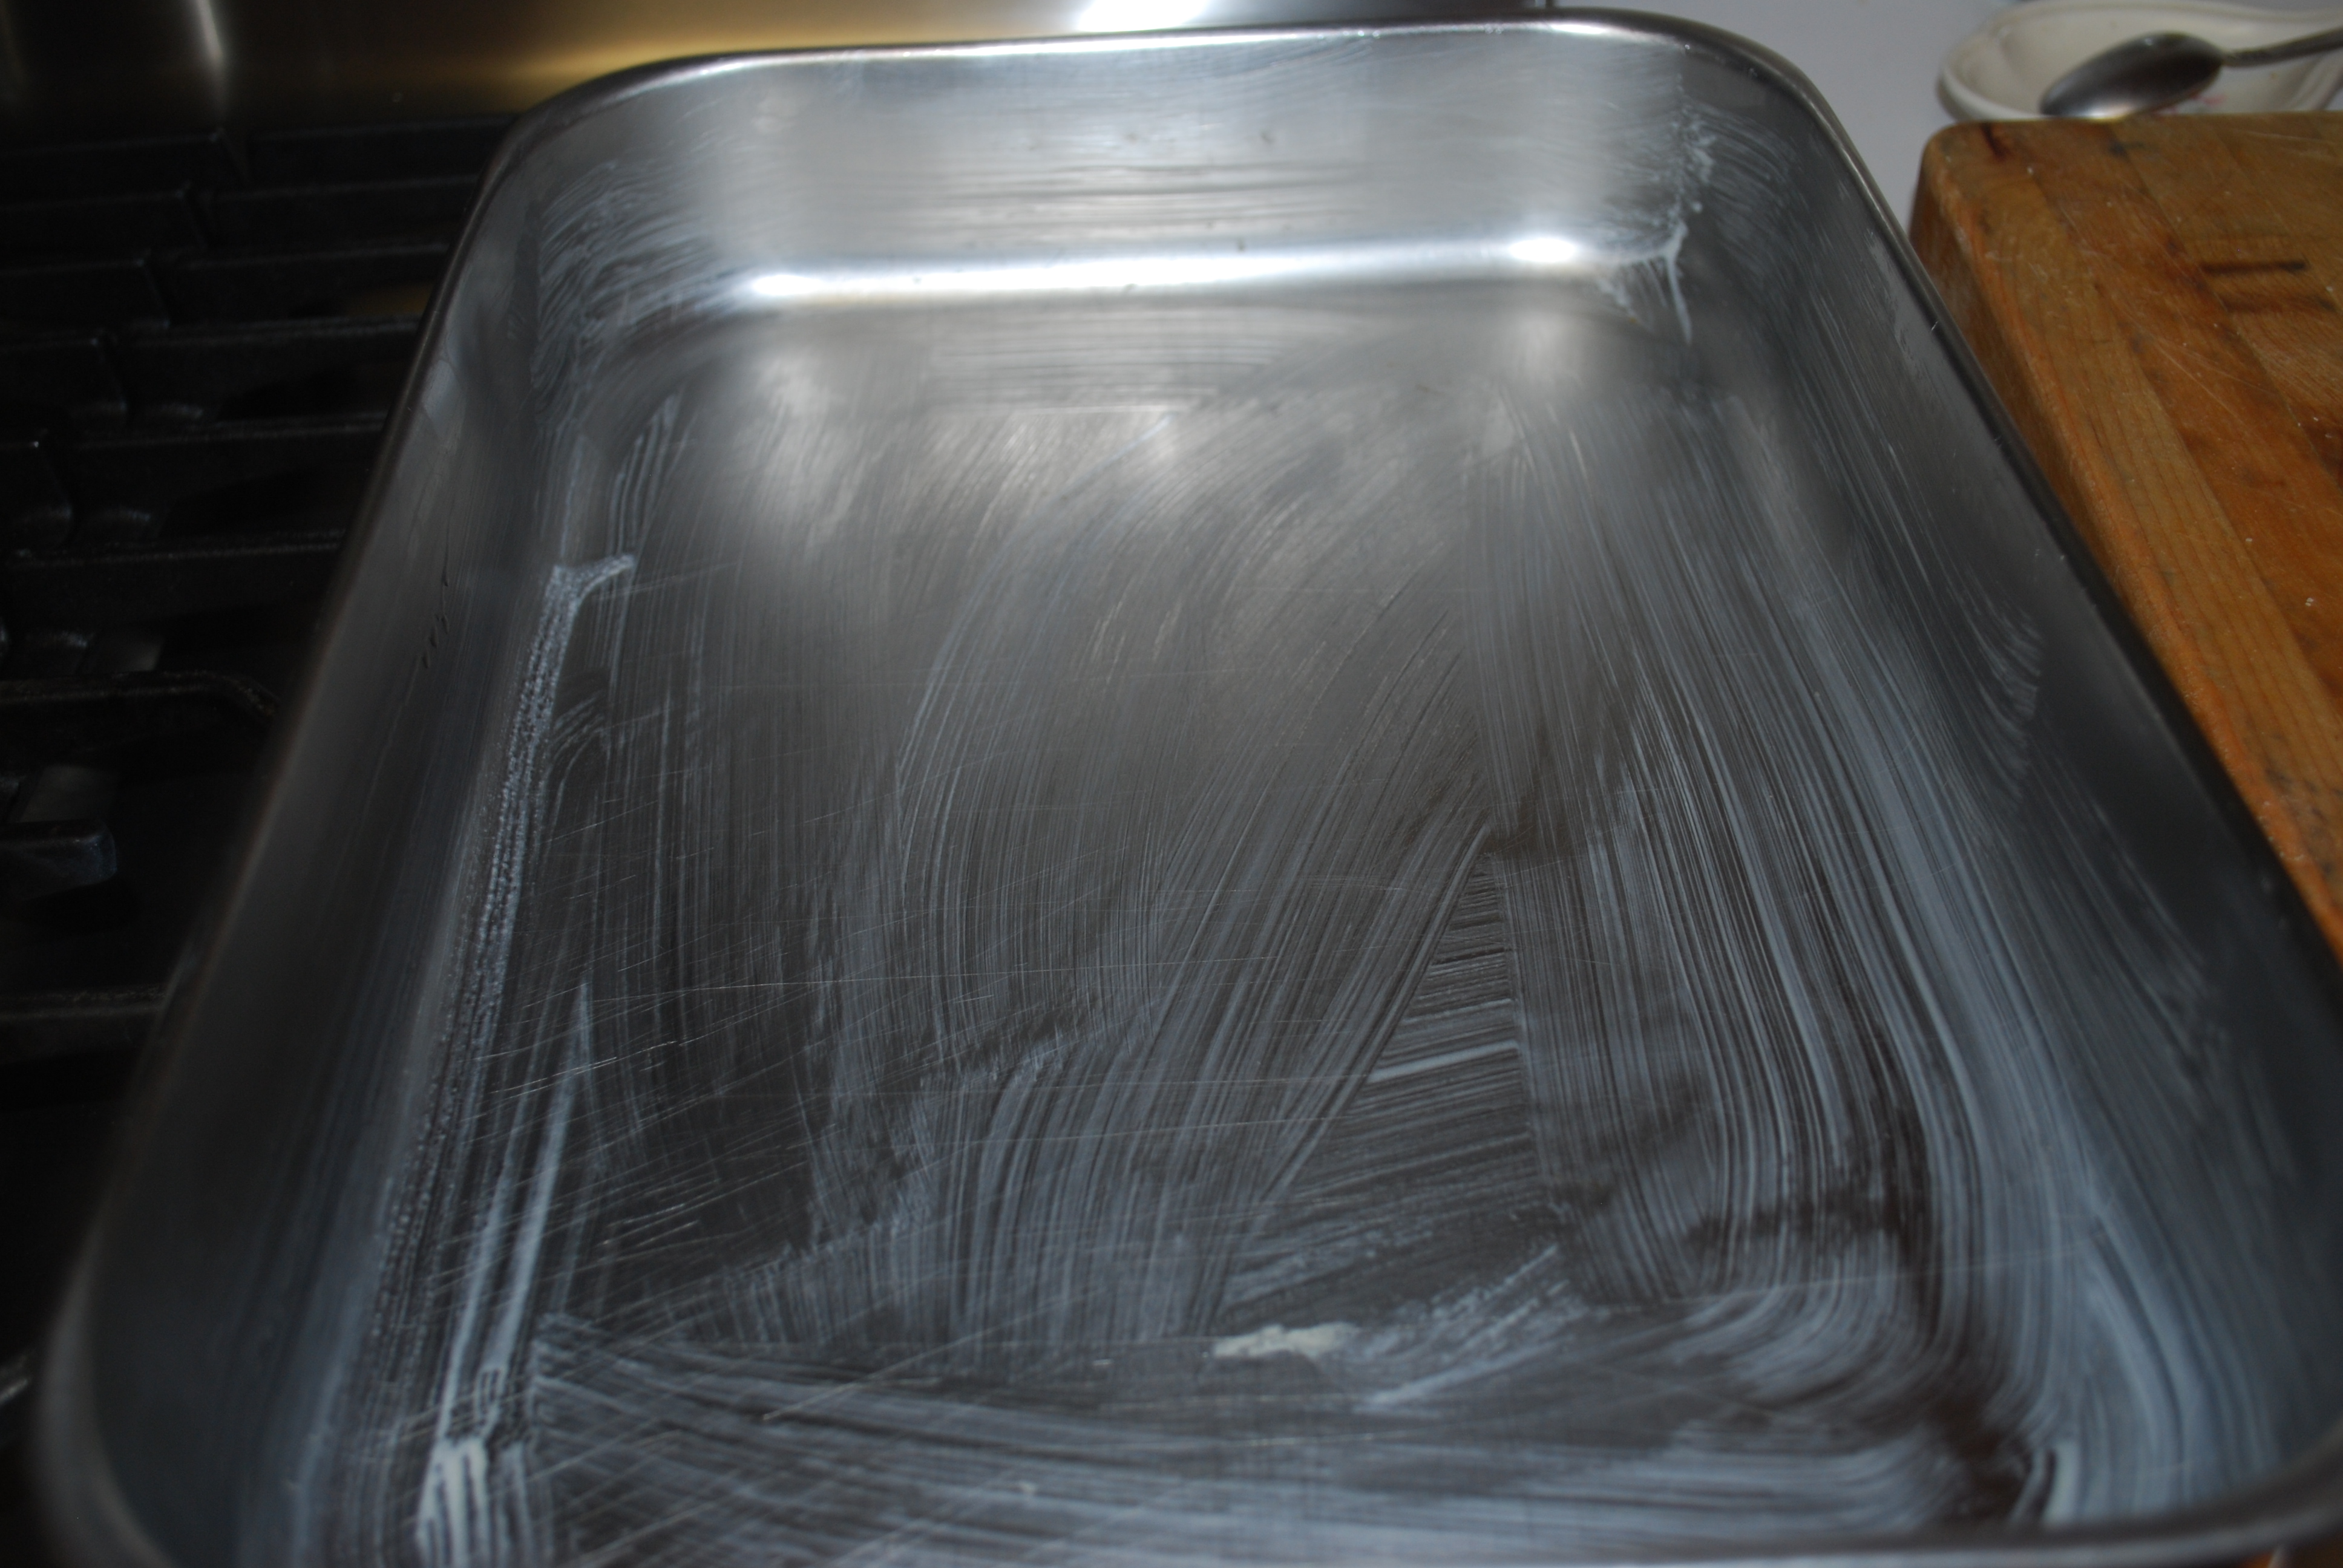
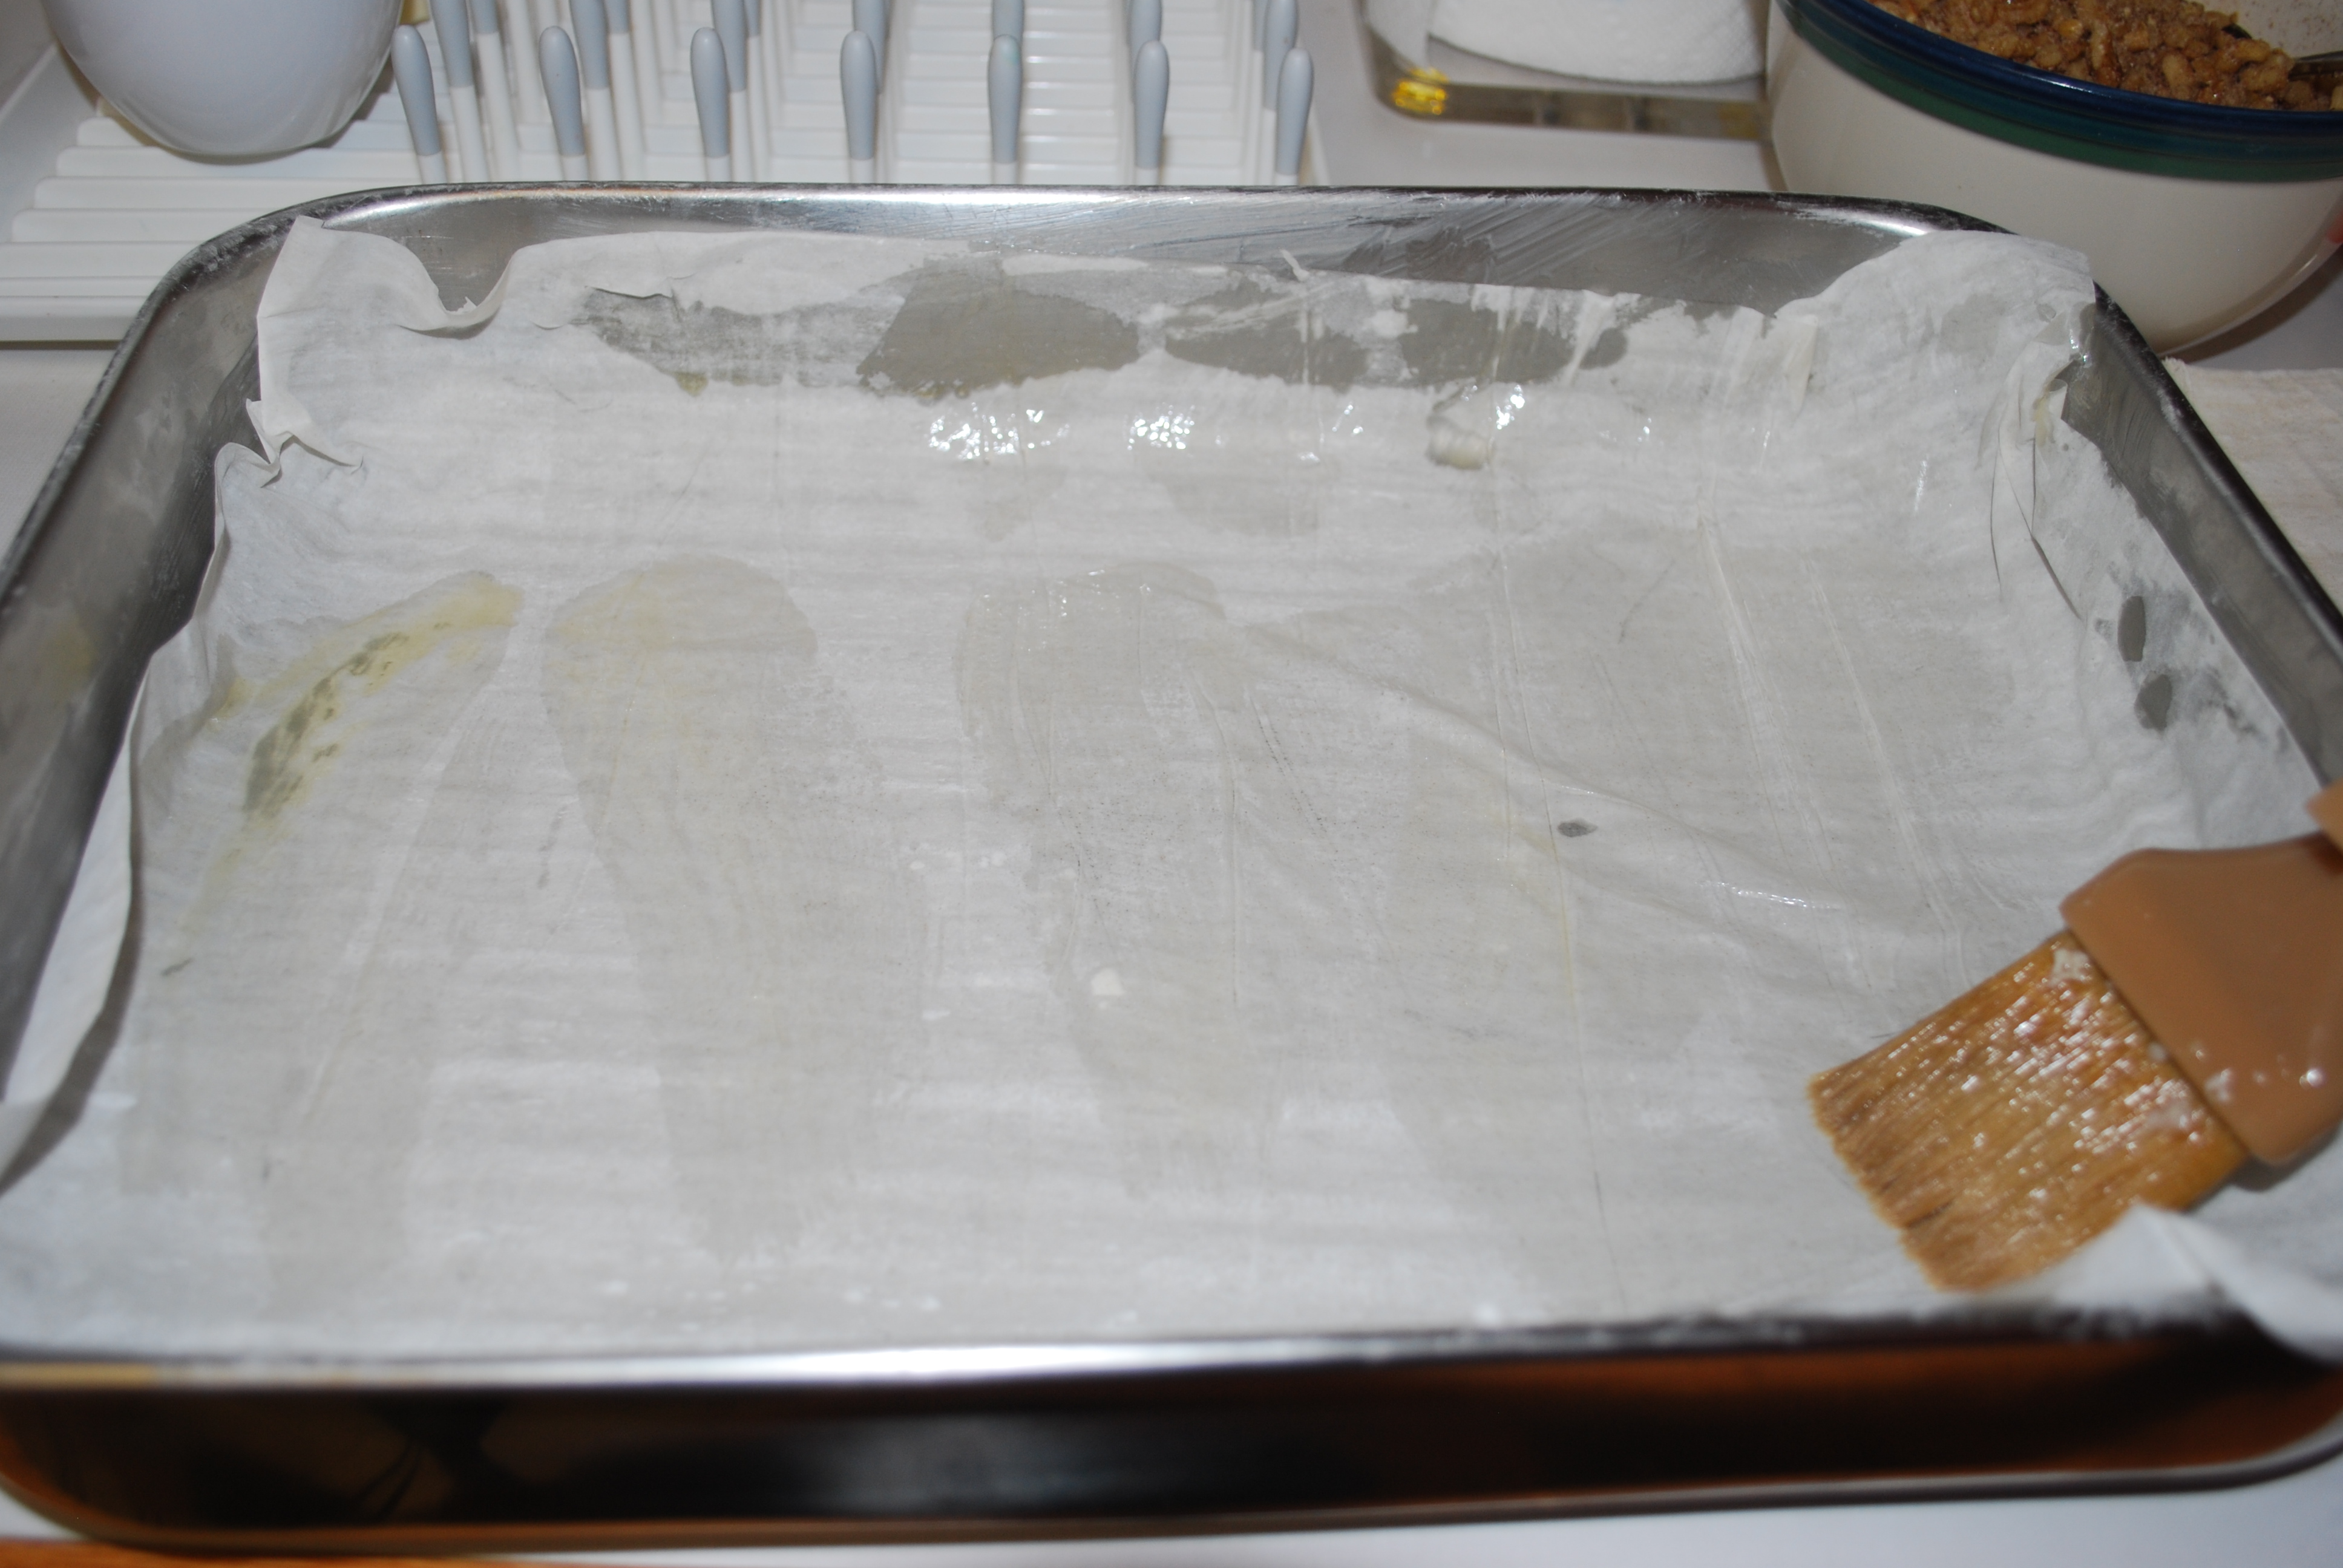
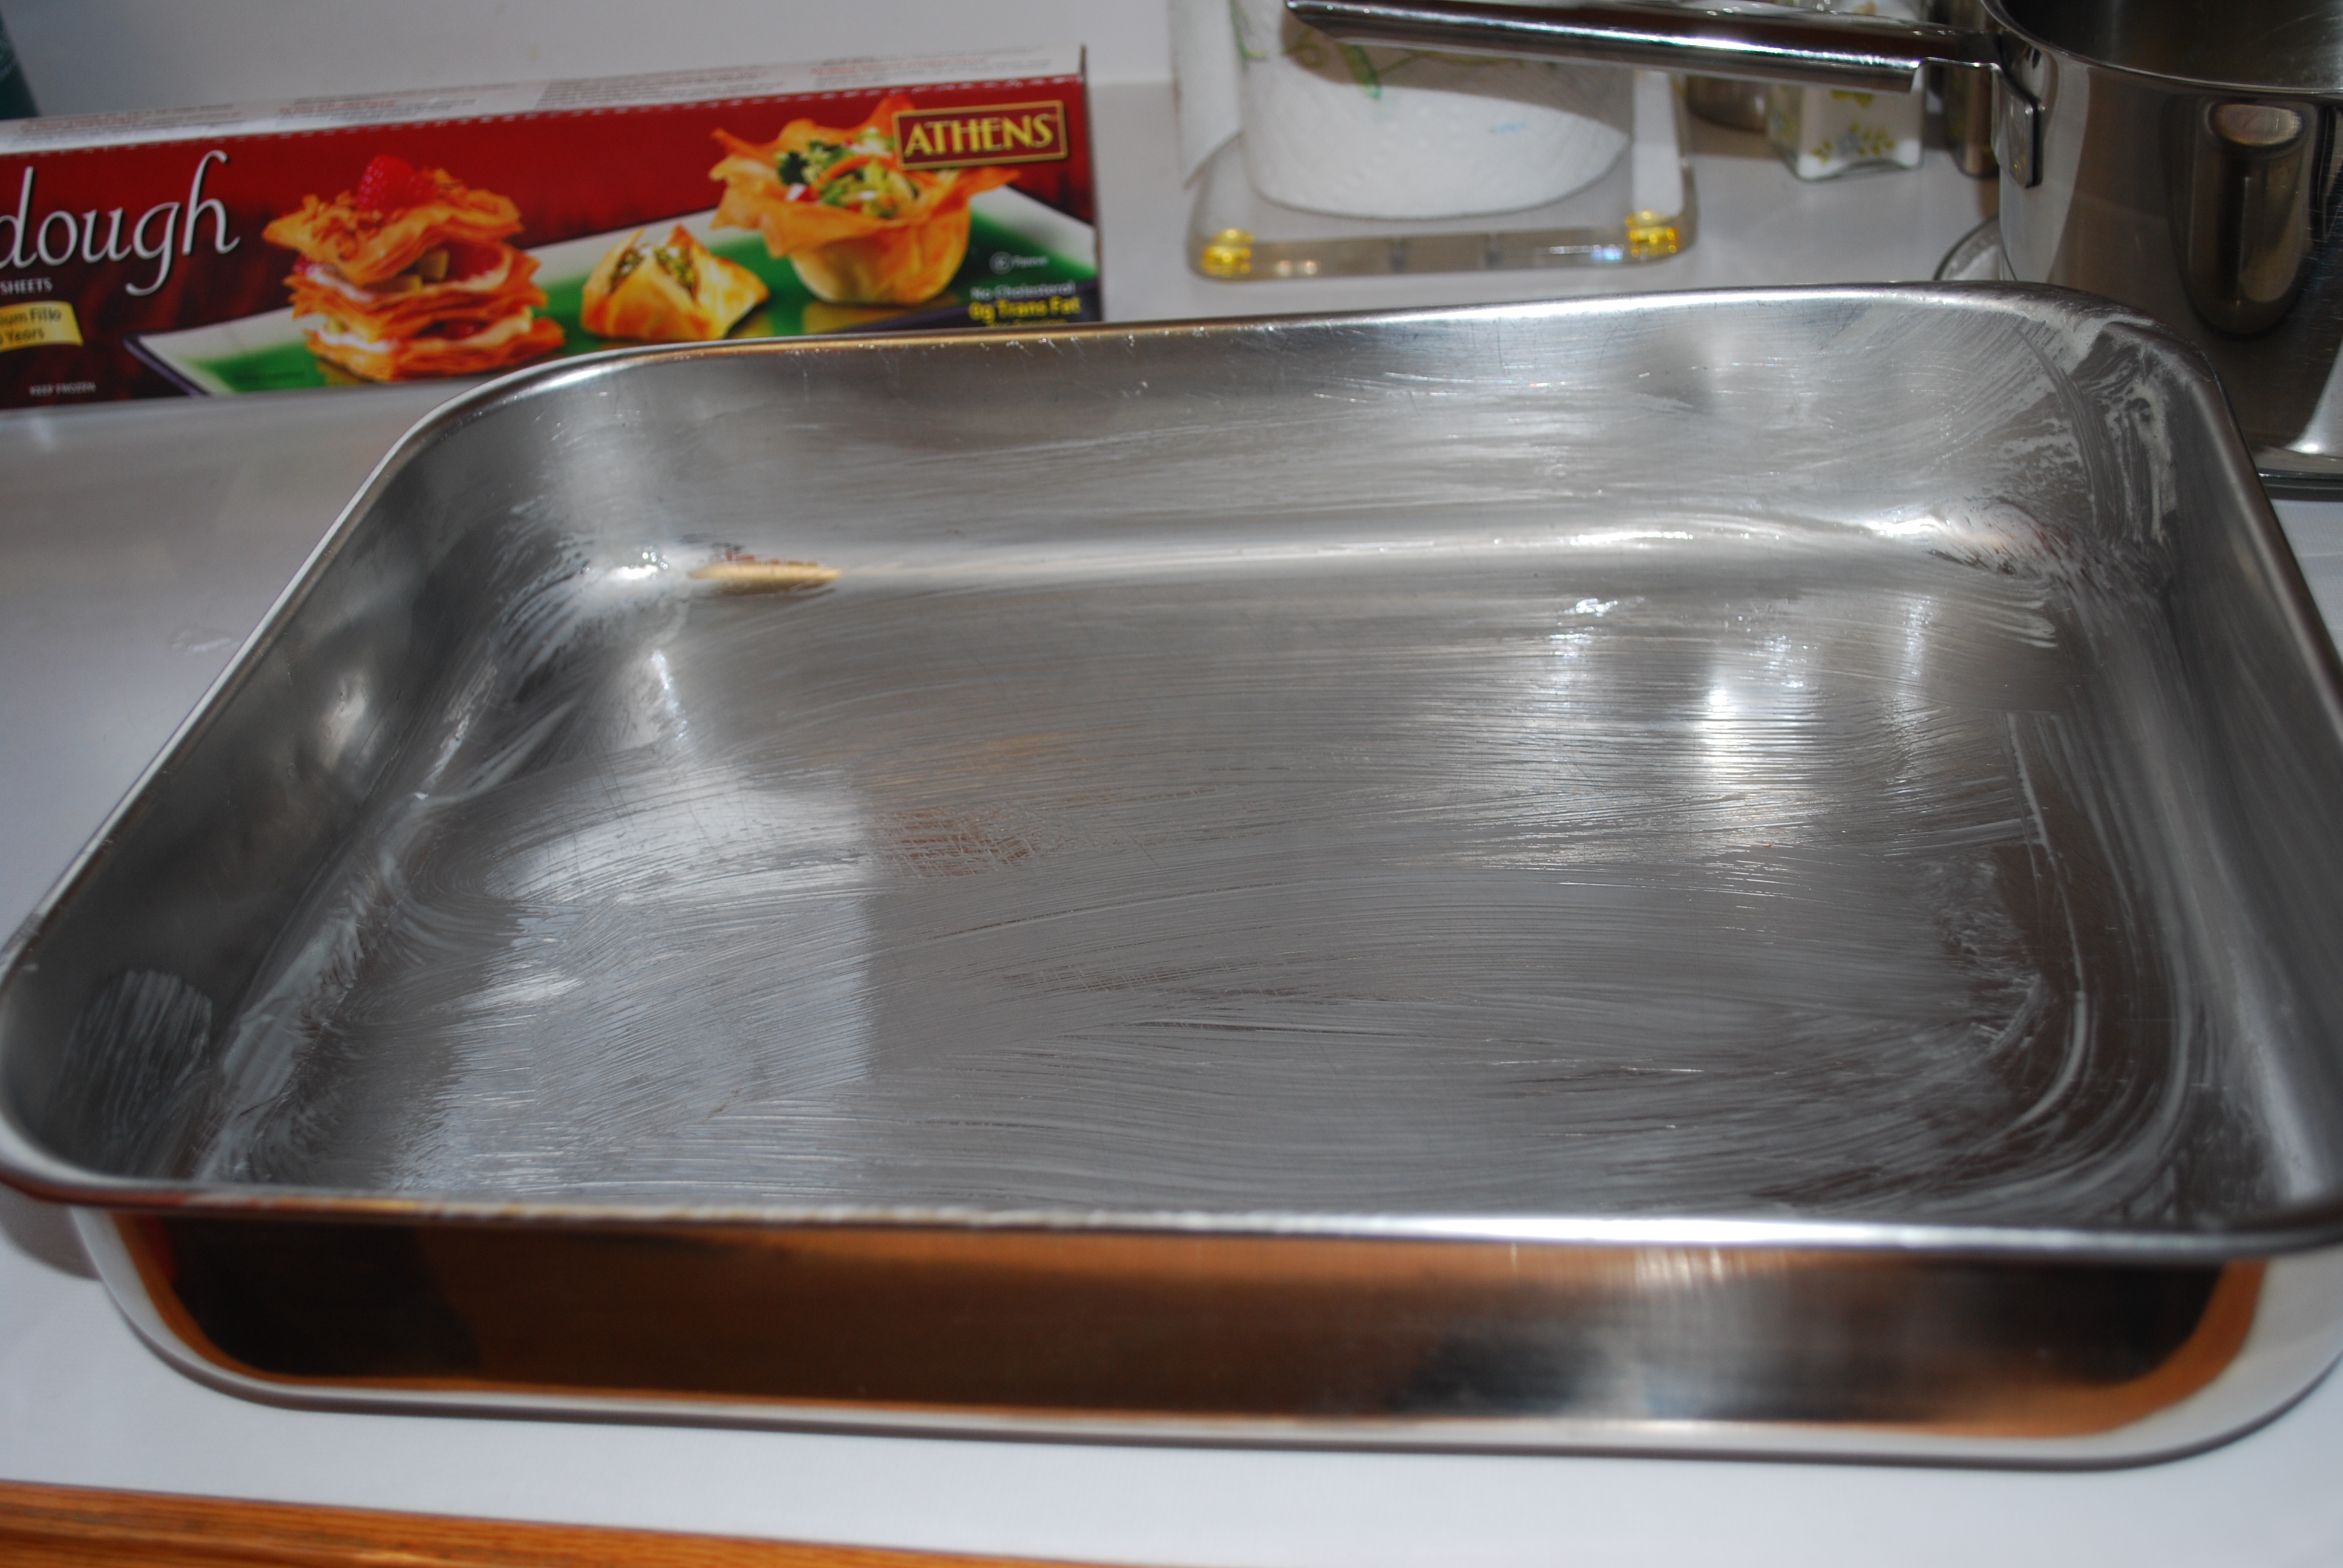
Now prepare your baking pan. Take a 13x9x2 in. pan (or the closest you have ) and brush it with melted butter.

DSC_0288

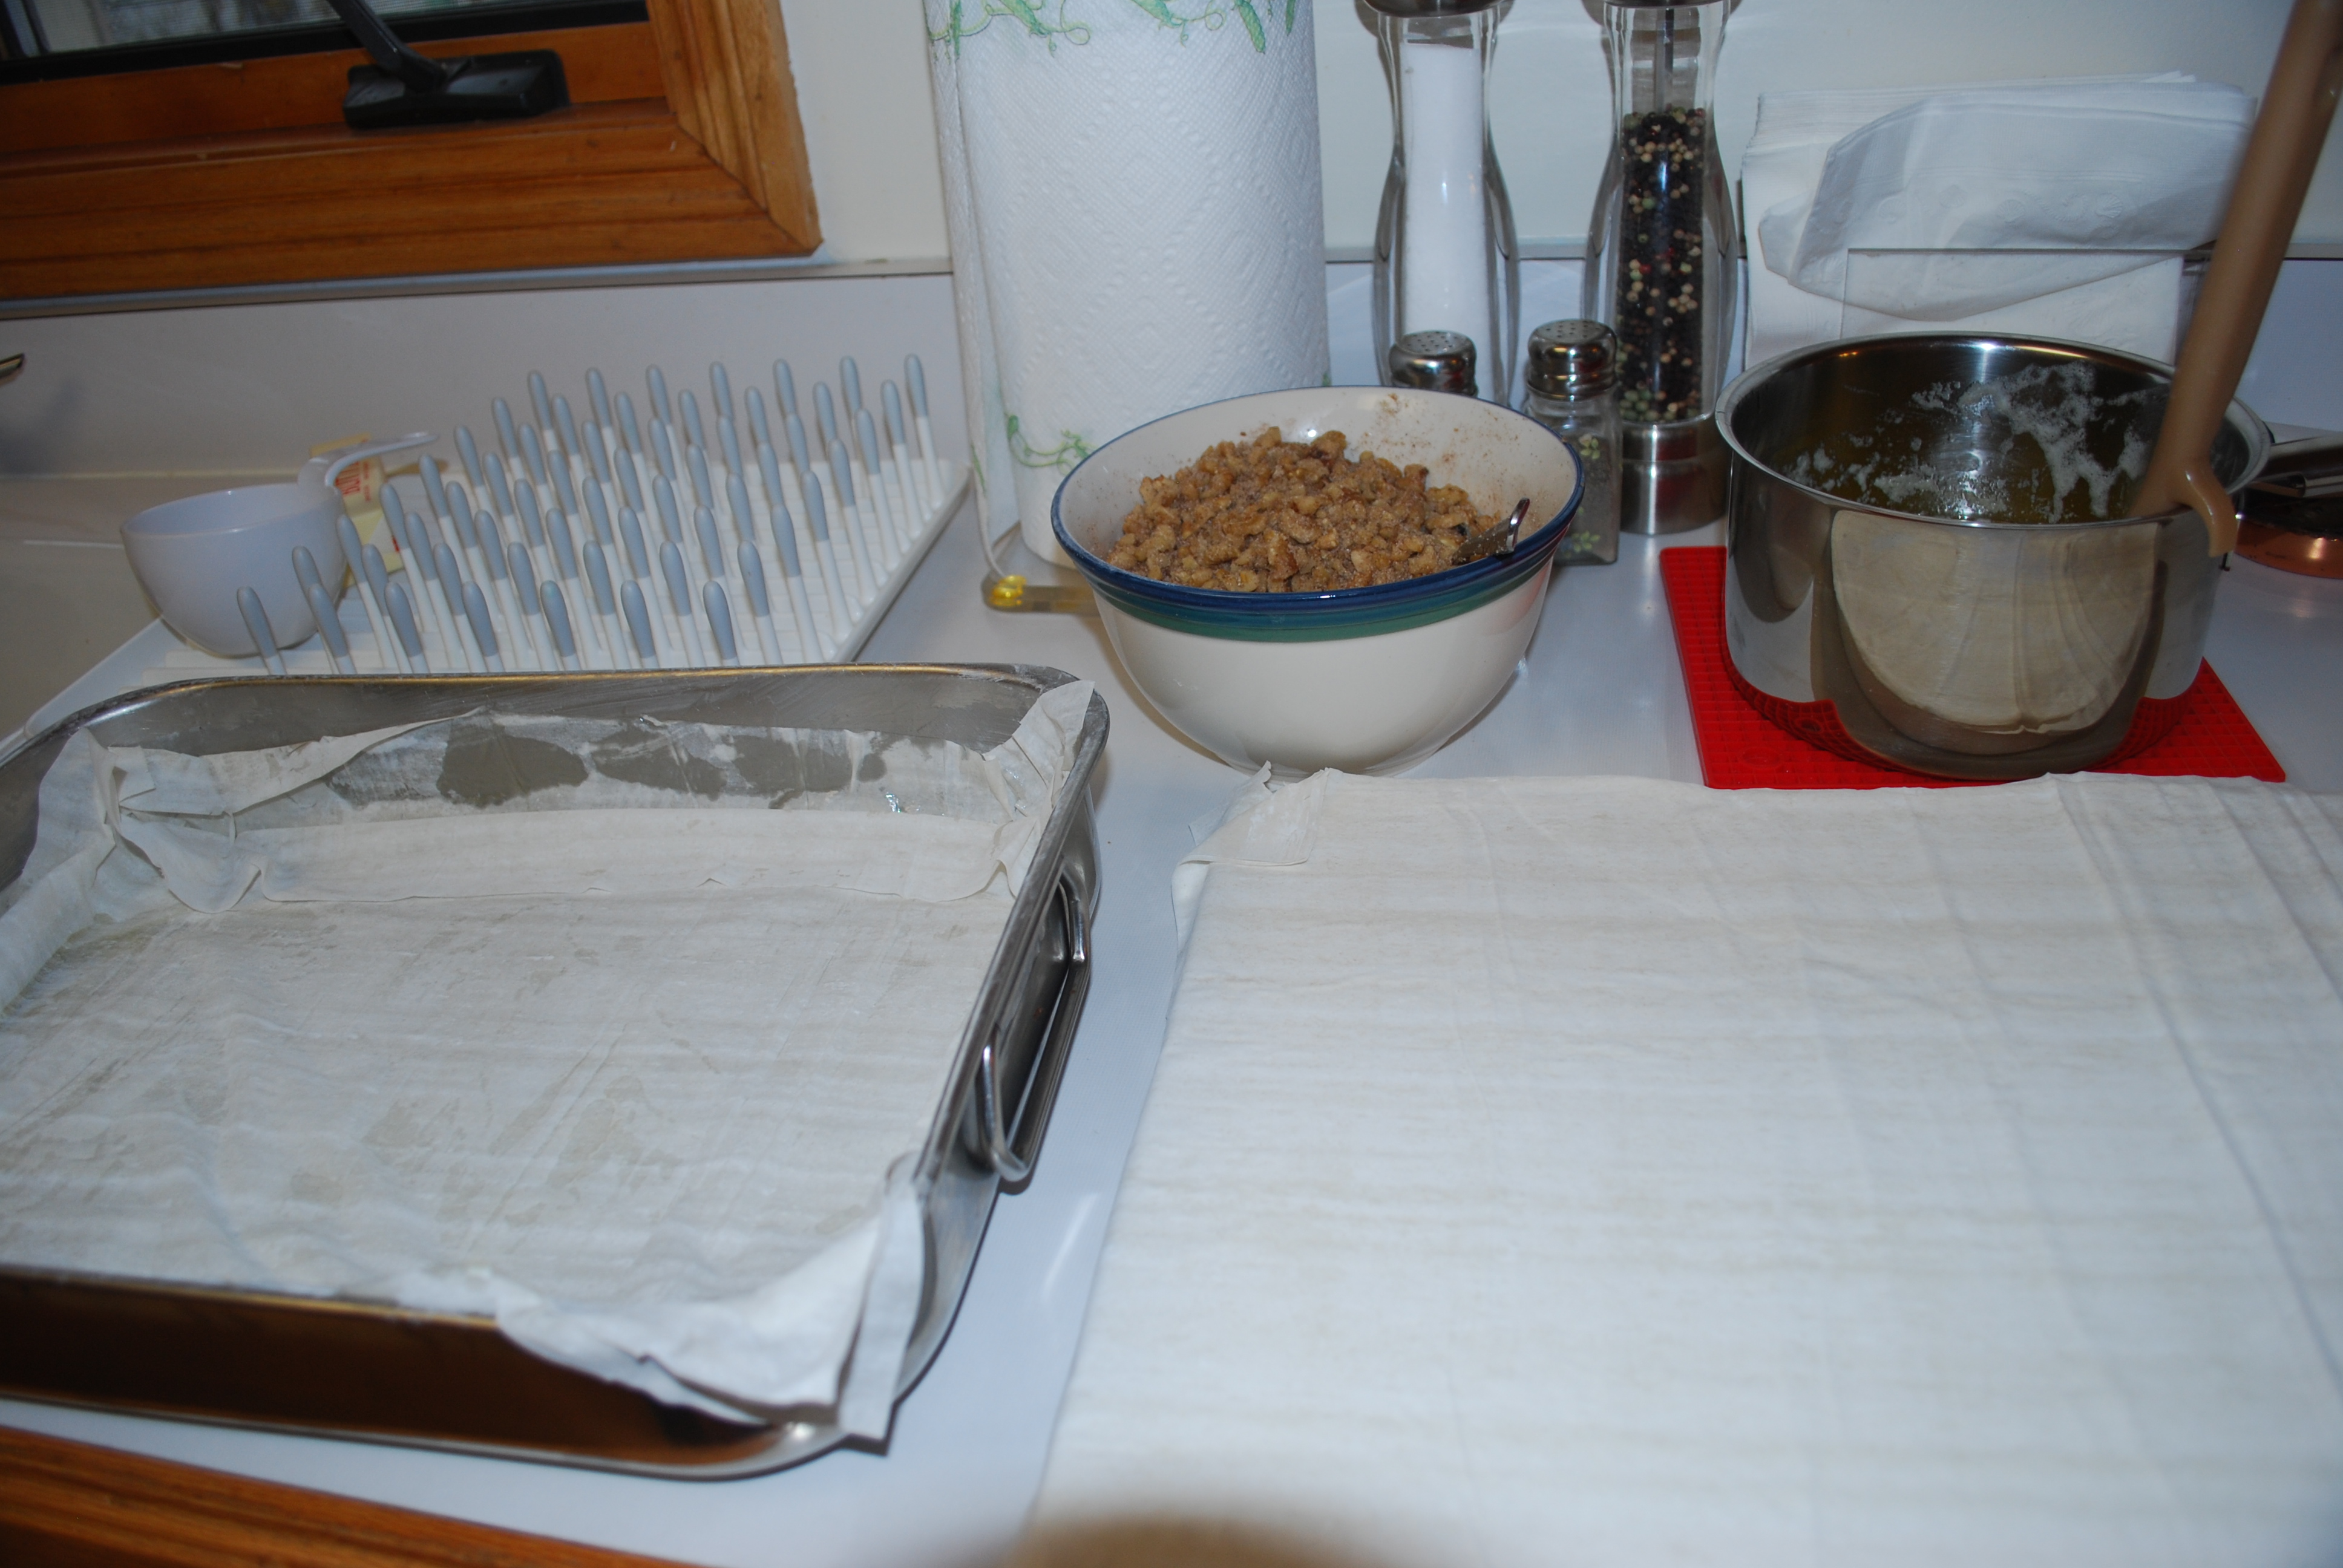
Get your Spanakopita station set up. You will need the baking pan, the spinach mixture, melted butter and a brush, and 1/2 a box of fillo sheets laid out on a clean surface.

DSC_0284

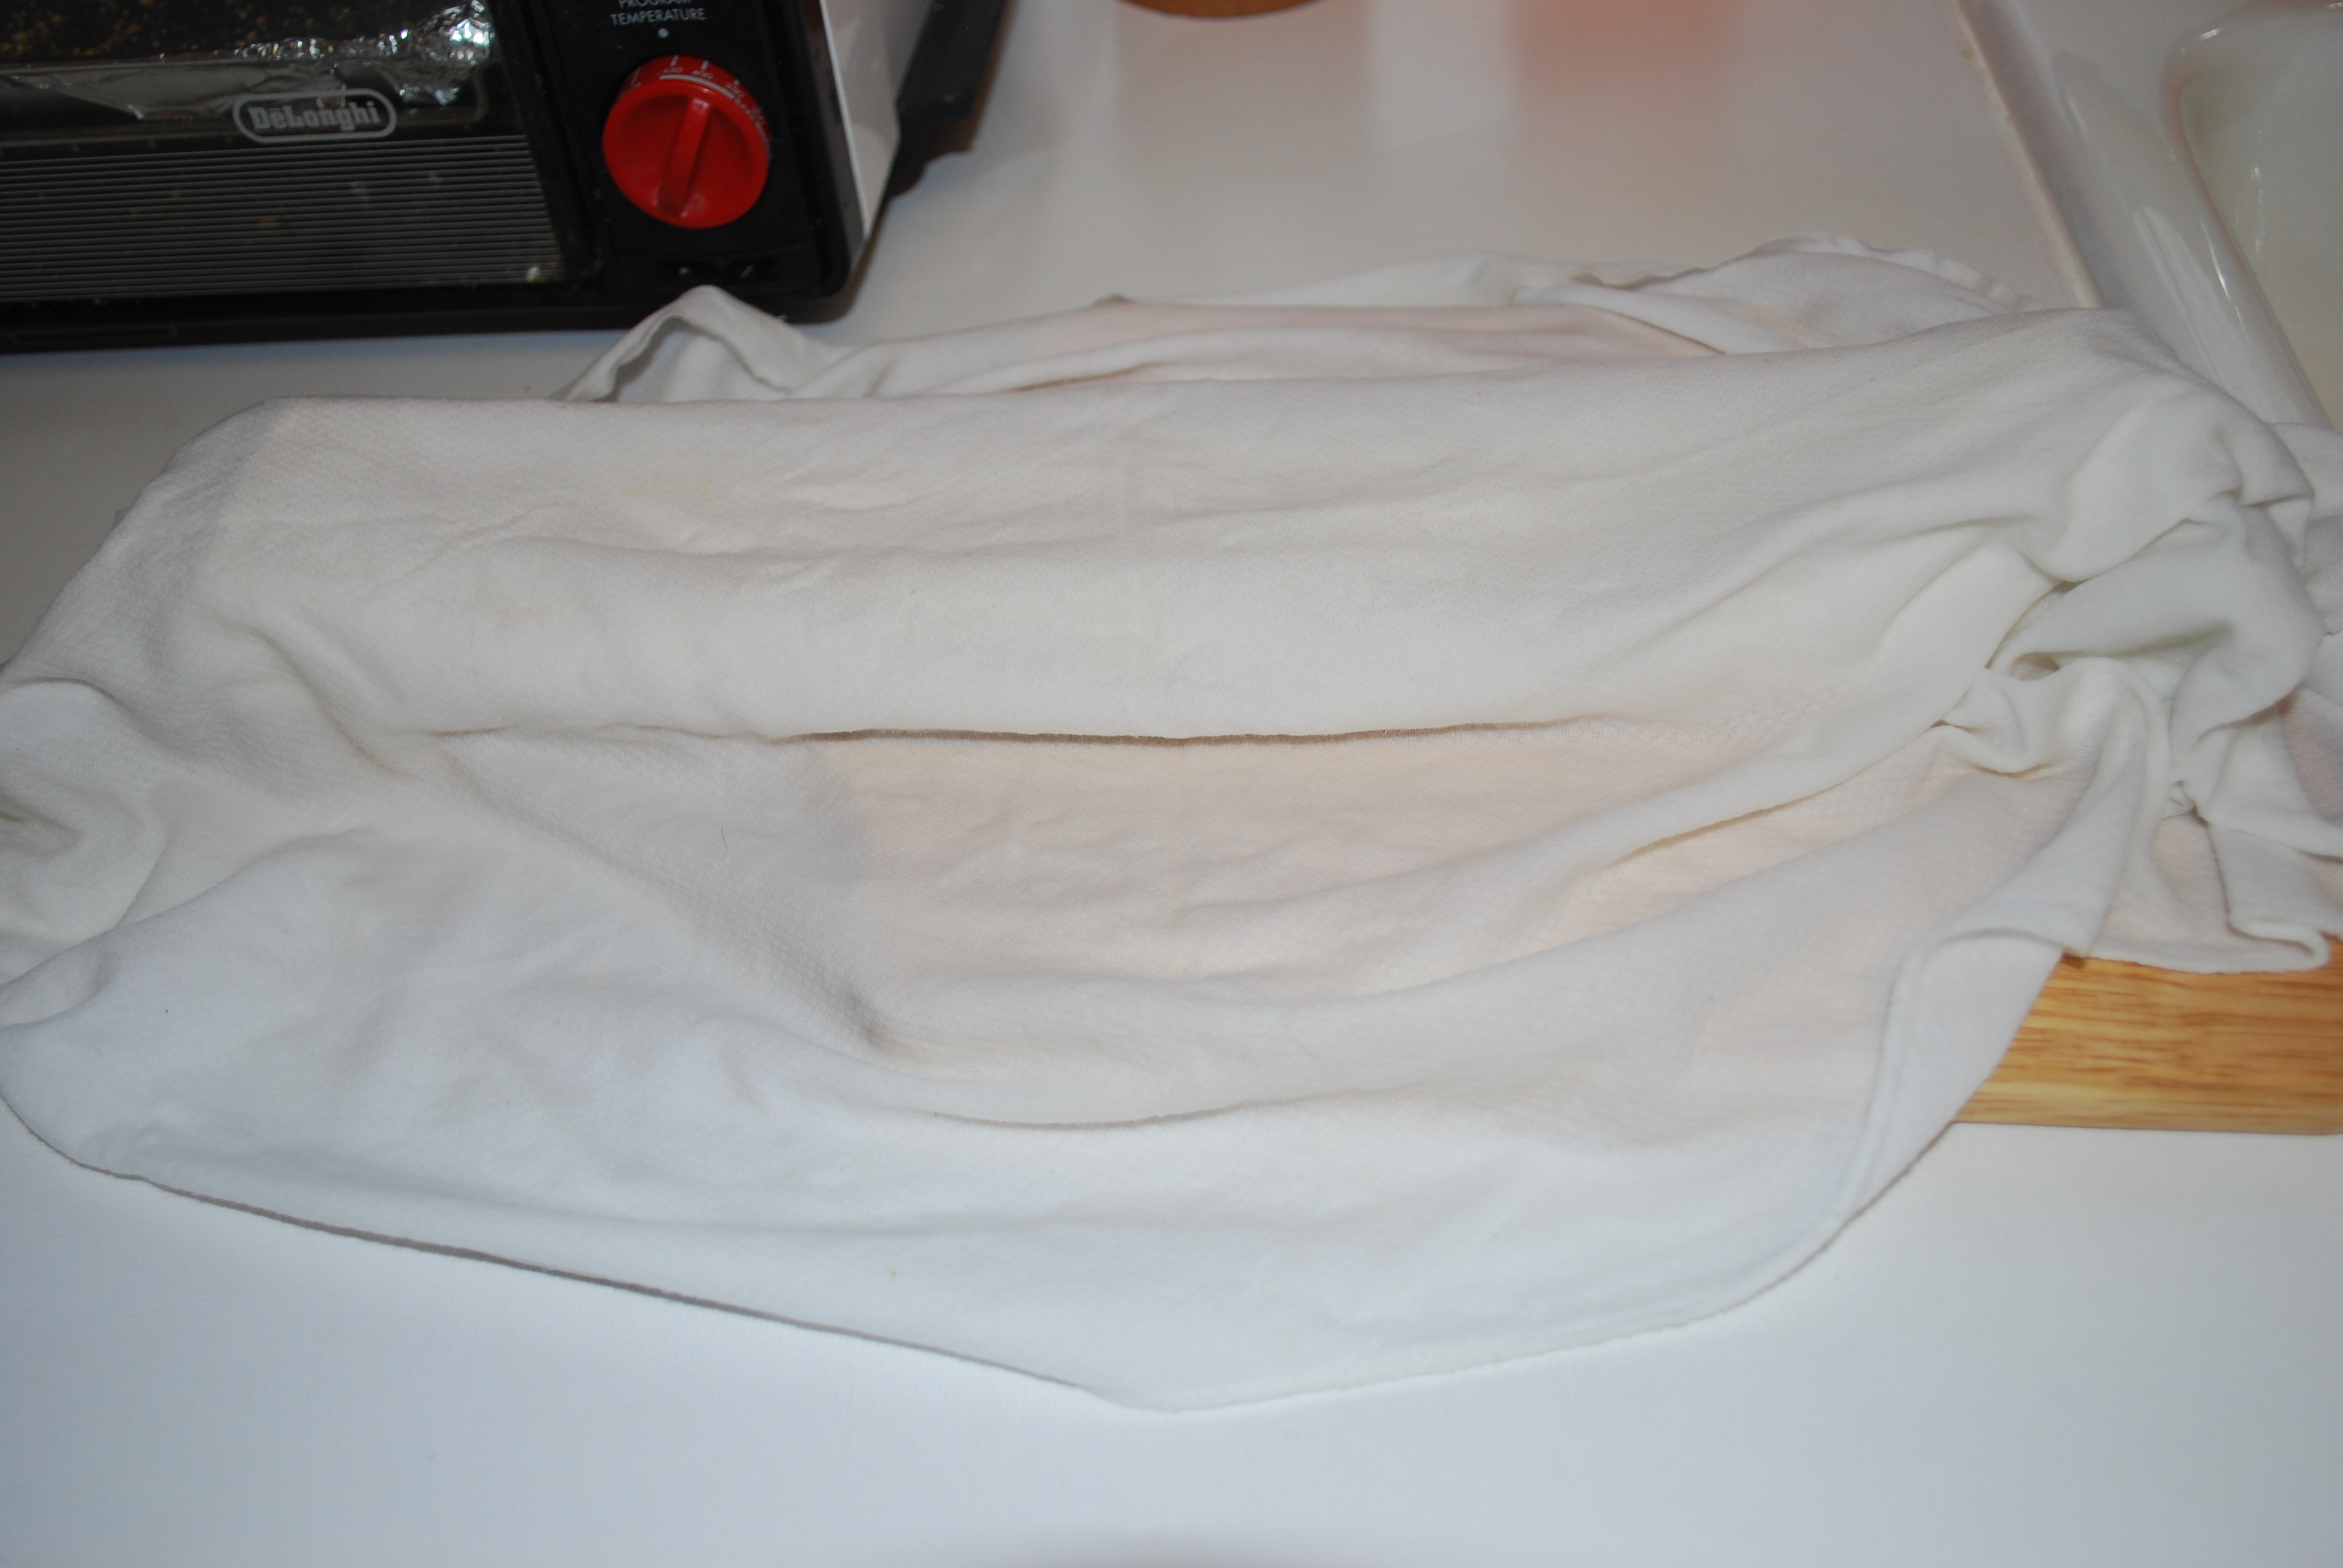
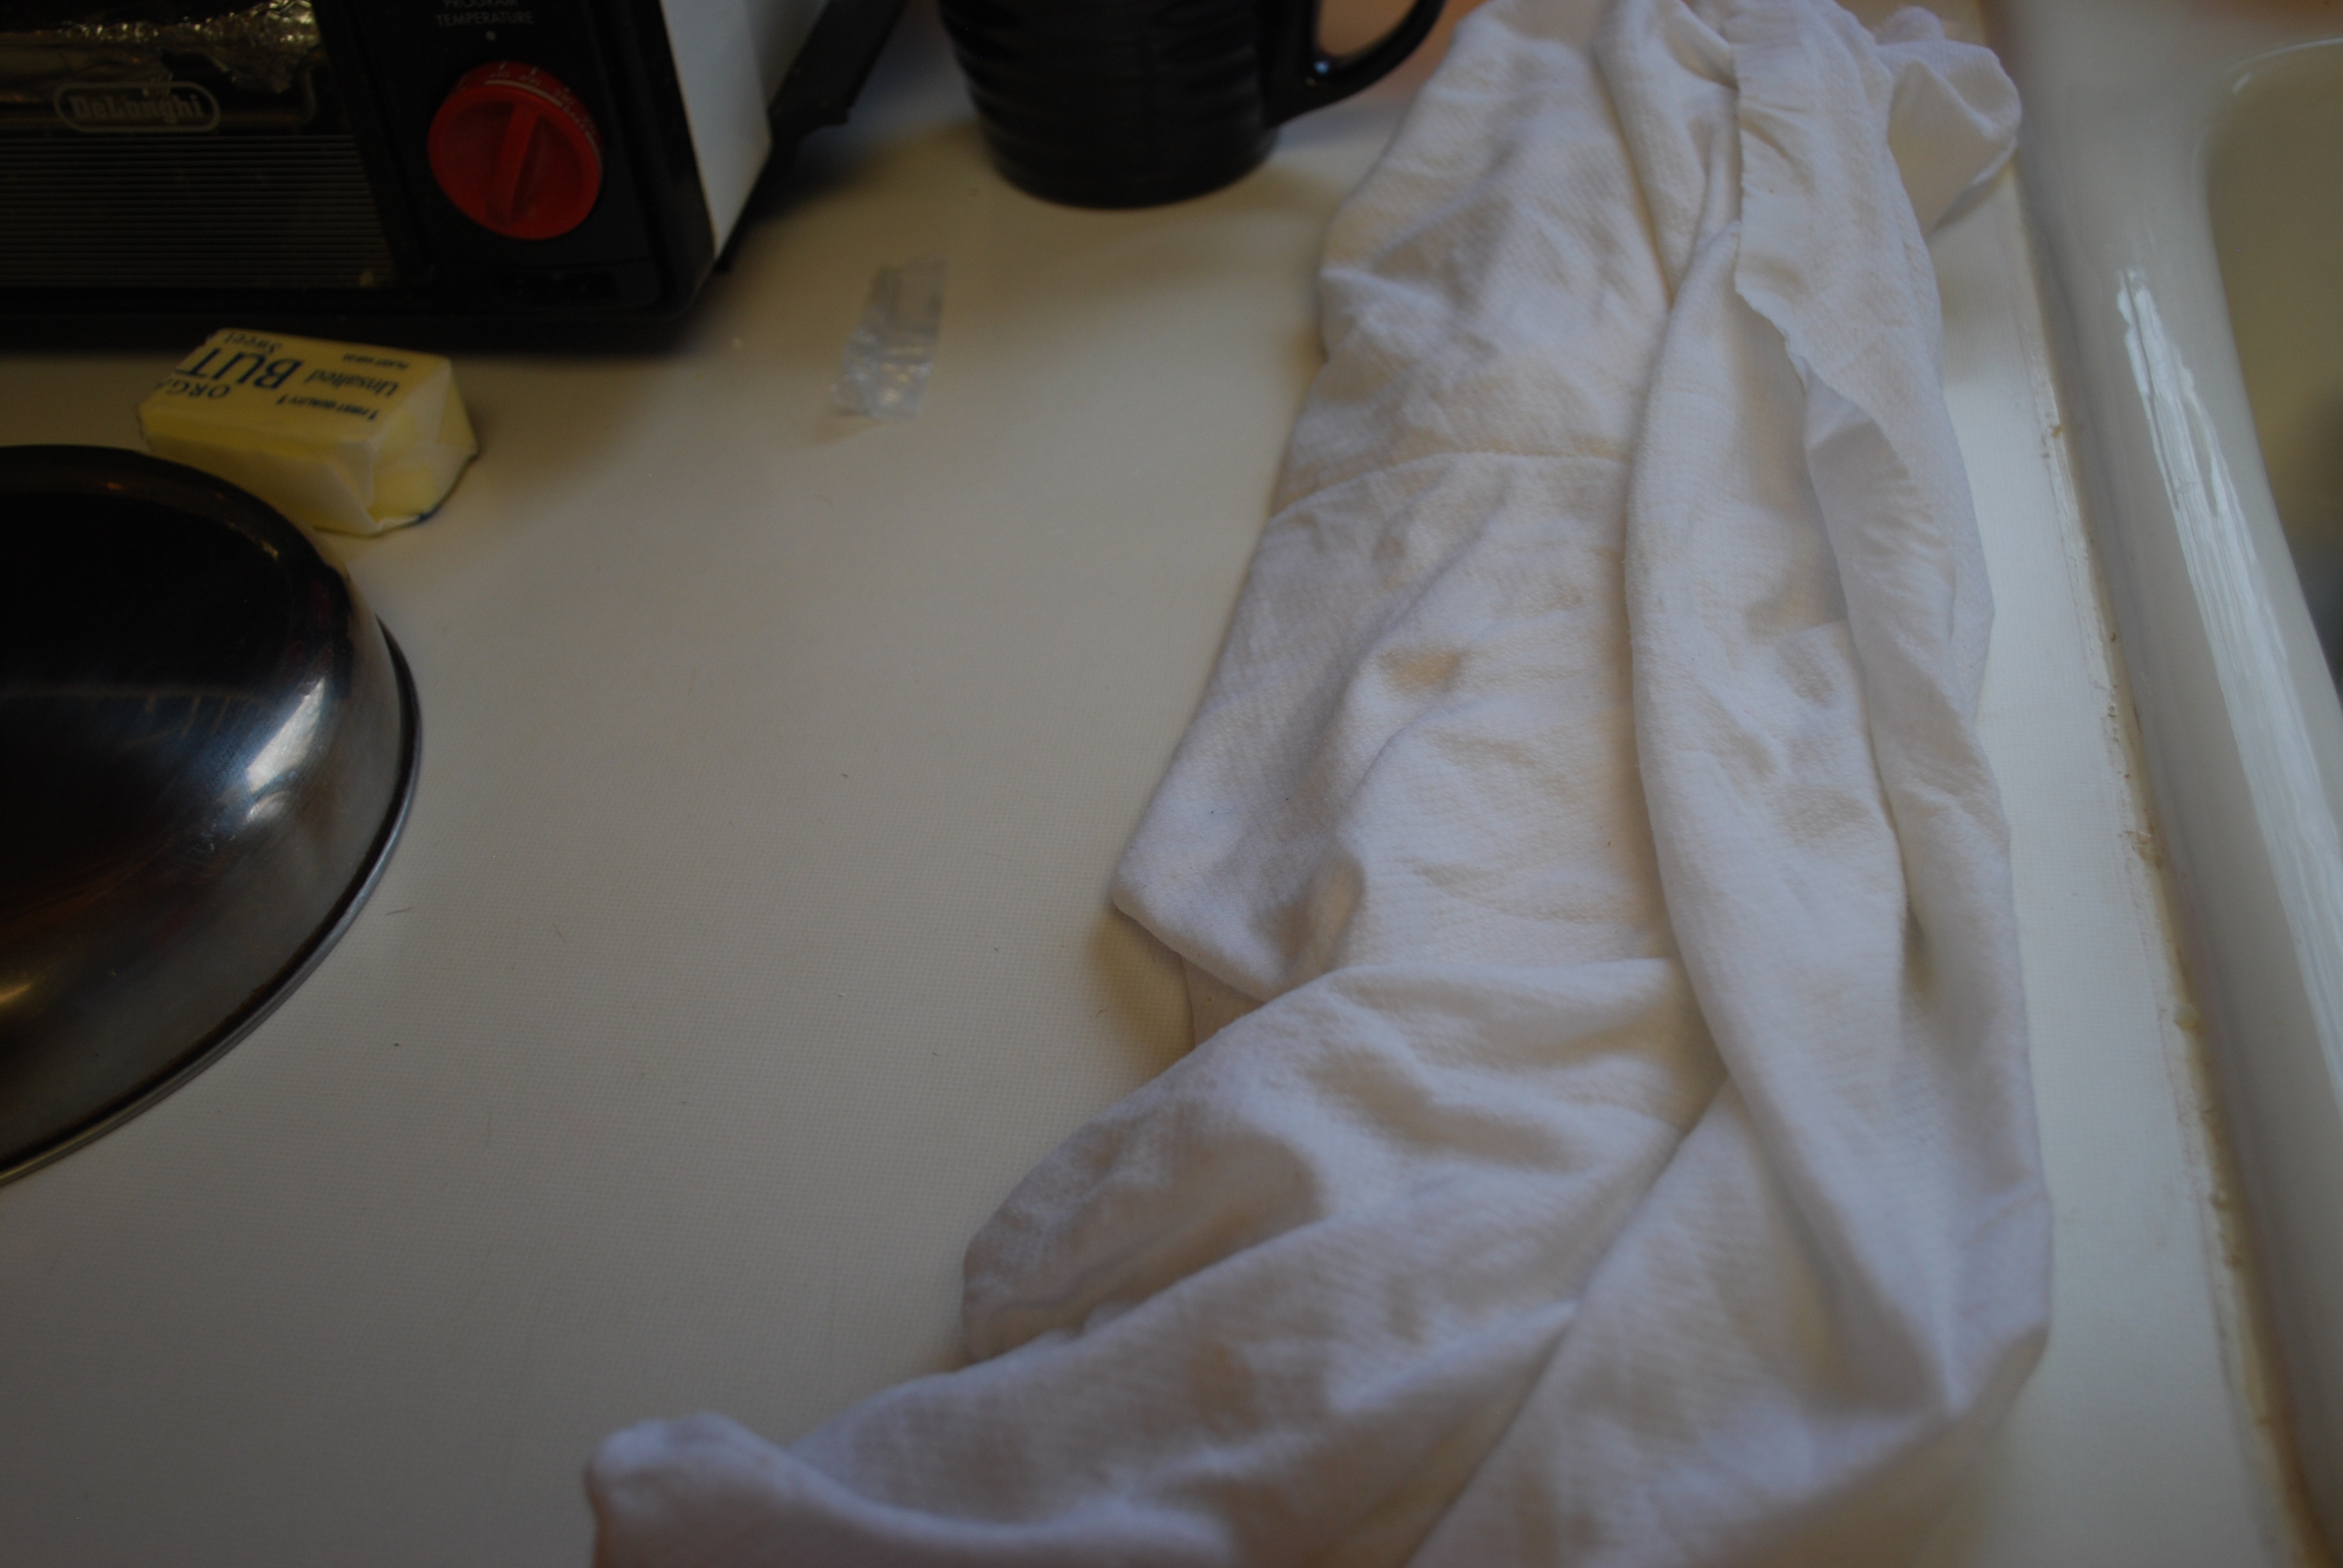
Put the other half of the box aside for now, covered with a damp towel so the fillo sheets do not dry out while you’re working.

DSC_0285

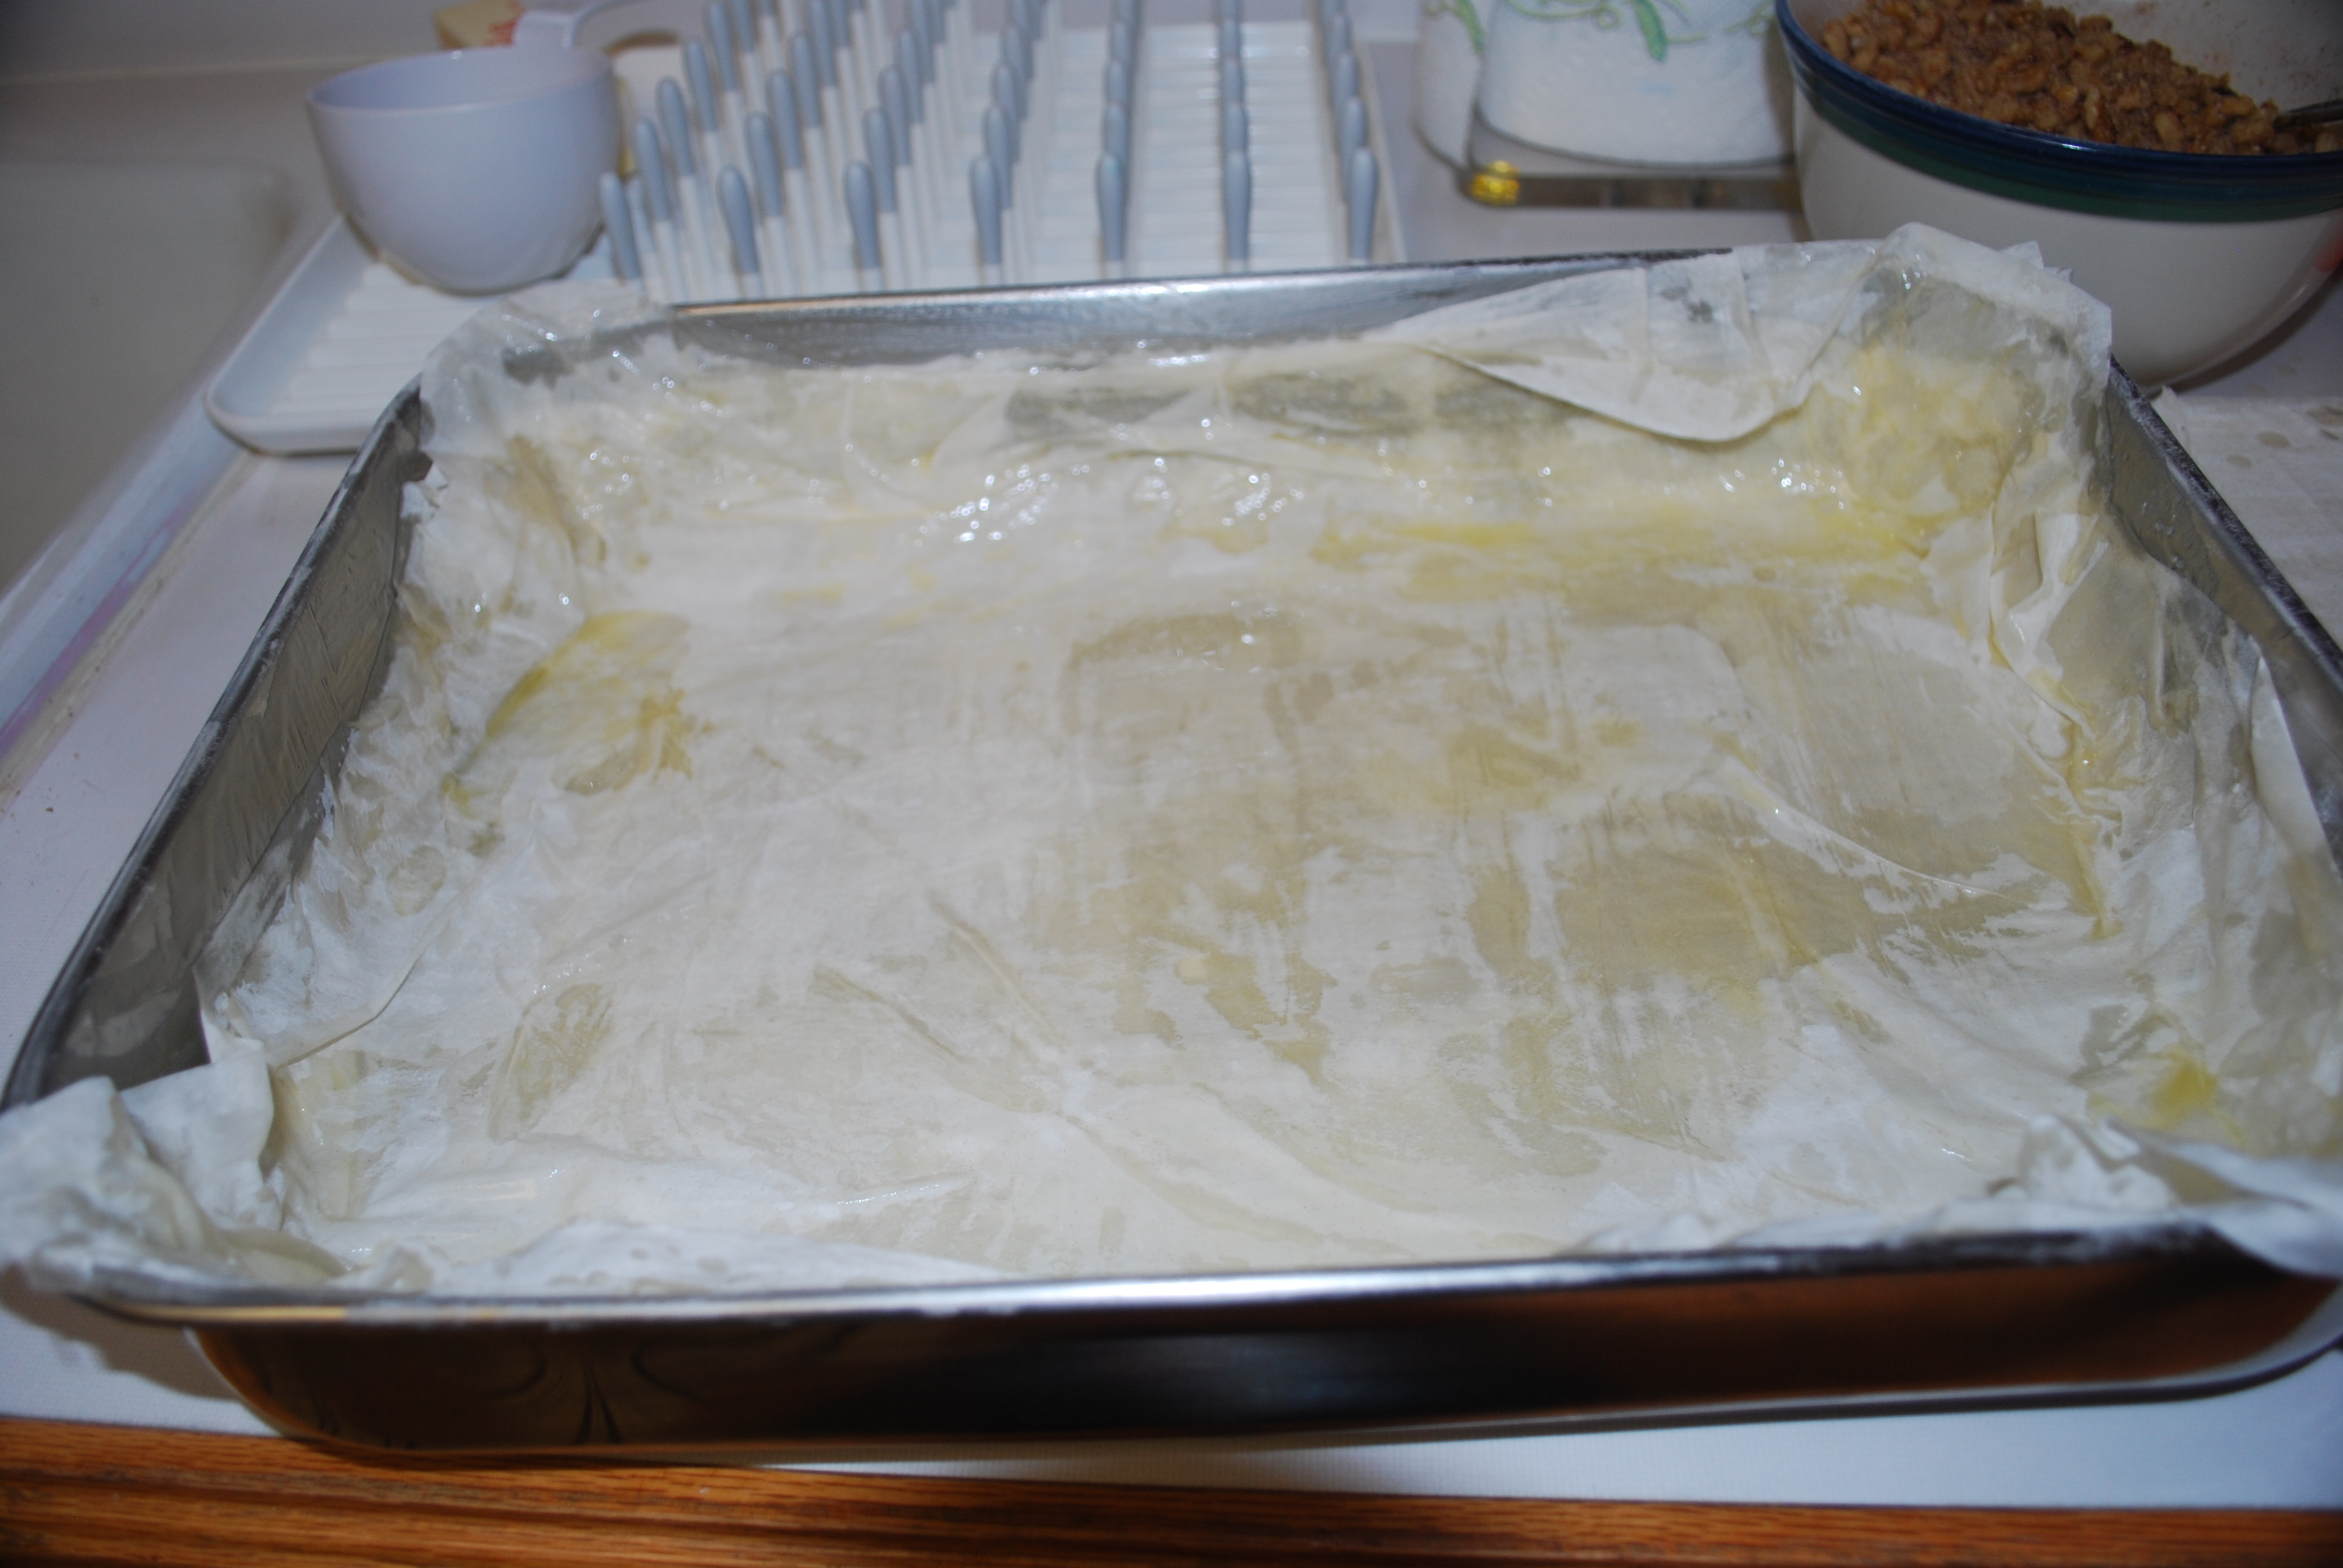
Lay one fillo sheet on the buttered baking pan, then brush the sheet with butter.

DSC_0289

DSC_0290

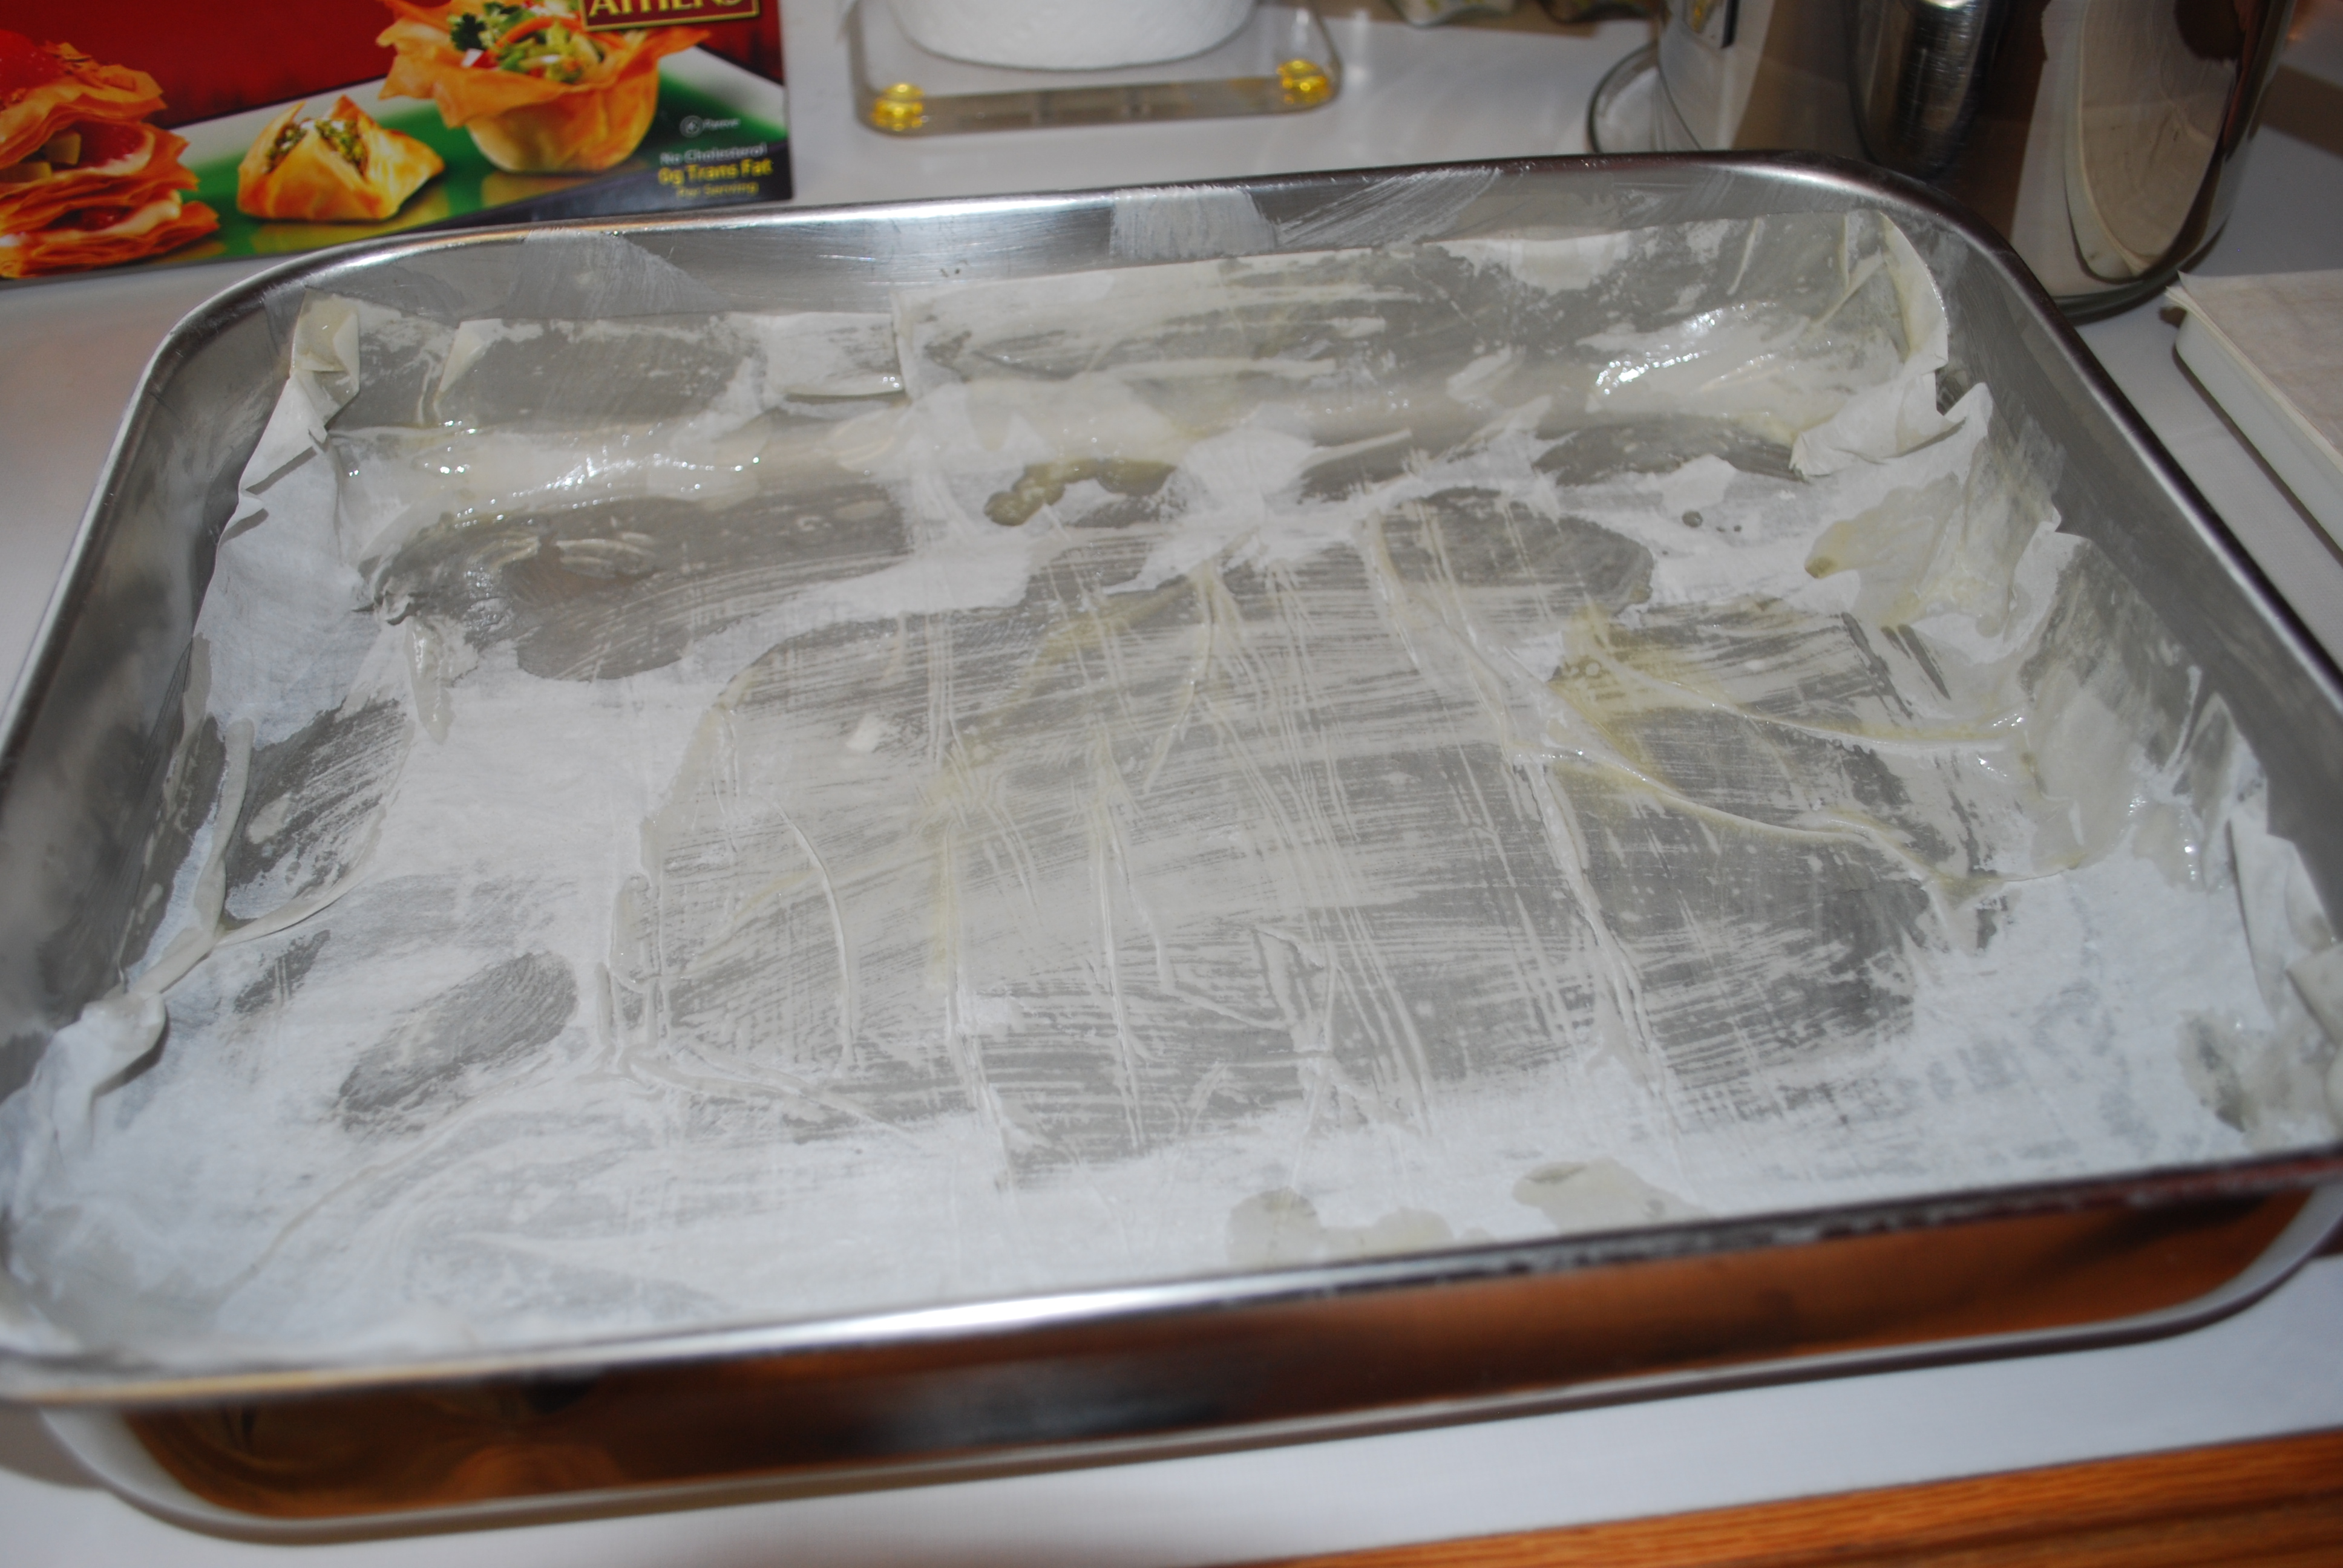
Repeat with the rest of the 1/2 box of fillo sheets.

DSC_0292

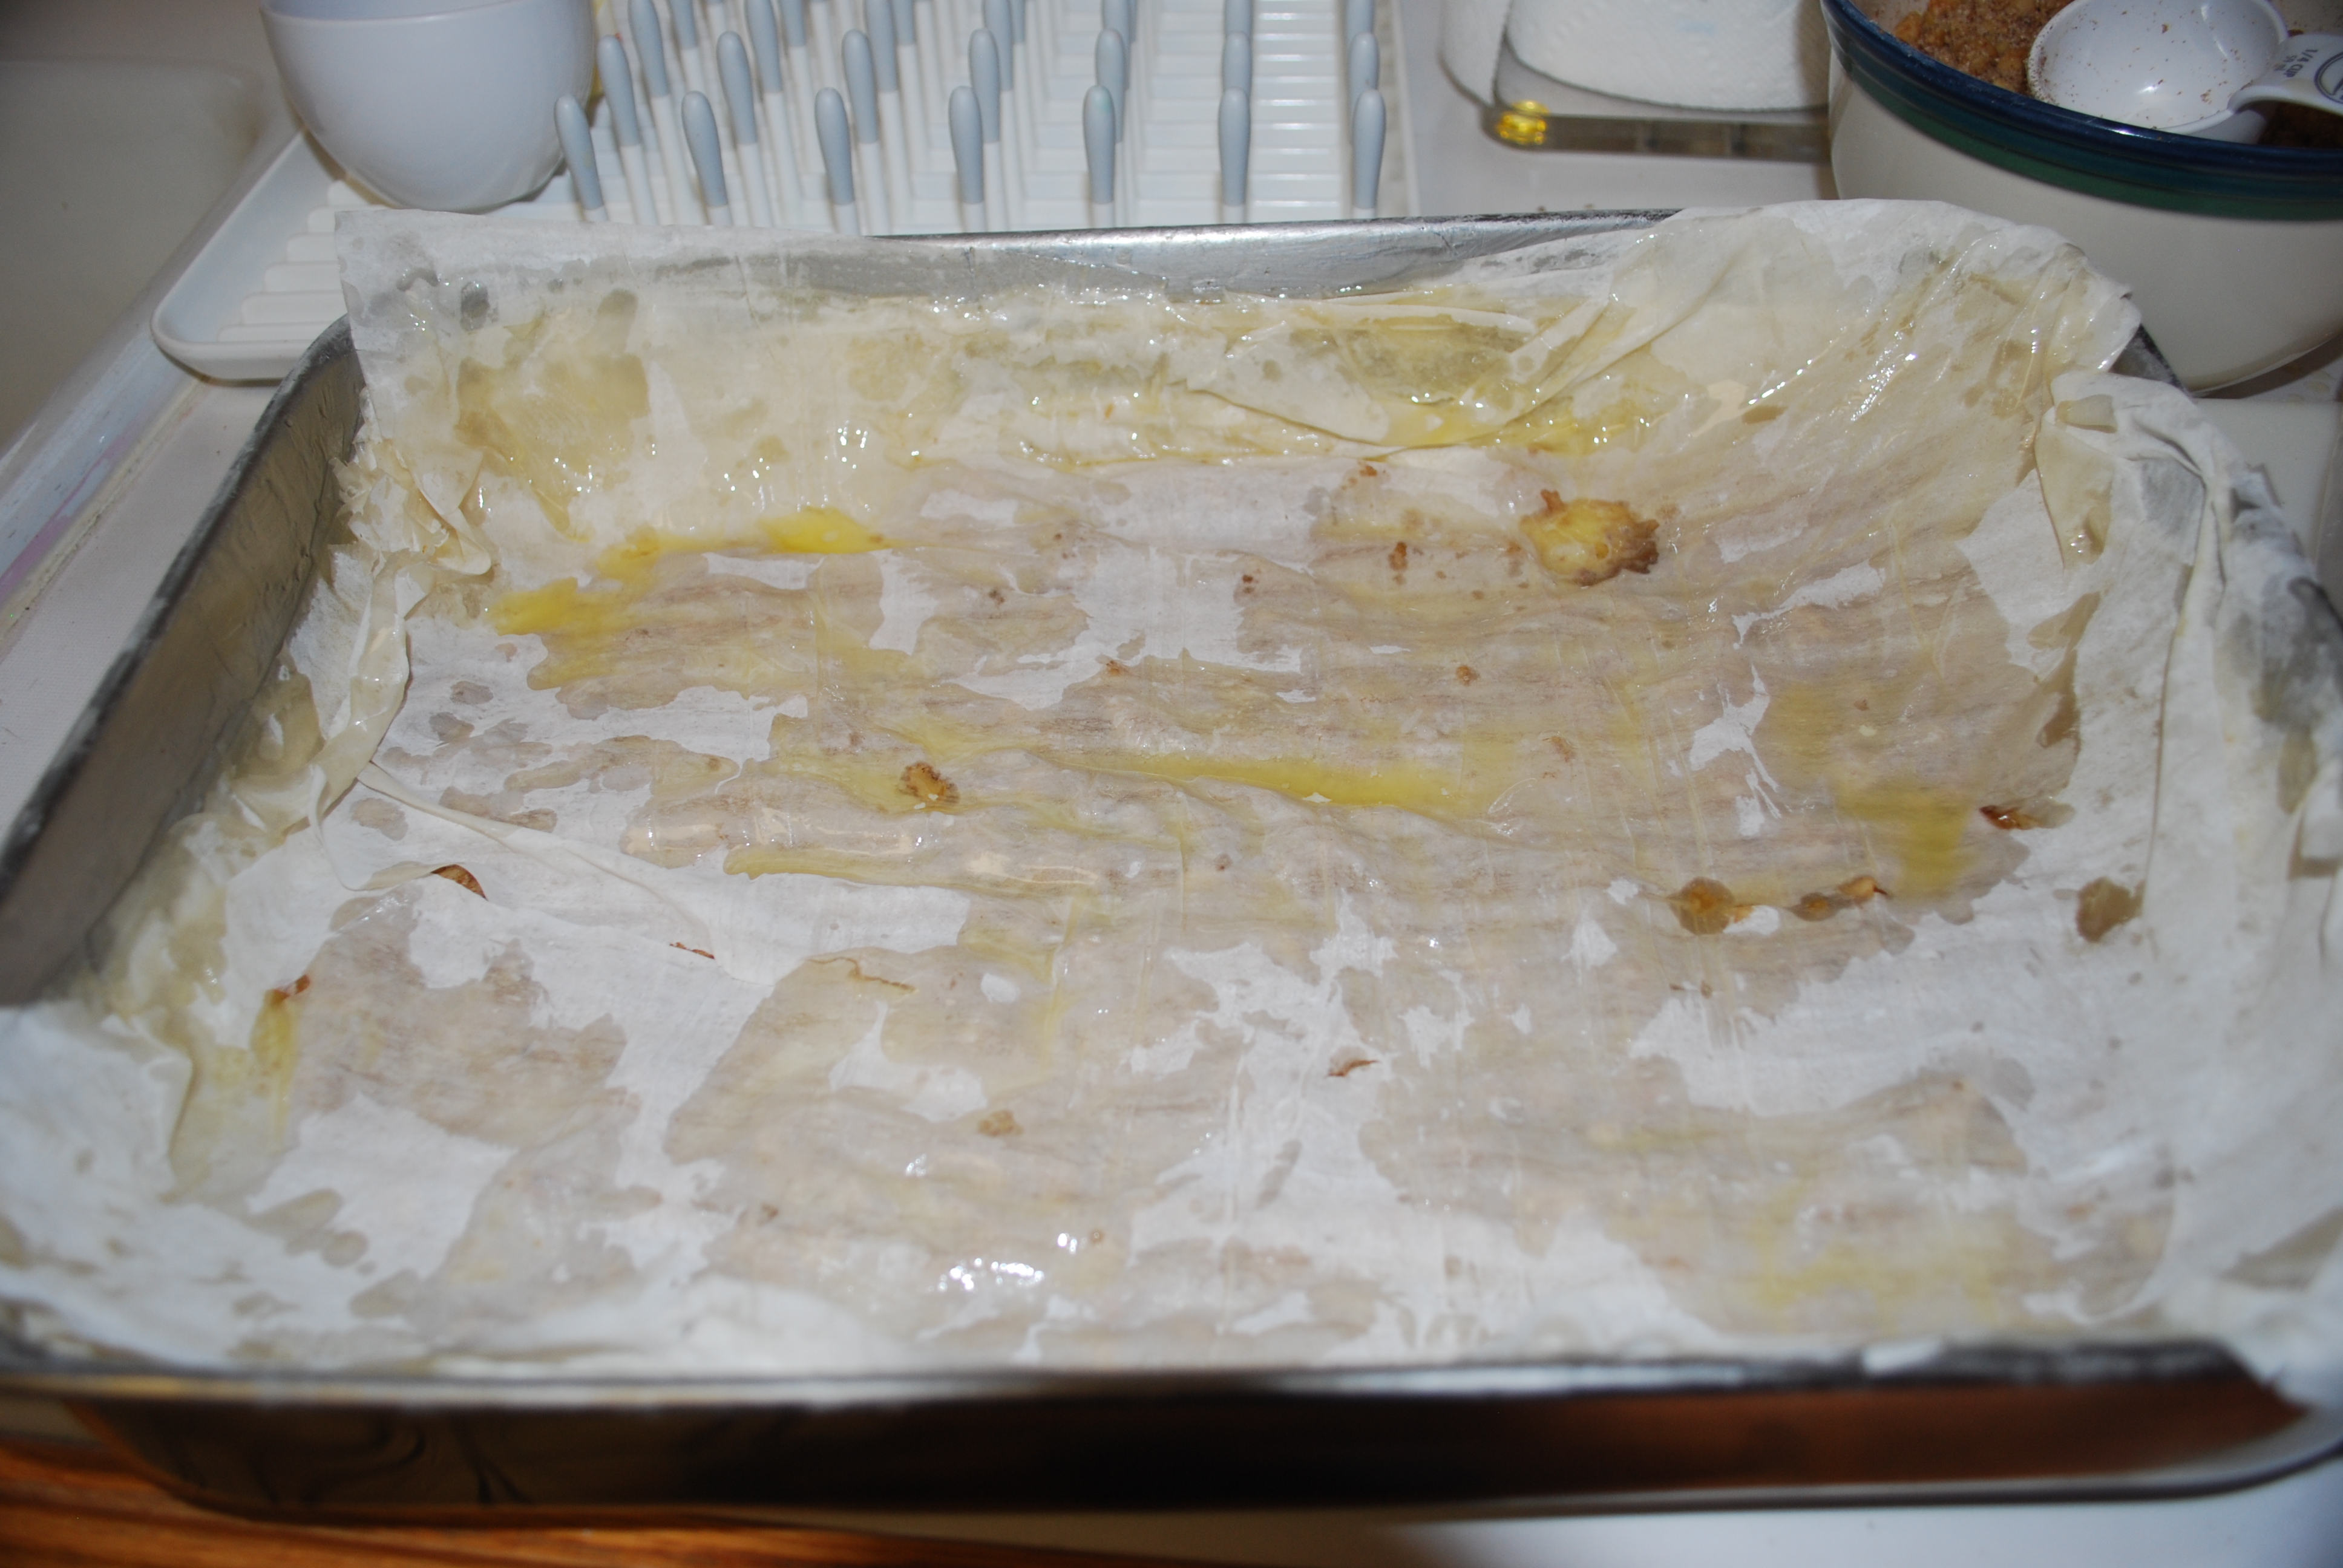
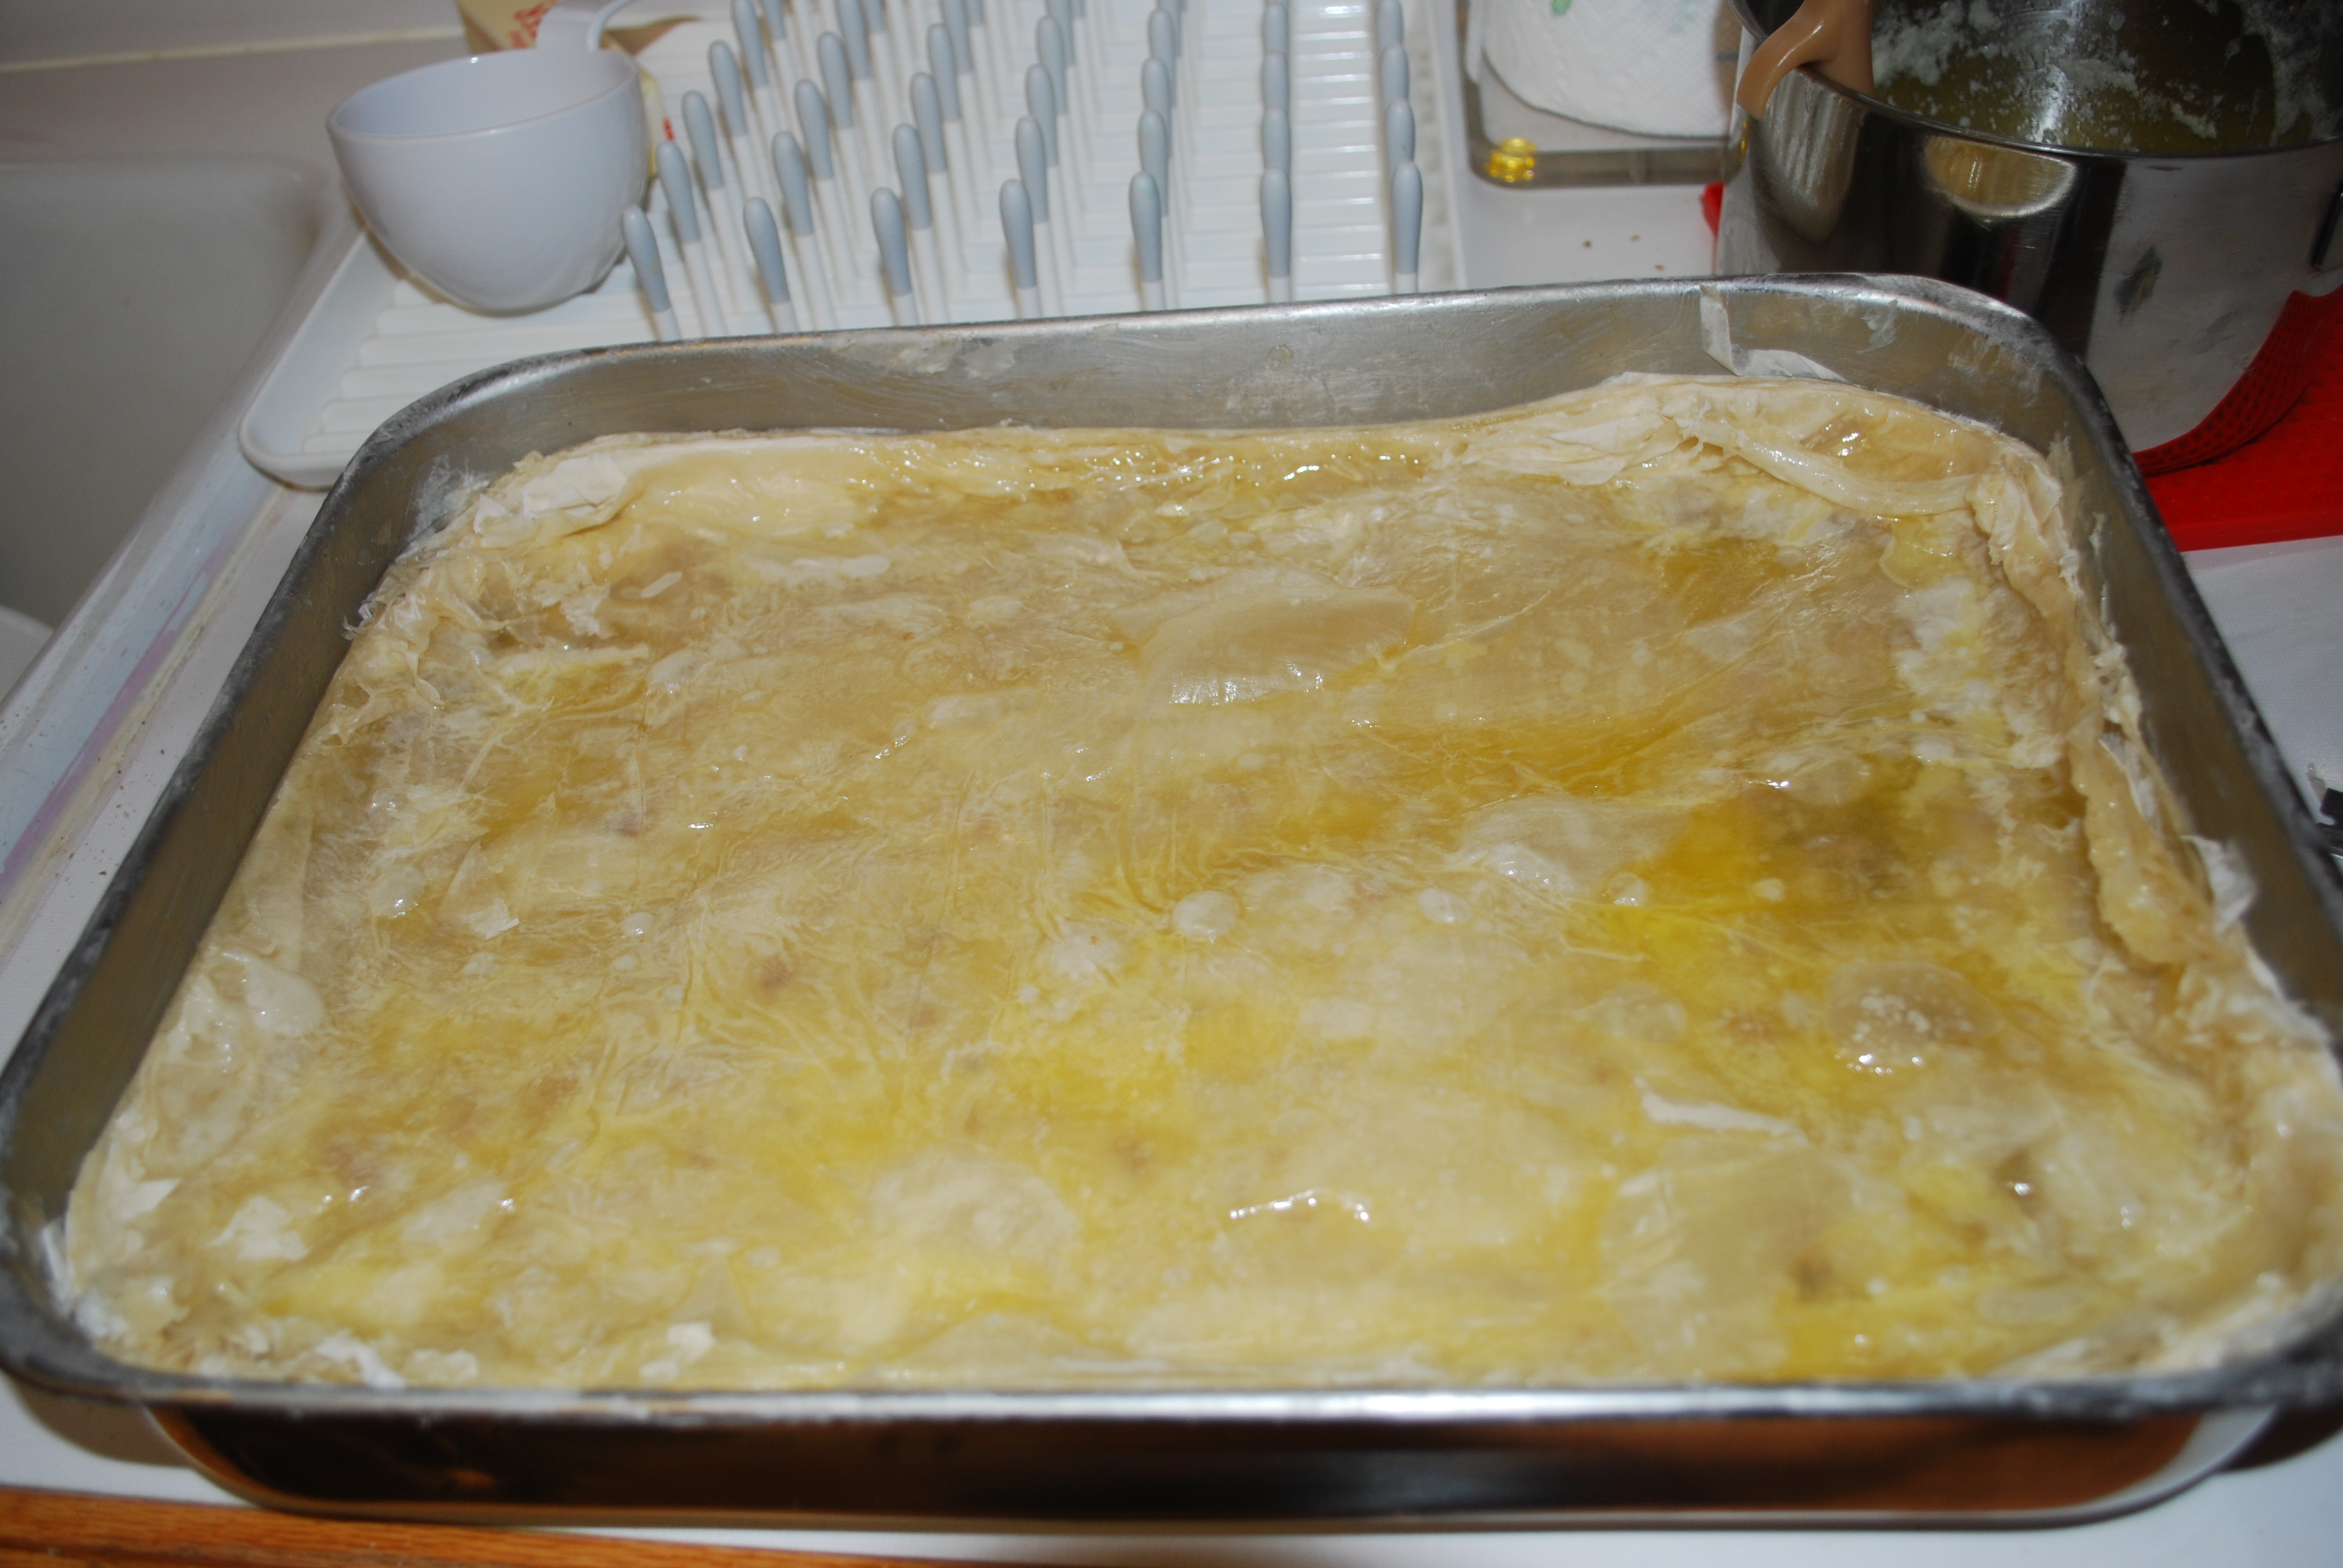
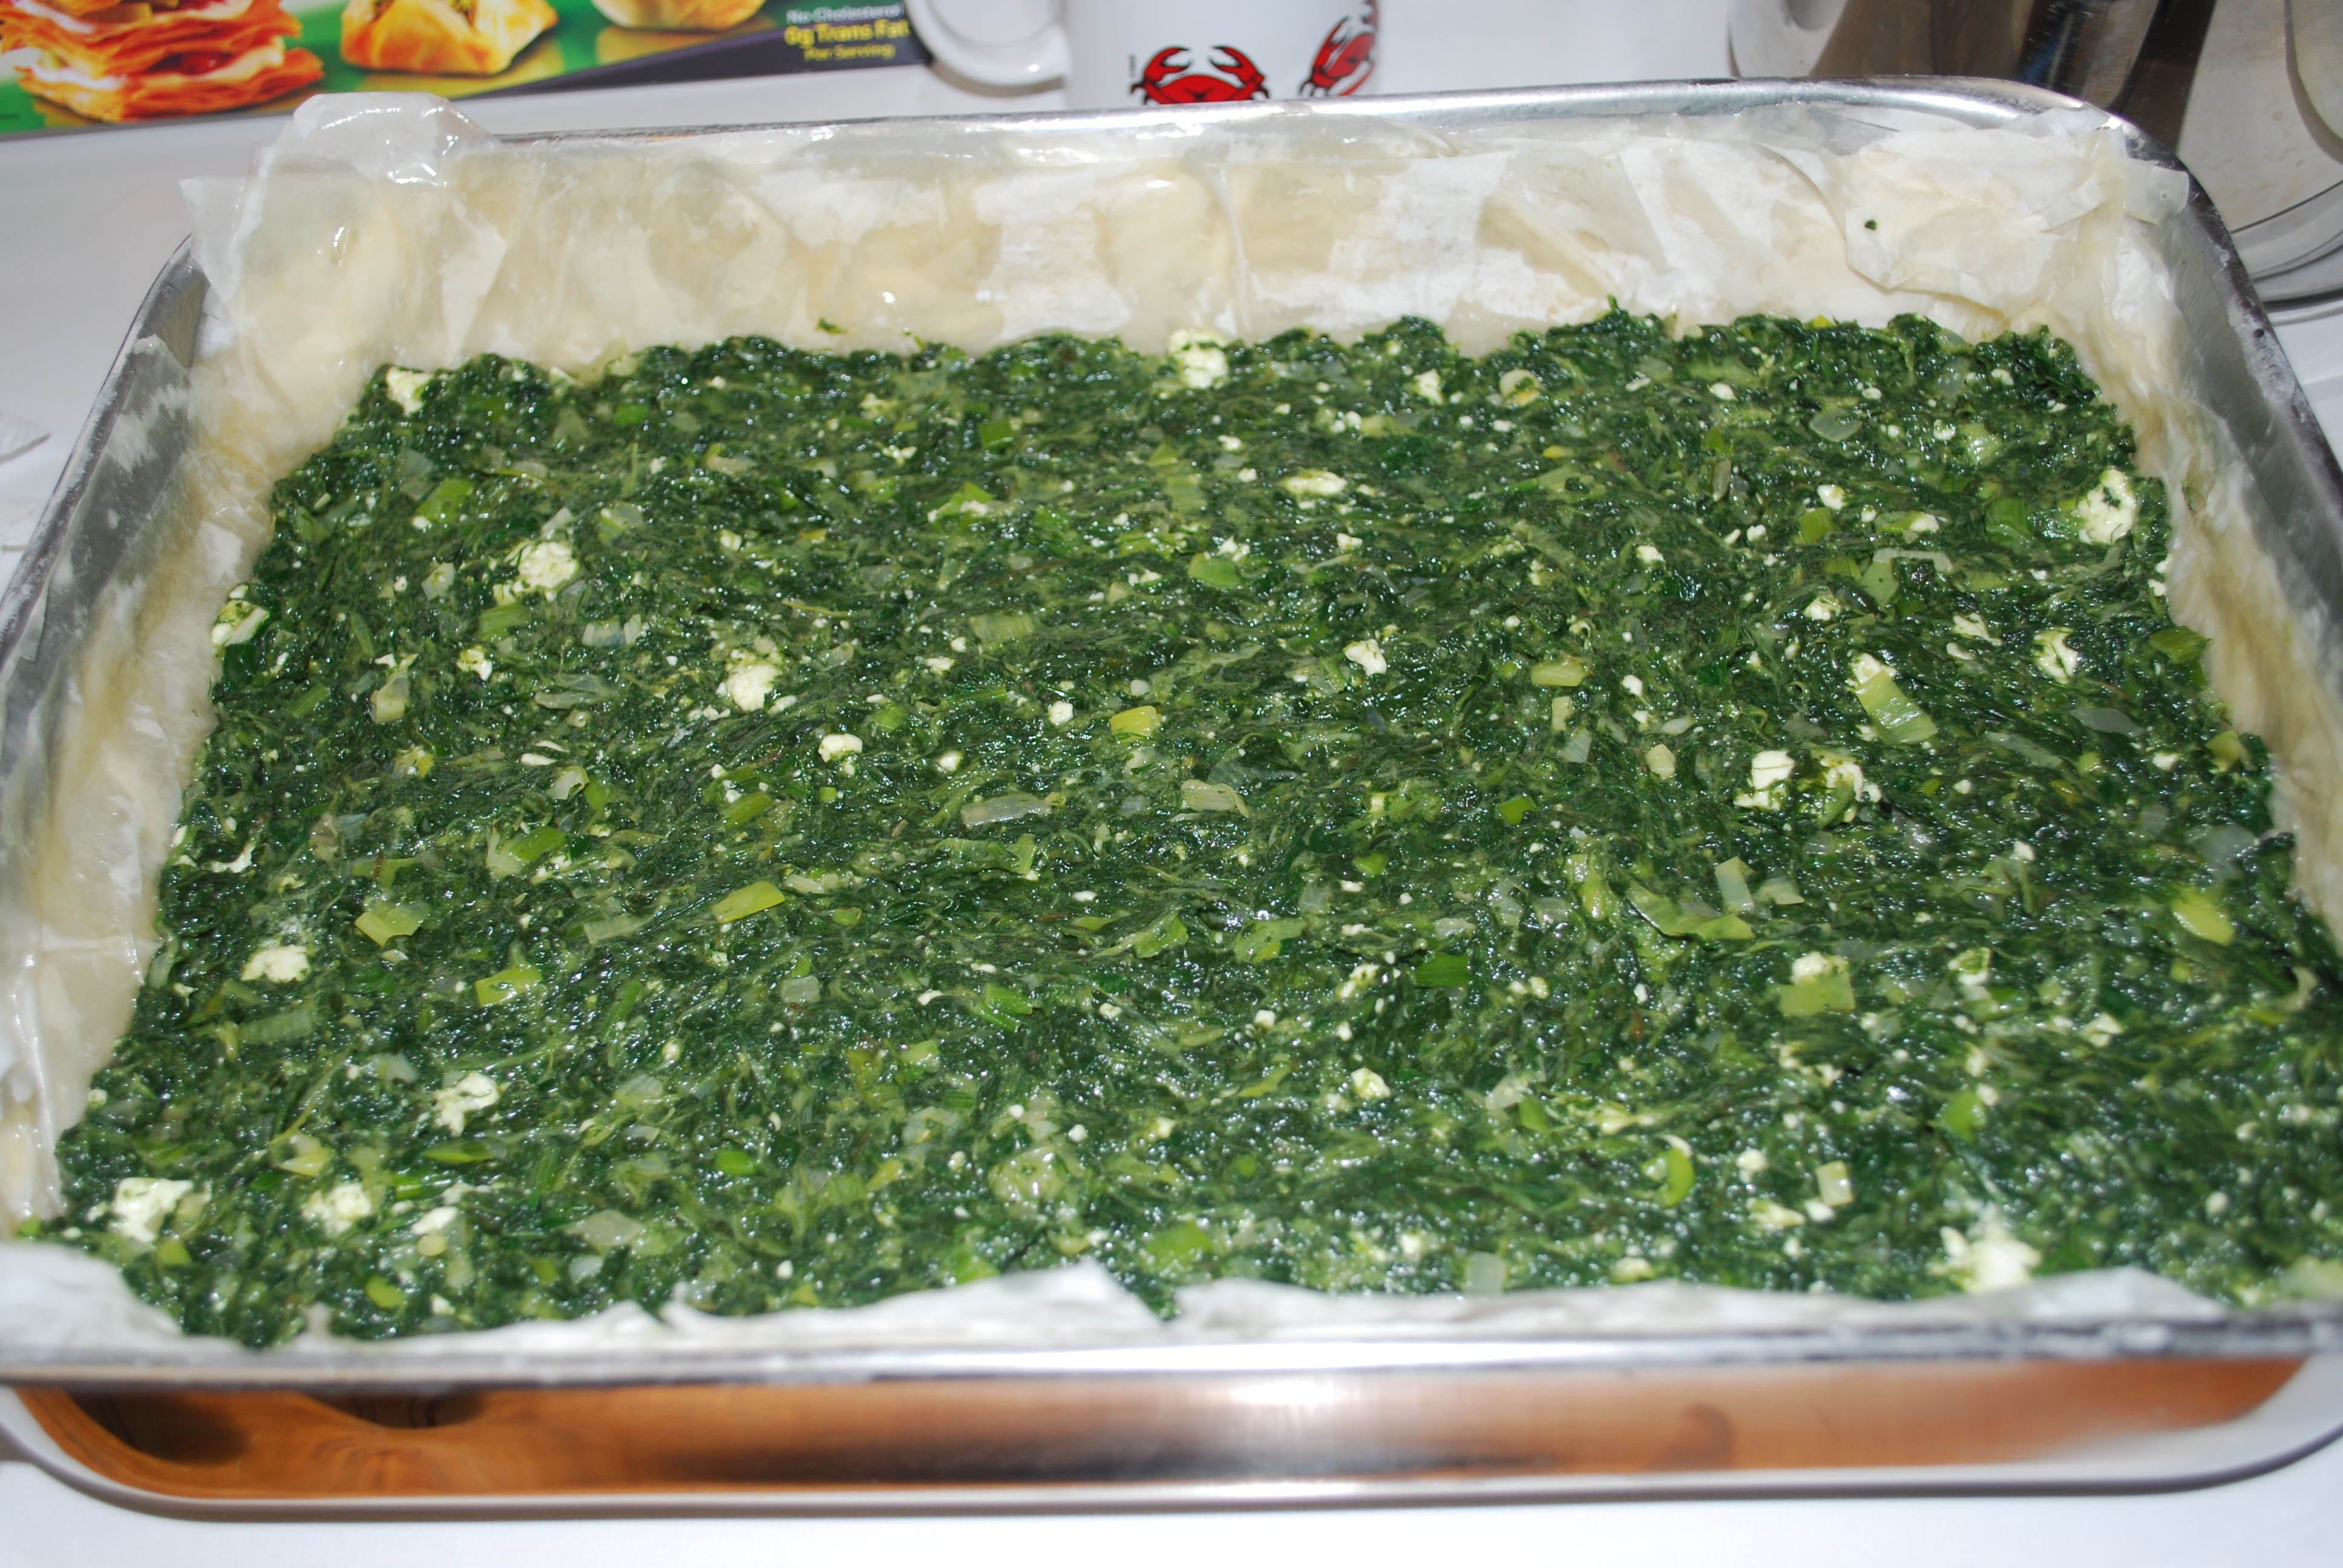
Once you’ve layered 1/2 the box with butter in the baking pan, pour the spinach mixture on top and spread it evenly.

DSC_0294

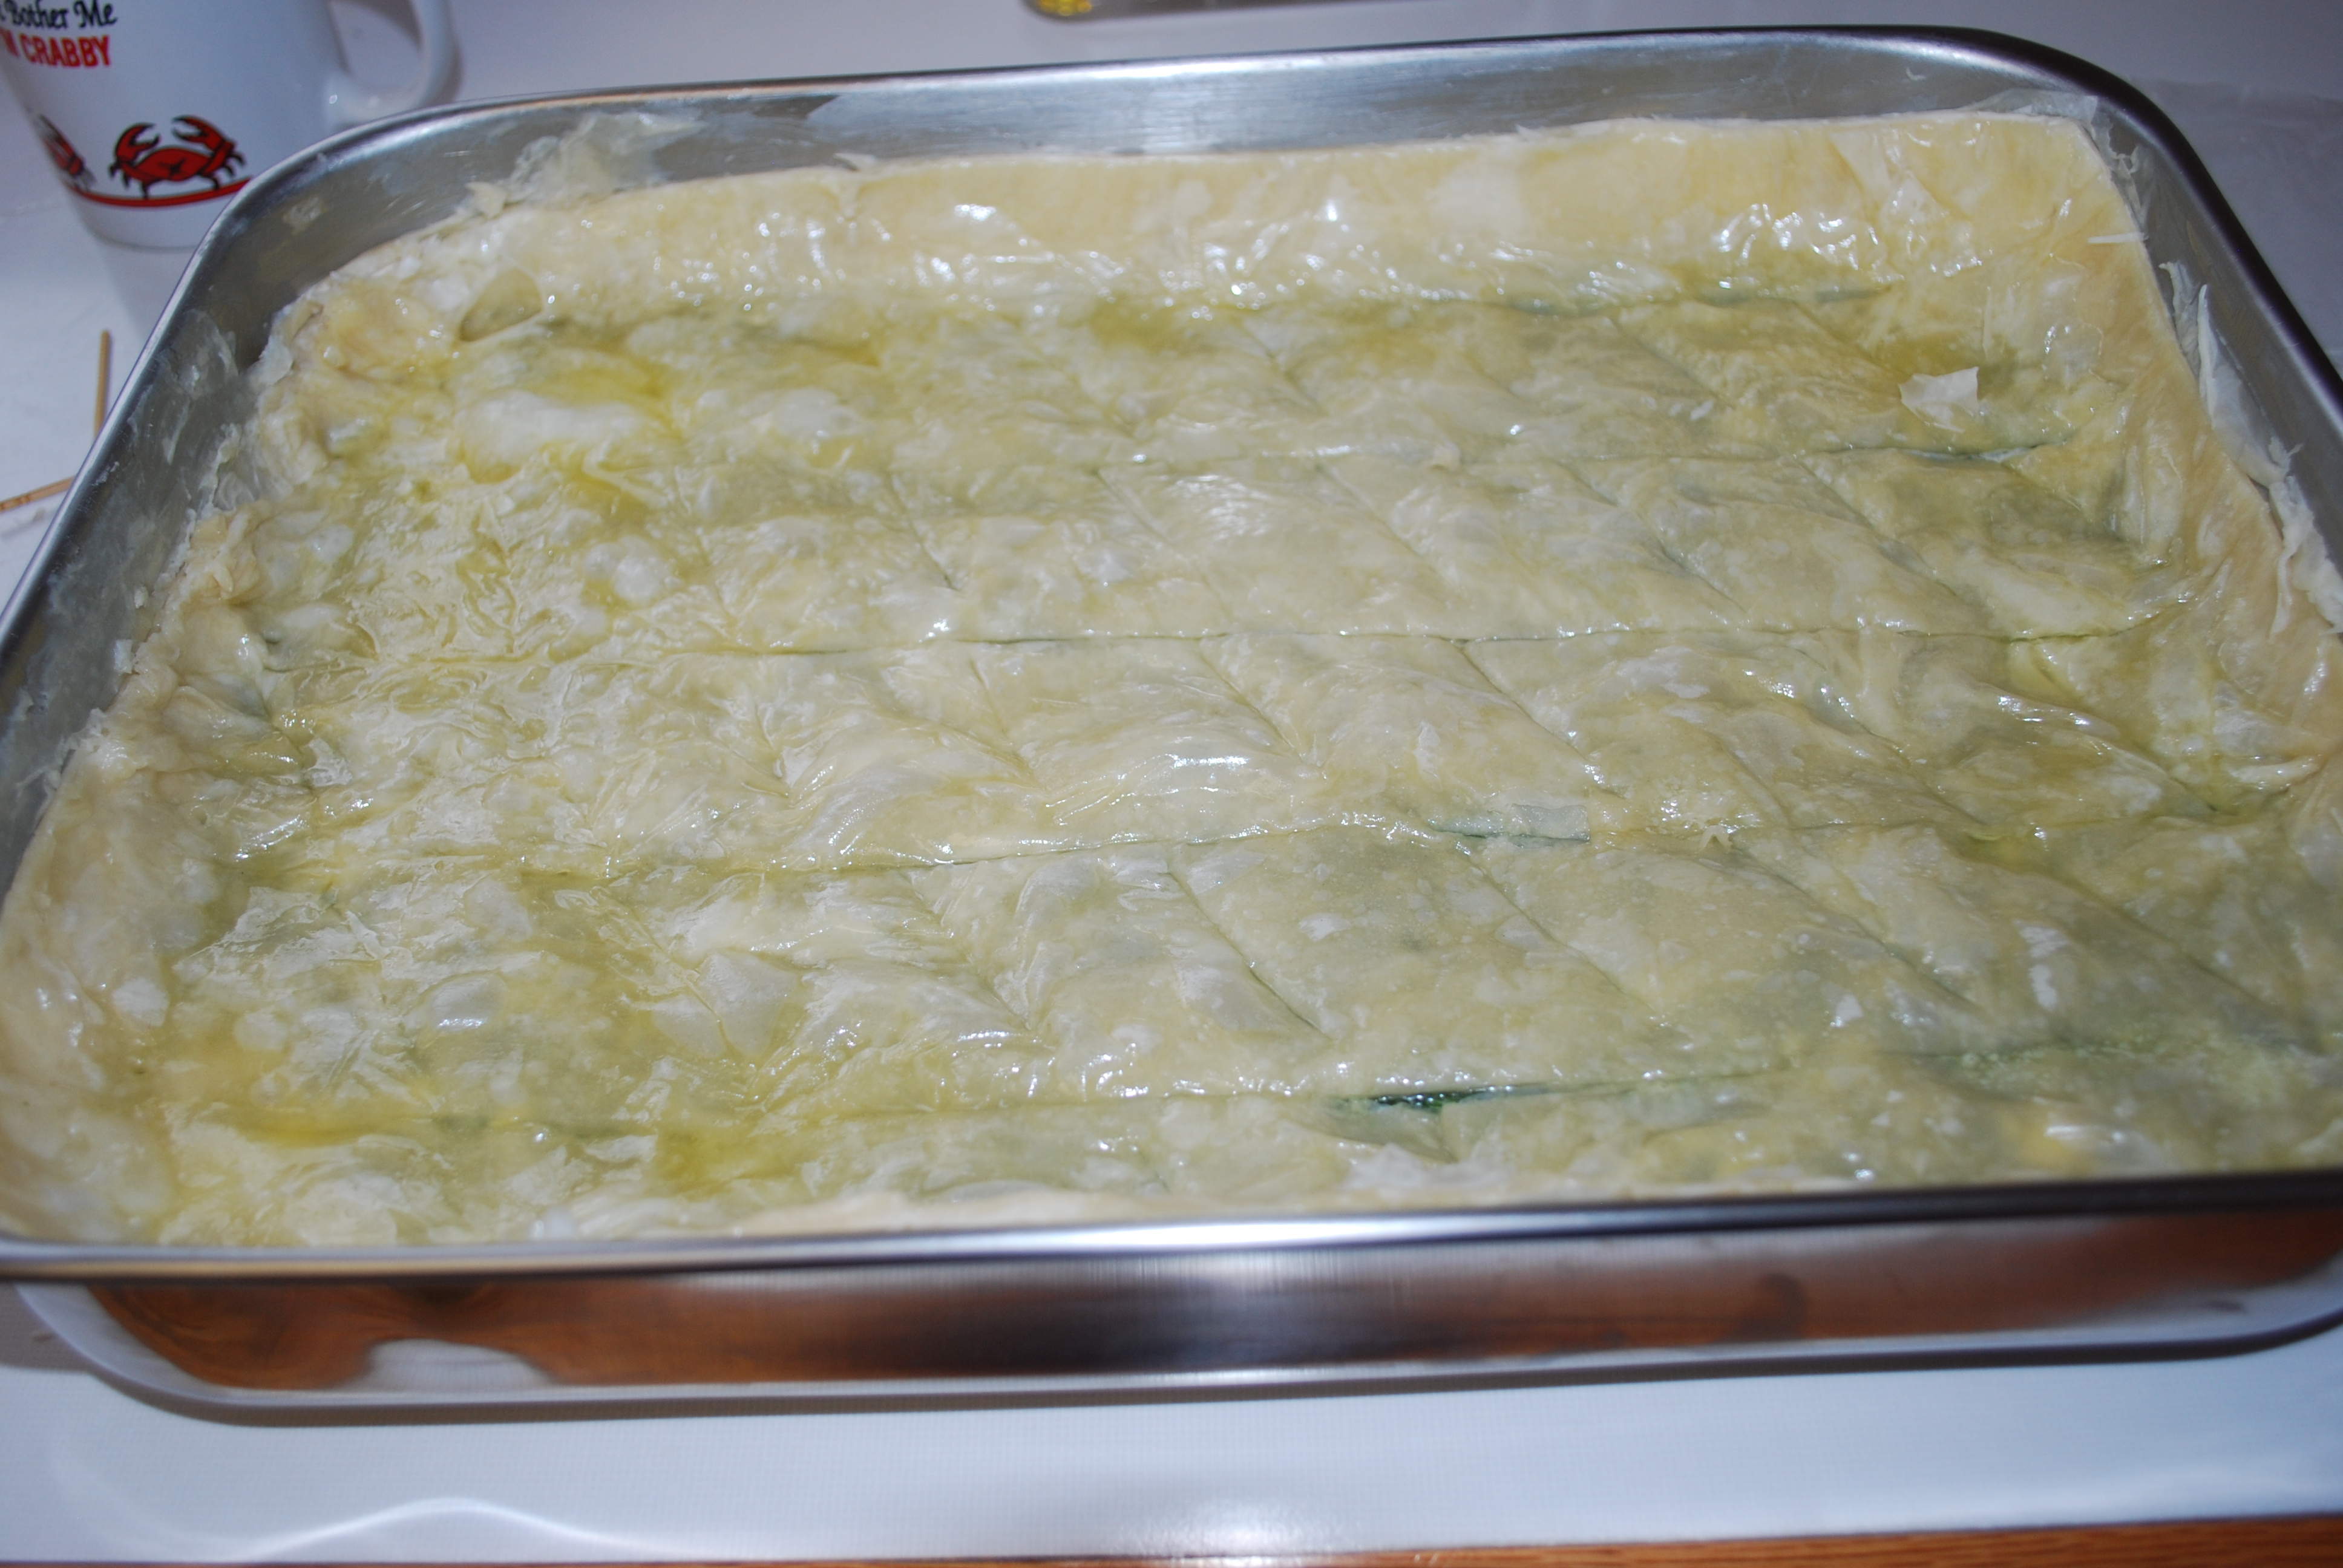
Next, take out the rest of the fillo sheets and lay them out on a clean surface. Lay one fillo sheet on top of the spinach mixture, then brush with melted butter. Repeat until you have used all of the fillo sheets. Pour the rest of the butter on top.

DSC_0295

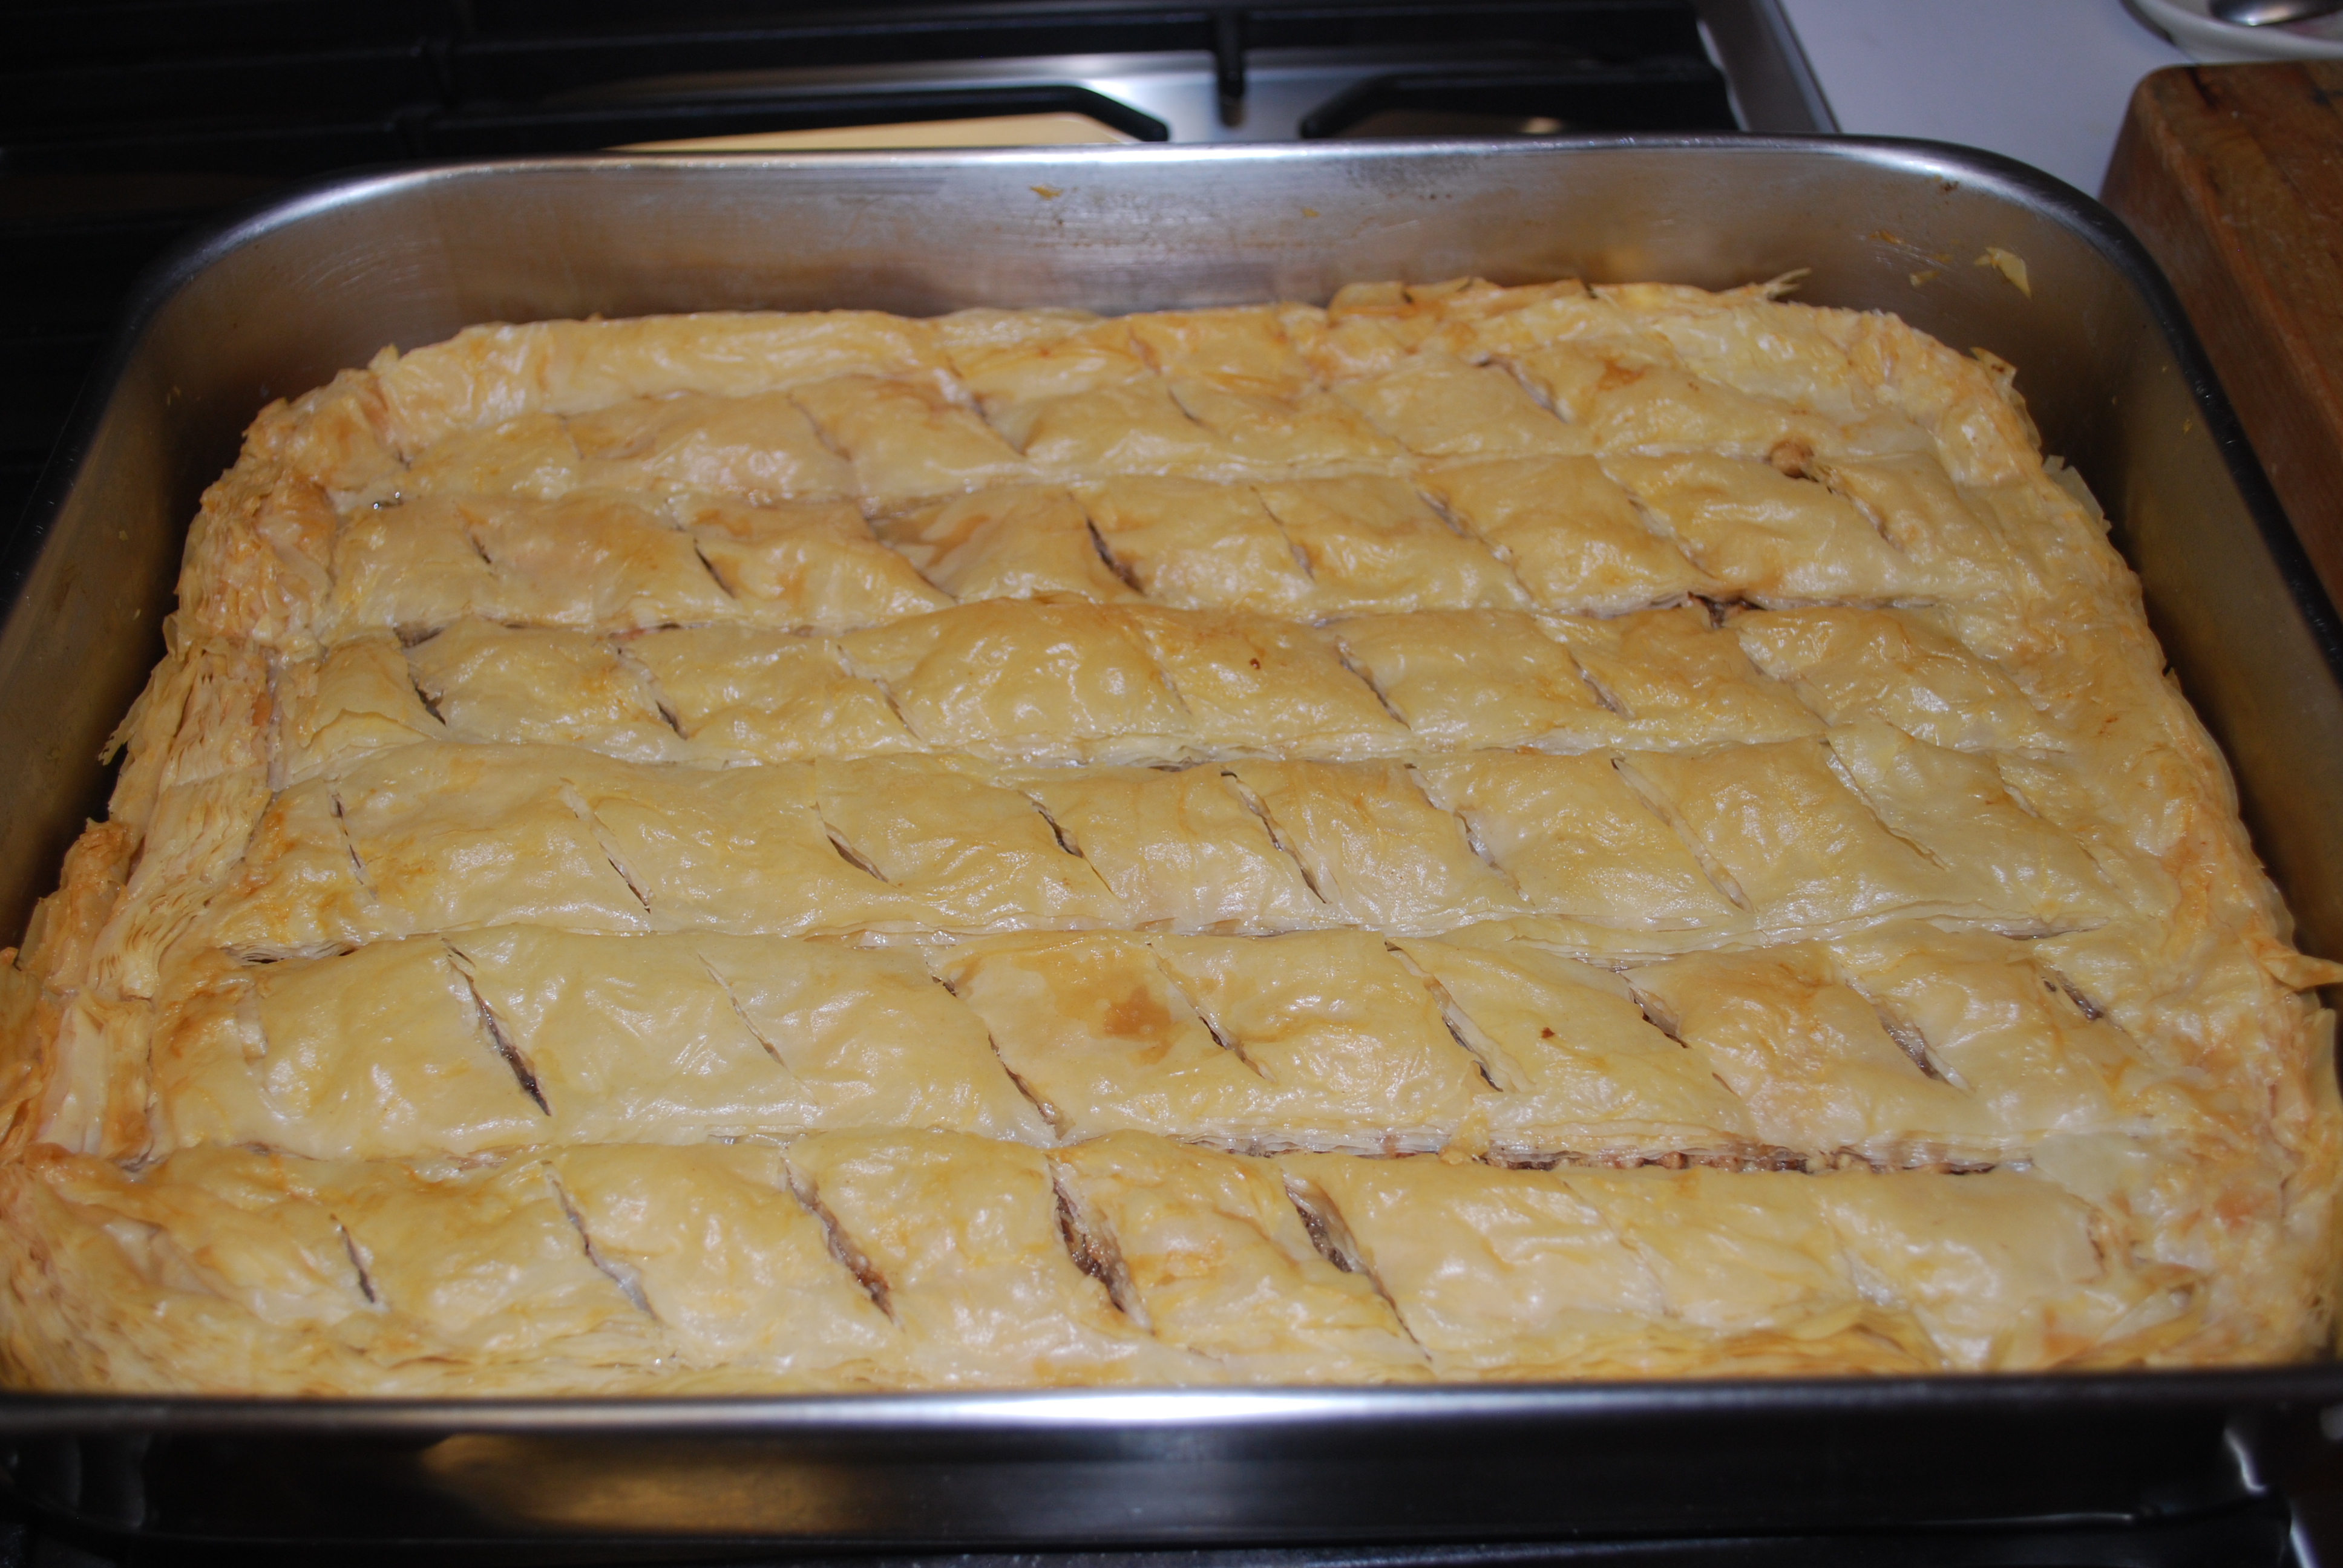
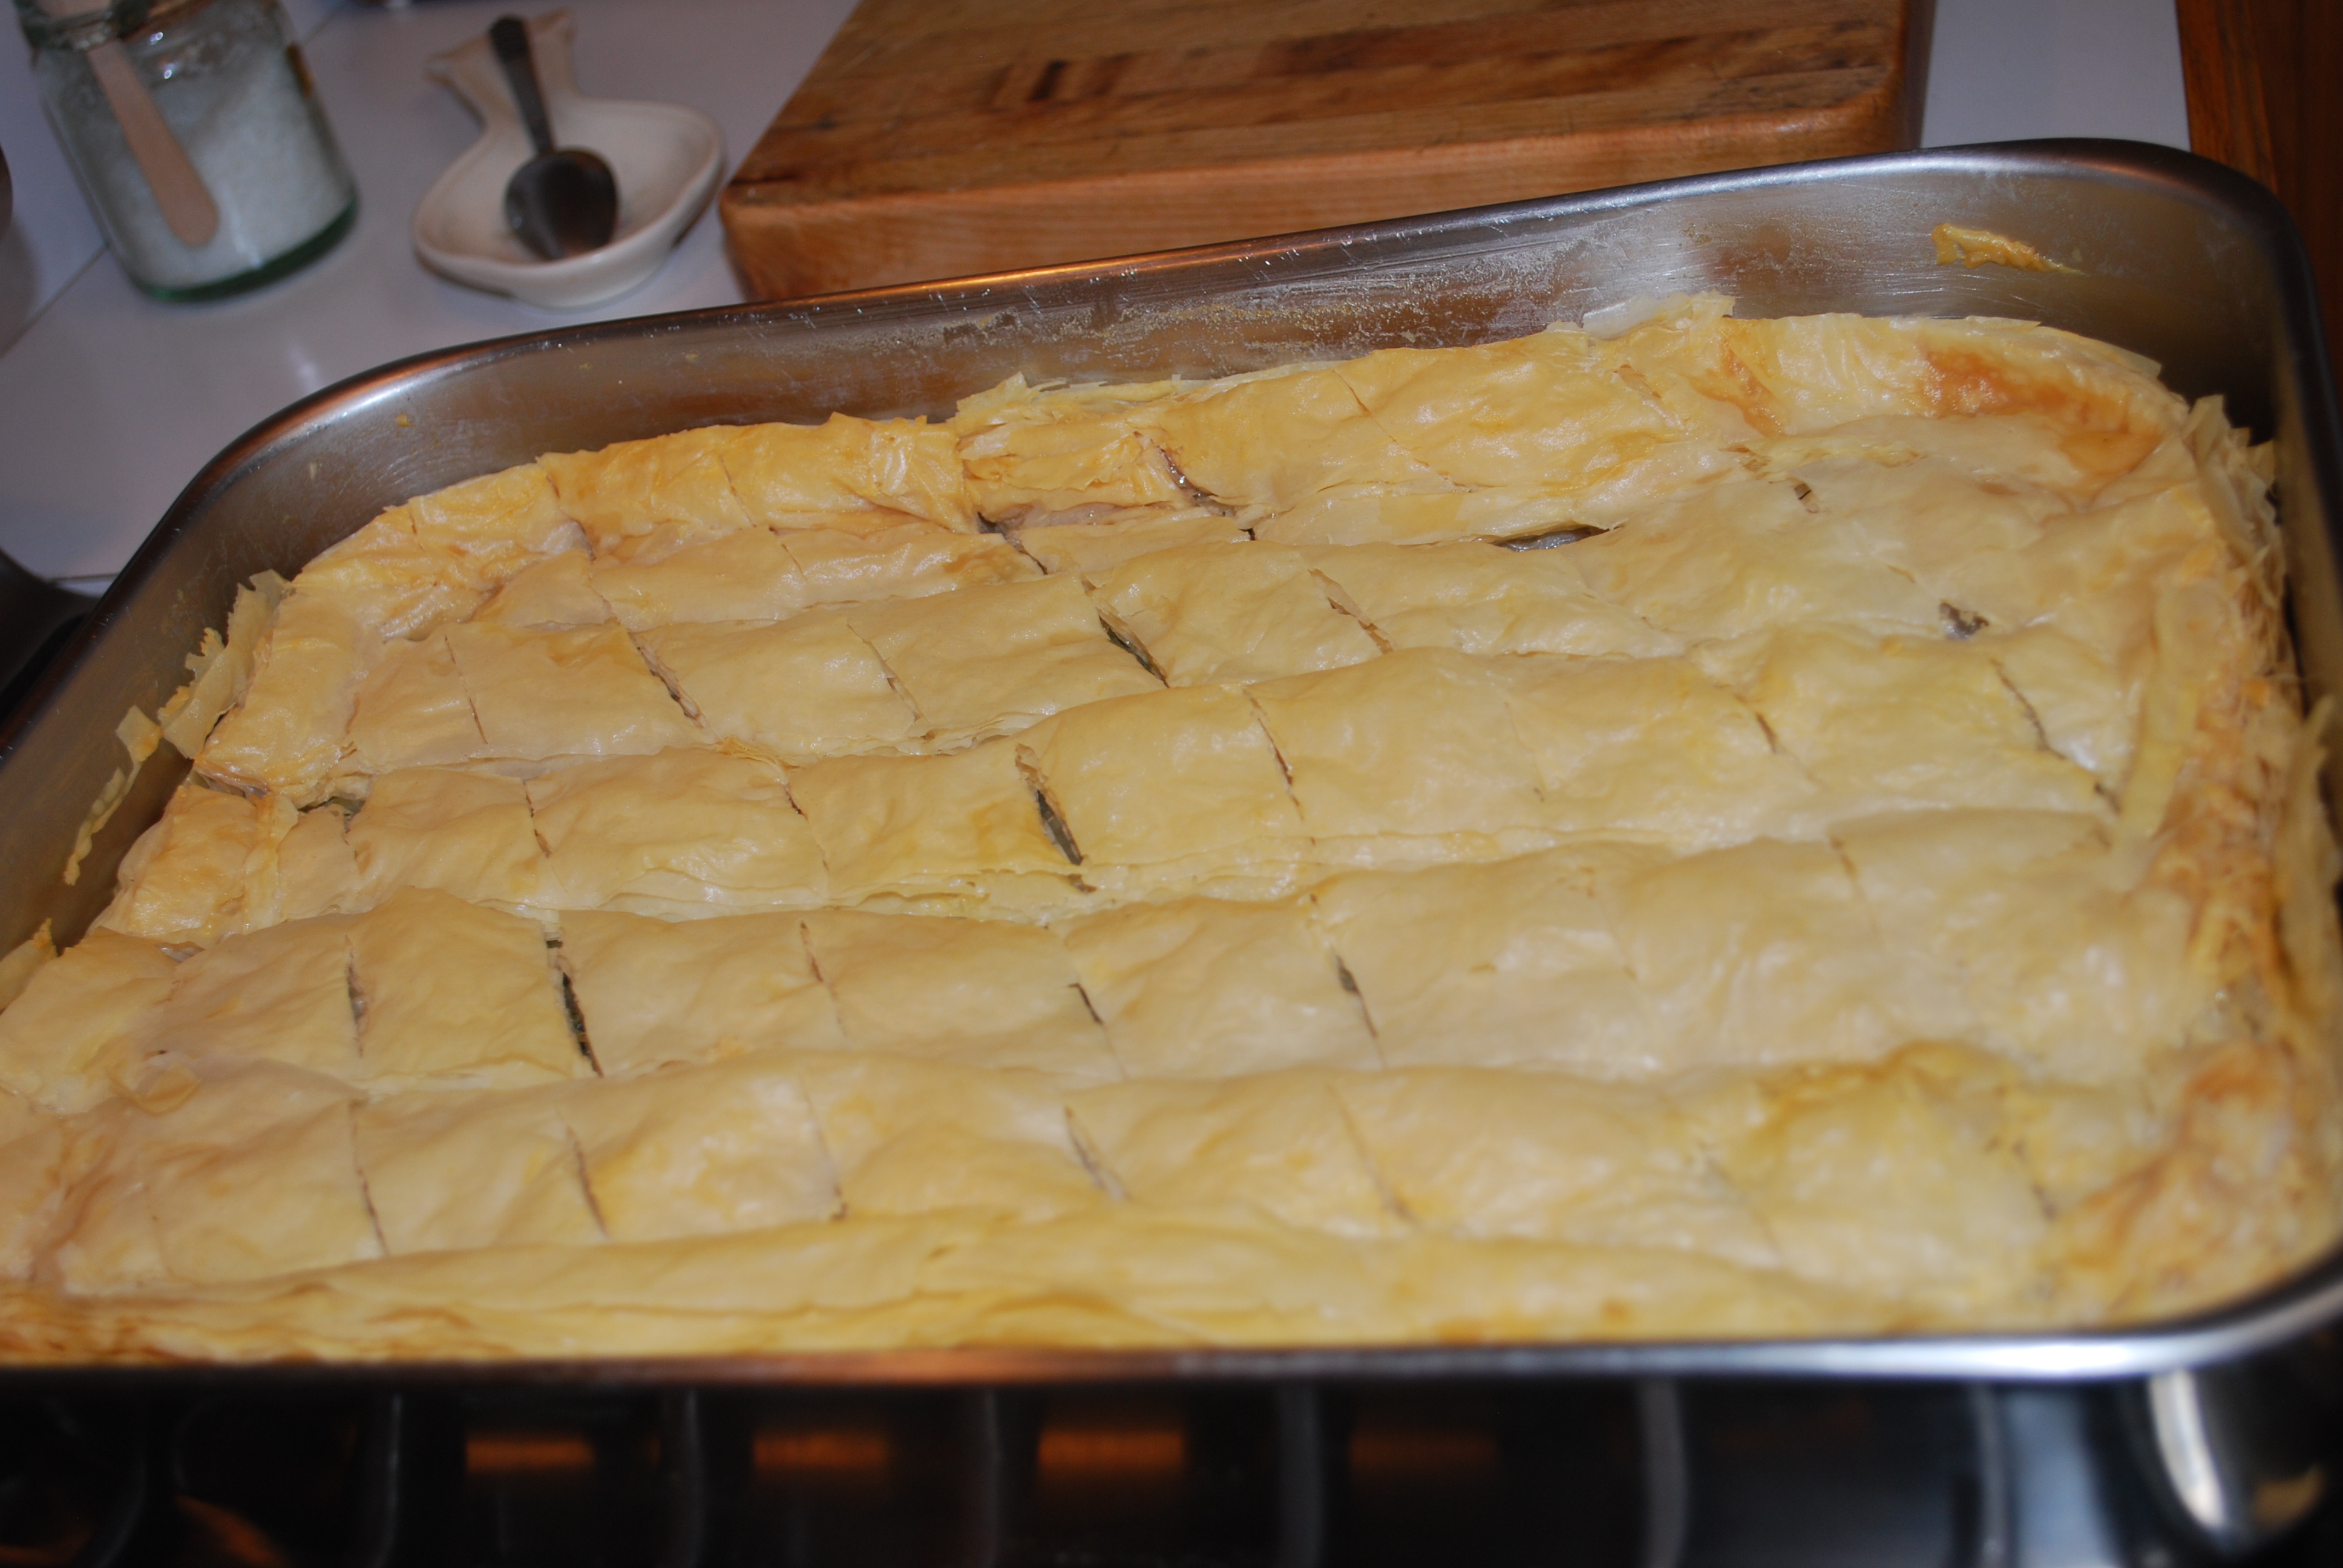
Using a razor or a sharp knife (my mom likes to use a razor), trim off any uneven edges of fillo.

DSC_0296

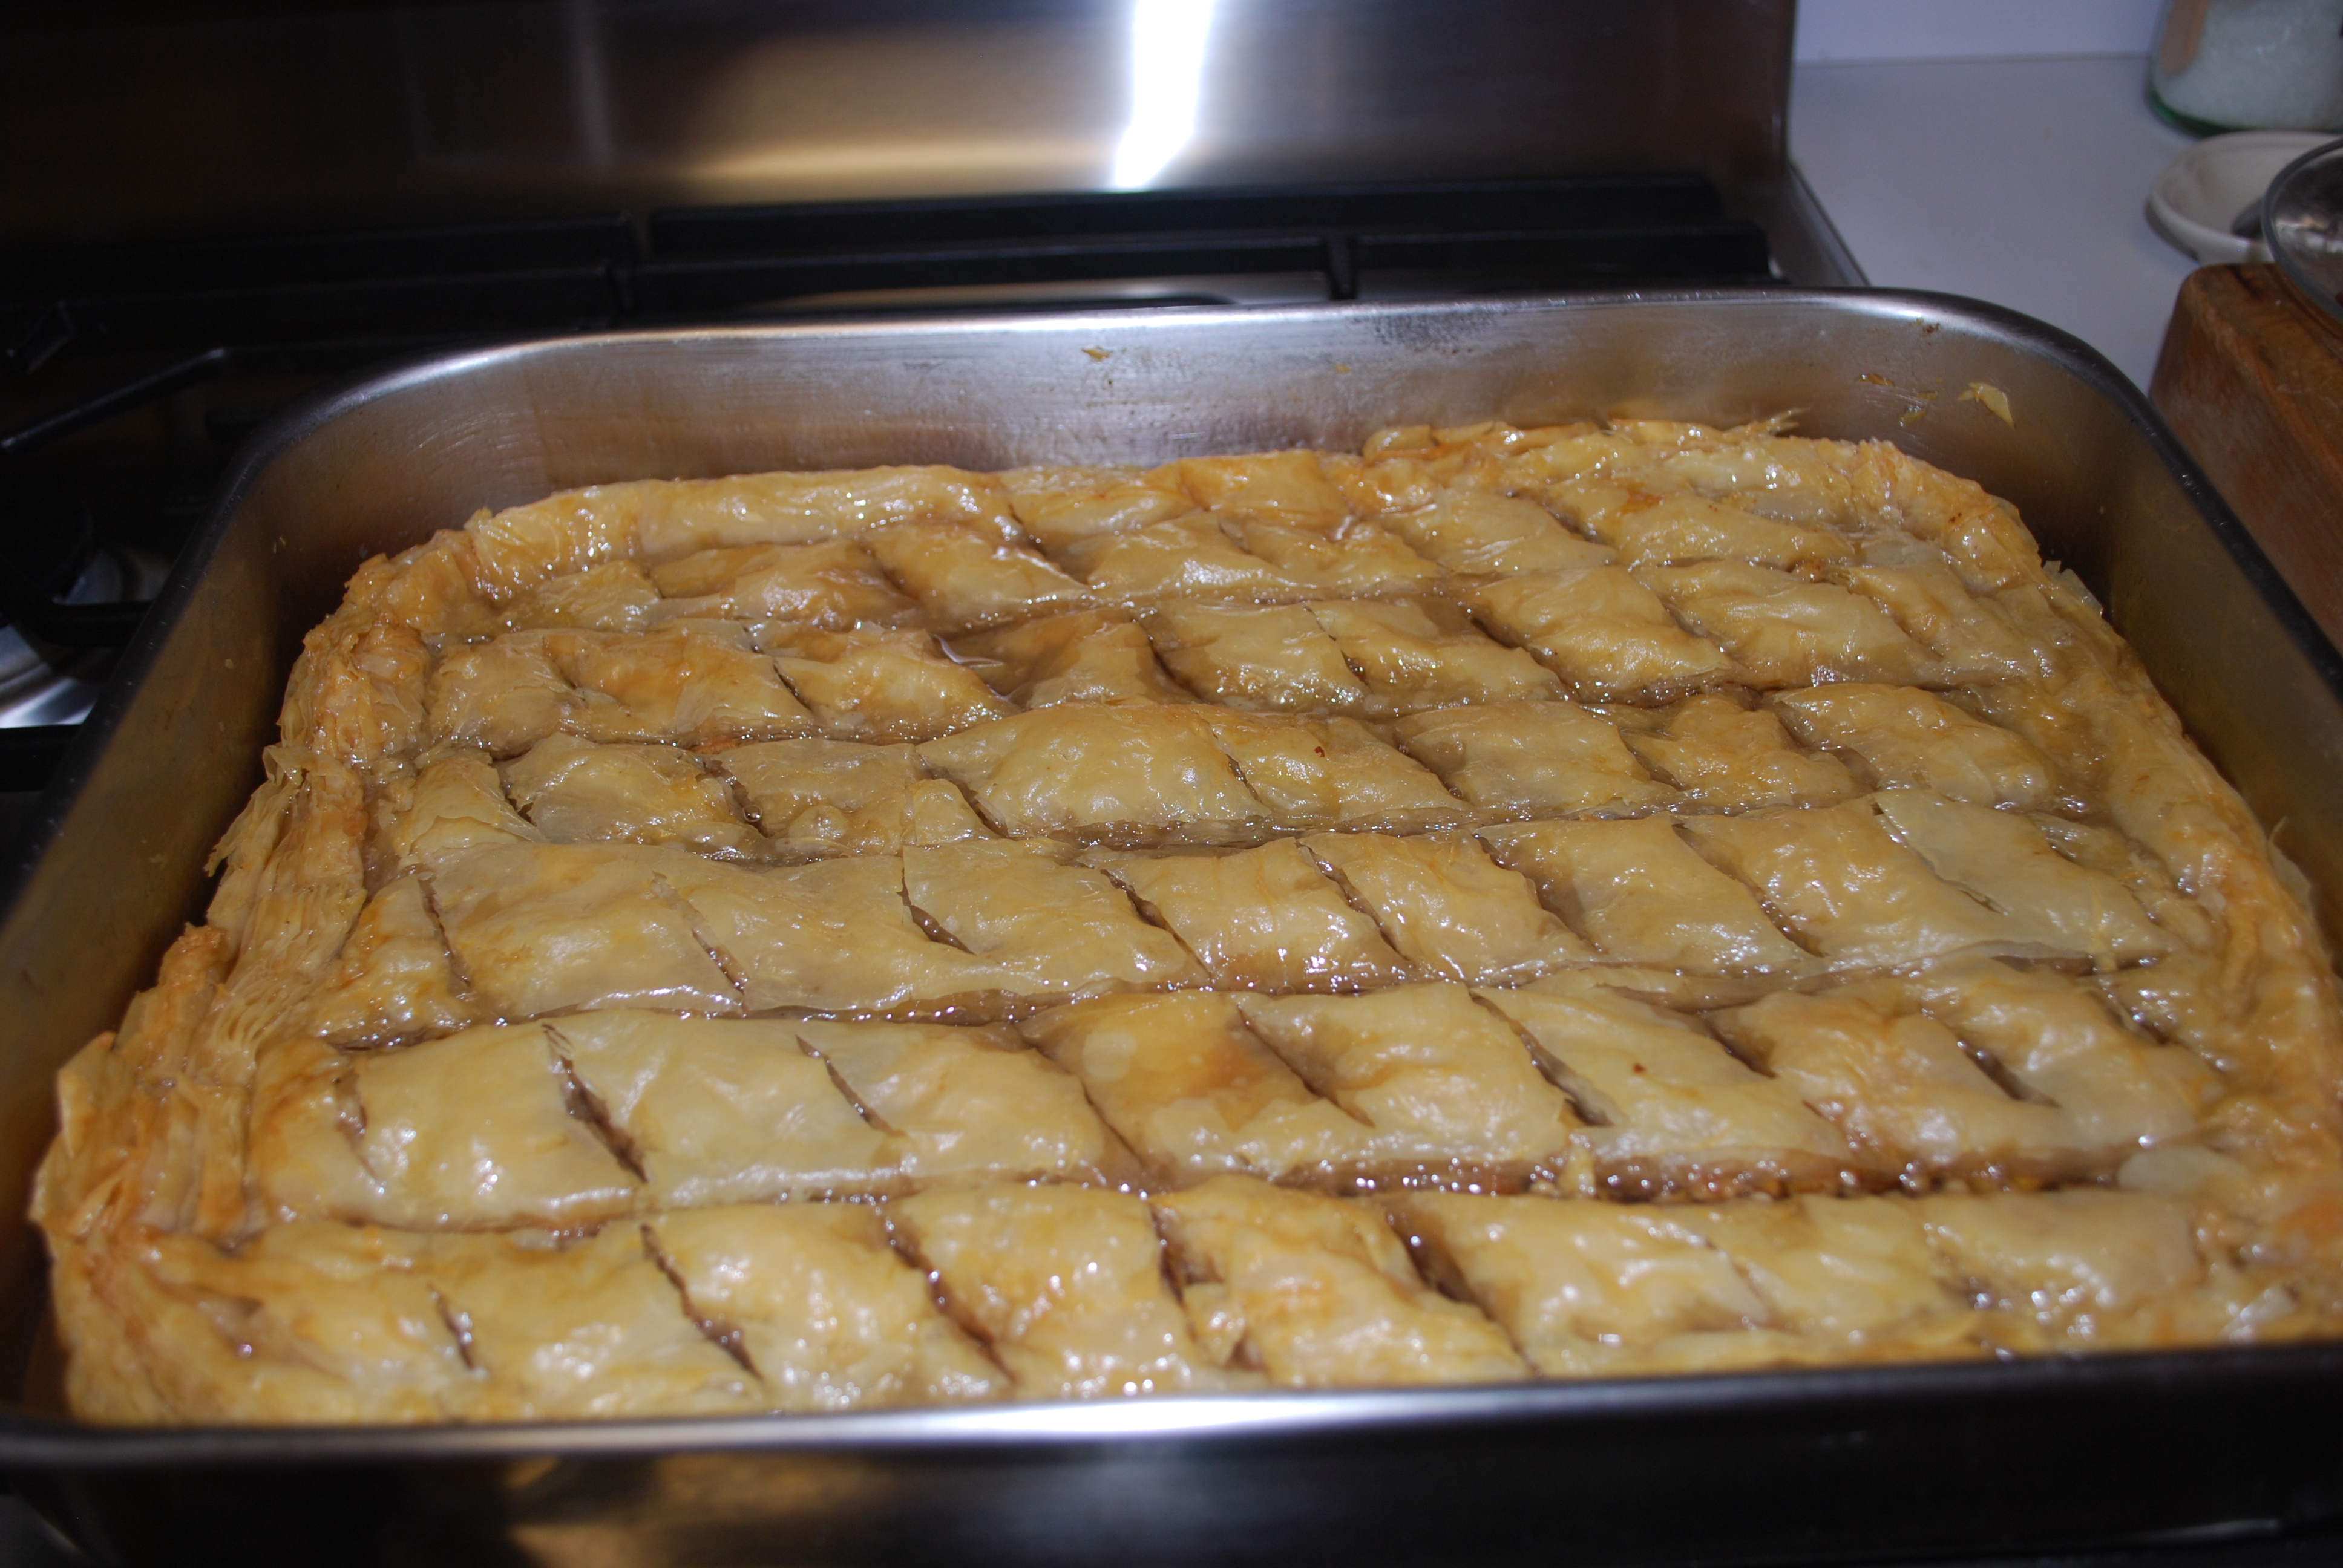
Cut through only the top layer of fillo so that you can make neat cuts later on, after the Spanakopita has cooked. Cut horizontally across the pan, then cut diagonally across the horizontal cuts to make diamonds.

DSC_0297

Place Spanakopita in the oven and cook at 350 for around 45 minutes, or until the pastry is puffy and golden. We ended up having to cook ours about 1 hour, so the time will probably depend on your oven – just make sure you wait to take it out until the pastry is golden.

DSC_0298

Yum!!

DSC_0312

DSC_0318

The Best Spanakopita Ever
From Gourmet Greek Girl’s Mom

Ingredients: 

1 pound fillo dough (1 box), room temperature
3 10-ounce packages frozen chopped spinach, thawed and drained
1/3 cup Extra Virgin Olive Oil
1 finely chopped yellow onion
1 bunch (about 2 cups) green onions
1/2 cup chopped parsley
1 cup chopped dill
1/2 pound Feta cheese, crumbled
3 eggs
salt
pepper
3 sticks butter

Directions: 

  1. Preheat oven to 350. Take fillo out of the fridge to let it get room temperature. Chop and prepare all ingredients and drain the thawed spinach.
  2. In sauce pan, saute chopped yellow onion in olive oil on medium-high heat until golden, about 5 minutes. Add in the green onion, parsley, and dill and saute about 5 minutes.
  3. Add the spinach to the mixture and stir for another 5 minutes. Remove from heat.
  4. Add Feta cheese to spinach mixture and mix well.
  5. In a bowl, whisk eggs very well, then very slowly add them to the spinach mixture, mixing very well. Season mixture with salt and pepper.
  6. Melt butter in a sauce pan. Brush a 13x9x2 baking pan with melted butter. Divide your fillo dough in half. Prepare one half on a clean surface to use immediately, then cover the rest with a damp towel so the sheets don’t dry out. Place one fillo sheet on the baking pan, then brush with butter. Repeat with the 1/2 box of fillo sheets you have prepared.
  7. Pour the spinach mixture on top of the fillo sheets in the baking pan, then spread evenly. Get the rest of the fillo sheets ready (1/2 the box) and place one fillo sheet on top of the spinach mixture then brush with melted butter. Repeat until you have used every fillo sheet. Pour the remaining butter on top.
  8. Using a razor blade or a very sharp knife, trip the edges of the pastry to make it even. Cut through the top layers of the pastry horizontally, then across on diagonal to form diamond shapes.
  9. Bake in oven at 350 for 45 minutes, or until pastry is puffy and golden.

DSC_0315

Posted in Appetizers, Dinner, Greek Dishes, Sides | Tagged , , , , , , , | 7 Comments

The Best Baklava Ever

DSC_0236

DSC_0237

I am officially on Winter Break! Woohoo! I generally enjoy finals week since it’s a change of pace from the rest of the semester, but this time I had a pretty rough finals schedule: 3 finals on the very last day so I had a LOT of grading to do on Thursday. Luckily I’m all done now and have 2 weeks of sweet vacation to enjoy! 🙂

DSC_0242

Since I’m at home with my parents, my mom and I decided to make Baklava. She usually makes it around Christmastime as a holiday treat and thankfully she waited until I came home so we could make it together!

DSC_0239

Now I may be a little biased, but this is THE BEST baklava. Ever. And it doesn’t get more traditional than this. It’s delicious! If you want a traditional Greek baklava, this is the recipe for you to try.

DSC_0245

So here is my mom’s recipe for The Best Baklava Ever.
DSC_0241

DSC_0202

Start by preheating your oven to 375. Begin the nut mixture. Take 1 pound of walnuts and put them in a plastic bag and pound on them with a meat tenderizer until they are somewhat crushed/chopped. You don’t want any giant pieces in the baklava, but they don’t have to be very fine either. Alternatively, if you have a grinder you could use that to grind them as well (medium ground).

DSC_0204

Add 1/2 cup granulated sugar, 2 teaspoons ground cinnamon, and 1 teaspoon ground cloves to the nuts and mix well. Set the nut mixture aside.

DSC_0205

DSC_0206

DSC_0207

Take 4 sticks of unsalted butter, and melt them in a sauce pan.

DSC_0209

Prepare your 10×15 inch baking pan by brushing the bottom with melted butter.

DSC_0210

Next get your baklava station set up. You should have the buttered pan, nuts, melted butter with a brush, and a clean surface for the fillo dough set up.

DSC_0214

Take 1 box fillo dough. Take 6 sheets out of the roll, then cover the rest with a squeezed-out wet towel so they don’t dry out.

DSC_0212

Line the bottom of your pan with 1 fillo sheet. Brush the sheet with butter.

DSC_0213

Repeat until 6 fillo sheets line the bottom of the pan. Brush the top with butter.

DSC_0215

Then, sprinkle with 3/4 cup nut mixture.

DSC_0217

Prepare 9 more fillo sheets. Cover pan with 1 fillo sheet. Brush the top of the sheet with butter.

DSC_0218

Repeat until 3 sheets cover the nut mixture. Sprinkle with 3/4 cup nut mixture. Repeat 3 sheets/nut mixture process 2 more times, using all the nut mixture.

DSC_0220

Place remaining fillo sheets on top (should be about 5-6 sheets), alternating with butter. Brush top with butter. Be liberal with the butter!

DSC_0221

Next, trim the sides of the baklava with a sharp knife or razor blade. My mom always uses a razor blade.

DSC_0223

Then, use the razor blade to cut the baklava into 2 inch diamond pieces. Don’t cut through the whole baklava – only cut through the top layer so it cuts neatly later.

DSC_0224

Bake for 30 minutes or until golden brown. While the baklava is baking, start on the syrup.

DSC_0203

Combine 3 cups granulated sugar, 3 cups water, 1 slice lemon, 1 cinnamon stick, 2 whole cloves, and 2 tablespoons honey in a sauce pan and bring to a slow boil. Let the syrup boil slowly until medium thick. Cool.

DSC_0228

DSC_0230

DSC_0232

Before syrup

Pour cooled syrup over warm baklava. Cool completely before cutting.

DSC_0233

After syrup is added

DSC_0244

DSC_0255

The Best Baklava Ever 

Ingredients: 

1 lb. walnuts, chopped or medium ground
1 lb. fillo dough (1 box)
1 lb. unsalted butter (4 sticks)
2 tsp. ground cinnamon
1 tsp. ground cloves
1/2 cup granulated sugar

Syrup:
3 cups granulated sugar
3 cups water
1 slice lemon
1 cinnamon stick
2 whole cloves
2 Tbsp. honey

Directions: 

  1. Preheat oven to 375. Place walnuts in plastic bag, then pound with meat tenderizer until medium-crushed. Add sugar, cinnamon, and cloves to the nuts. Mix, then set aside.
  2. Melt butter in sauce pan. Brush the bottom of a 10×15 in. baking pan with melted butter. Prepare fillo dough: have 6 sheets ready and cover the rest with a squeezed-out wet towel. Line the bottom of the pan with 1 fillo sheet, then brush with butter. Repeat until 6 pastry sheets line the bottom of the pan. Sprinkle with 3/4 cup nut mixture. Cover with fillo sheet, then brush with butter. Repeat 2 more times, then sprinkle with 3/4 cup nut mixture. Repeat this process 2 more times, using all the nut mixture. Place remaining fillo sheets on top (should be 5-6), alternating with butter. Brush the top with butter. Trim the edges of the fillo, then use a sharp knife or razor blade to cut the top layer of the baklava into 2 inch diamond pieces. Bake for 30 minutes, or until golden brown.
  3. While baklava is baking, make the syrup. Combine sugar, water, lemon, cinnamon, cloves, and honey in a sauce pan and bring to a slow boil. Let the syrup boil until medium thick. Cool.
  4. Pour cooled syrup over warm baklava. Let cool completely before cutting.

DSC_0235

DSC_0246

Posted in Desserts, Greek Dishes | Tagged , , , , , , , | 1 Comment

White Chocolate Peppermint Cookies

DSC_0194

DSC_0191

My concert was awesome! I had mentioned I was a little nervous about it since I don’t often go out on weeknights, but even though I was a bit tired for work on Friday, it was worth it. All of the bands were really good, but Arctic Monkeys were definitely the highlight. I’ve been wanting to see them live since around 2006 and they did not let me down – they were aaaamazing! I’m so glad I went!

I spent the rest of my weekend resting since I was pretty tired from going to concerts both Thursday and Friday night, however I did make another trip to the Elephant Cafe. Last weekend, my boyfriend and I made the mistake of ordering a 3 out of 5 on the spicy scale and burned the heck out of our mouths there. This time I ordered a 1 and I absolutely loved my food! I got the ginger curry again and it had excellent flavor – recommended if you live in Milwaukee.

DSC_0188

I’m SO excited about this post!!! I made the ultimate Christmas cookies and boy are they tasty! I call them White Chocolate Peppermint Cookies. They are based off this recipe by Two Peas and Their Pod which I made some very slight adjustments to. They turned out wonderfully! Crispy on the edges and nice and soft inside. Mmmm. I can’t stop eating them!

DSC_0189

Here’s how to make these festive cookies:

DSC_0199

Preheat your oven to 350 and line your baking sheets with parchment paper. Start the cookies by mixing together 2 1/2 cups all-purpose flour, 1/2 teaspoon salt, and 3/4 teaspoon baking soda in a medium bowl. Set aside.

DSC_0171

Next cream 1 cup unsalted butter (make sure it’s room temperature!) with 1 cup light brown sugar and 1/2 cup granulated sugar. I did this by hand but you can do it with a mixer if you prefer. Once it’s light and fluffy, add in 2 large eggs and 1 tablespoon vanilla extract and beat until smooth.

DSC_0174

Slowly mix in the dry ingredients little by little until well-combined.

DSC_0175

Add in 1 cup white chocolate chips, 1/2 cup peppermint Andes baking chips, and 1 cup White Chocolate Peppermint M&Ms. Mix everything together.

DSC_0176

Drop heaping tablespoonfuls onto your baking sheets about 2 inches apart (12 per sheet). I have to warn you: they look a bit sticky, but don’t worry about that. They will smooth out as they cook.

DSC_0179

Bake for 10 minutes or until the edges are golden-brown. Let the cookies cool on the baking sheet for a couple minutes, then transfer them to a cooling rack.

DSC_0183

Enjoy!

DSC_0186


White Chocolate Peppermint Cookies 

Adapted from Two Peas and their Pod
Makes 3 dozen cookies

Ingredients: 

2 1/2 cups all-purpose flour
1/2 teaspoon salt
3/4 teaspoon baking soda
1 cup unsalted butter, at room temperature
1 cup light brown sugar
1/2 cup granulated sugar
2 large eggs
1 tablespoon vanilla extract
1 cup white chocolate chips
1/2 cup peppermint Andes baking chips
1 cup White Chocolate Peppermint M&M’s

Directions: 

  1. Preheat oven to 350 degrees and prepare baking sheets by lining them with parchment paper.
  2. Combine flour, salt, and baking soda then set aside.
  3. Cream butter and sugars together until mixture is light and fluffy. Add in the eggs and vanilla and beat until smooth. Mix in the dry mixture little by little until well-combined. Mix in the white chocolate chips, Andes peppermint baking chips, and White Chocolate Peppermint M&Ms.
  4. Place large tablespoonfuls of dough onto the baking sheets (12 per sheet). Bake for 10 minutes or until the edges are golden. Let the cookies cool for a couple minutes on the baking sheet, then transfer to a wire cooling rack.

DSC_0200

DSC_0187

DSC_0190

DSC_0198

Posted in Christmas, Desserts | Tagged , , , , | Leave a comment

Chocolate Covered Pretzels

DSC_0157

DSC_0150

I’m so excited! Tonight and tomorrow night I’m going to a 2 night concert: tonight it’s Bastille, Grouplove, Alt-J, and Phoenix and tomorrow night it’s Foals, No No No, and Arctic Monkeys. They are going to be epic concerts!!

The only problem is I have to work tomorrow… I’m usually not one to go out during the week. Occasionally I’ll go to a friend’s place or out to dinner, but I start to get a little anxious if I’m not home by 8. I just get a little nervous whenever I’m away from home late and I have to work the next day. I just couldn’t pass up this concert though! I may never get another chance to see all these bands again. I am pretty nervous though about being exhausted tomorrow at work then having to stay up to go to the 2nd night of the concert. Oh well, I’m sure it will be worth it! I’ll let you know how it goes! 🙂

Today I have an easy and perfect Christmas snack idea for you: Chocolate Covered Pretzels. They’d be great to serve at a Christmas party or you could even package them in cellophane to give as small gifts to friends or family. I served them to my department during our Christmas party today and they were a hit!

DSC_0163

Here you go!

DSC_0160

First, get your pretzels ready.

DSC_0099

Melt some semi-sweet chocolate chips. I used about 1/3 the bag. Microwave for 60 seconds, stir, microwave for 30 seconds, stir, then repeat until melted.

DSC_0101 DSC_0102

Spoon the chocolate over 1/2 your pretzels. I had 16 pretzels in the bag I bought (some were broken so I didn’t use those). The chocolate should cover 3/4 of the pretzel. Place pretzels on a wax paper-lined baking sheet.

DSC_0107

Repeat the melting process with your white chocolate chips. Again, I used about 1/3 of the bag. Spoon the white chocolate over the rest of your pretzels.

DSC_0108

While the chocolate is still hot, cover some of the pretzels with sprinkles or other embellishments.

DSC_0104

Now, microwave more semi-sweet chocolate chips, white chocolate chips, and some red candy coating melts in separate bowls, then pour them into 3 separate plastic bags. Snip one tiny corner off each bag then use these to drizzle chocolate over the pretzels.

DSC_0111

DSC_0110

DSC_0112

DSC_0114

DSC_0115

DSC_0119

I love these! They look so pretty and are a perfect holiday treat!

DSC_0133


Chocolate Covered Pretzels

Makes 26-36 pretzels

Ingredients:

1 bag pretzel rods
1/2 bag semi-sweet chocolate chips
1/2 bag white chocolate chips
1/3 bag red candy coating melts
sprinkles or other embellishments

Directions:

  1. Microwave 3/4 of the semi-sweet chocolate chips in a microwaveable bowl for 1 minute. Stir, then microwave in 30 second increments, stirring in between, until melted.
  2. Take a pretzel rod and spoon the melted chocolate over 3/4 of the pretzel. Repeat for 1/2 the pretzels. Place the pretzels on a wax paper-lined baking sheet. Decorate with sprinkles or other embellishments if desired while the chocolate is still hot.
  3. Microwave white chocolate chips the same way as the semi-sweet chocolate. Spoon white chocolate over the rest of the pretzels. Decorate with sprinkles or other embellishments if desired while the chocolate is still hot.
  4.  Microwave the rest of the semi-sweet chocolate chips, white chocolate chips, and red candy coating melts in separate bowls, then transfer into separate plastic bags. Snip a tiny corner off each plastic bag then use to decorate the pretzels.

DSC_0151

DSC_0165

DSC_0138

DSC_0164

DSC_0139

Posted in Christmas, Desserts, Snacks, Uncategorized | Tagged , , , , , , | 6 Comments

Peanut Butter and Banana Tortilla

I can’t believe the weekend is over already! I spent the majority of mine writing my final exams. It wasn’t ideal, but had to get done.

I did manage to sneak away a little last night to go out for Thai food with Dan. We went to The Elephant Cafe on Farwell. We had never been there before, but decided to brave the freezing cold weather so that we could try it out. Our crab rangoon appetizer was delicious, but when it came down to ordering our food we both decided on curries. Dan ordered the red curry and I ordered the ginger curry (it has baby corn in it – how could you go wrong with that?) When asked how spicy we wanted them, we both went with 3 out of 5, thinking that would be pretty safe. We figured we wanted a little bit of spice, but didn’t want to burn our mouths too much. When we tried our food however, holy cow it was HOT!!! I mean really, really spicy. I have never experienced this much spice in my life. I can’t even imagine what 5 out of 5 would have been like! I assume my food was really good, but honestly my tongue was too numb to even taste anything. So we have learned our lesson: next time we go to the Elephant Cafe, we will be asking for a 1 out of 5 on the spicy scale! You should have seen us airing out our mouths in the frigid Milwaukee air, trying to cool off our tongues. We probably looked quite silly.

Since I still have a lot more work to do on my finals, I am going to leave you with a short, extremely easy lunch/snack idea: Peanut Butter and Banana Tortilla

DSC_0878

It’s so simple and a great source of energy to include in your lunch or as a mid-day snack.

Take 1 tortilla.

DSC_0873

Spread it with peanut butter (almond butter would be great too if you prefer it!).

DSC_0874

Next, top with one sliced banana.

DSC_0875

Roll up your tortilla like a burrito and that is it! Wrap it in some plastic wrap so that it stays together for easy storage in your lunchbox.

DSC_0876

So simple! It’s one of my favorite things to take for lunch – I love it! You can even make one the night before and store it in your fridge for an easy grab-and-go breakfast or lunch in the morning.

DSC_0877


Peanut Butter and Banana Tortilla

Serves 1

Ingredients: 

1 tortilla
peanut butter
1 sliced banana

Directions: 

  1. Spread tortilla with peanut butter. Top with 1 sliced banana. Roll up tortilla, then roll tightly in plastic wrap for easy storing.
Posted in Breakfast, Lunch, Snacks | Tagged , , , , , , | 2 Comments